
With July being considered the hottest month of the year and especially with the way the season has been so far, finding ways to beat the heat is necessary to get through the dog days of summer. A trip to a local ice cream shop is a fun family activity out in the community that will keep you cool with the rising temperatures. Take a look at this ranking of Columbia ice cream shops to find a parlor that suits your family’s idea of fun!
If you’d prefer a DIY method instead of traveling to the ice cream shop, making your own ice cream is a fun way to experiment with different techniques and flavors. No ice cream machine required!
I was interested in trying something new with my family this summer. So, with a little research, I stumbled upon a simple way to create ice cream using only two ingredients. This particular recipe calls for condensed milk and heavy cream. I learned that in regular ice cream preparation, there is a balance that needs to be met between the ingredients in order for the ice cream to be made successfully. In the two-ingredient method, steps can be skipped due to the sweetness of the condensed milk and the process of whisking the heavy cream. This ‘experiment’ was a fun and yummy project for my family! My 6-year-old loved watching the heavy cream ‘fluff’ and he enjoyed mixing the ingredients. If you are looking for something fun to do with your family — I recommend giving this a try!
Ice Cream with Two Ingredients…Actually Three?
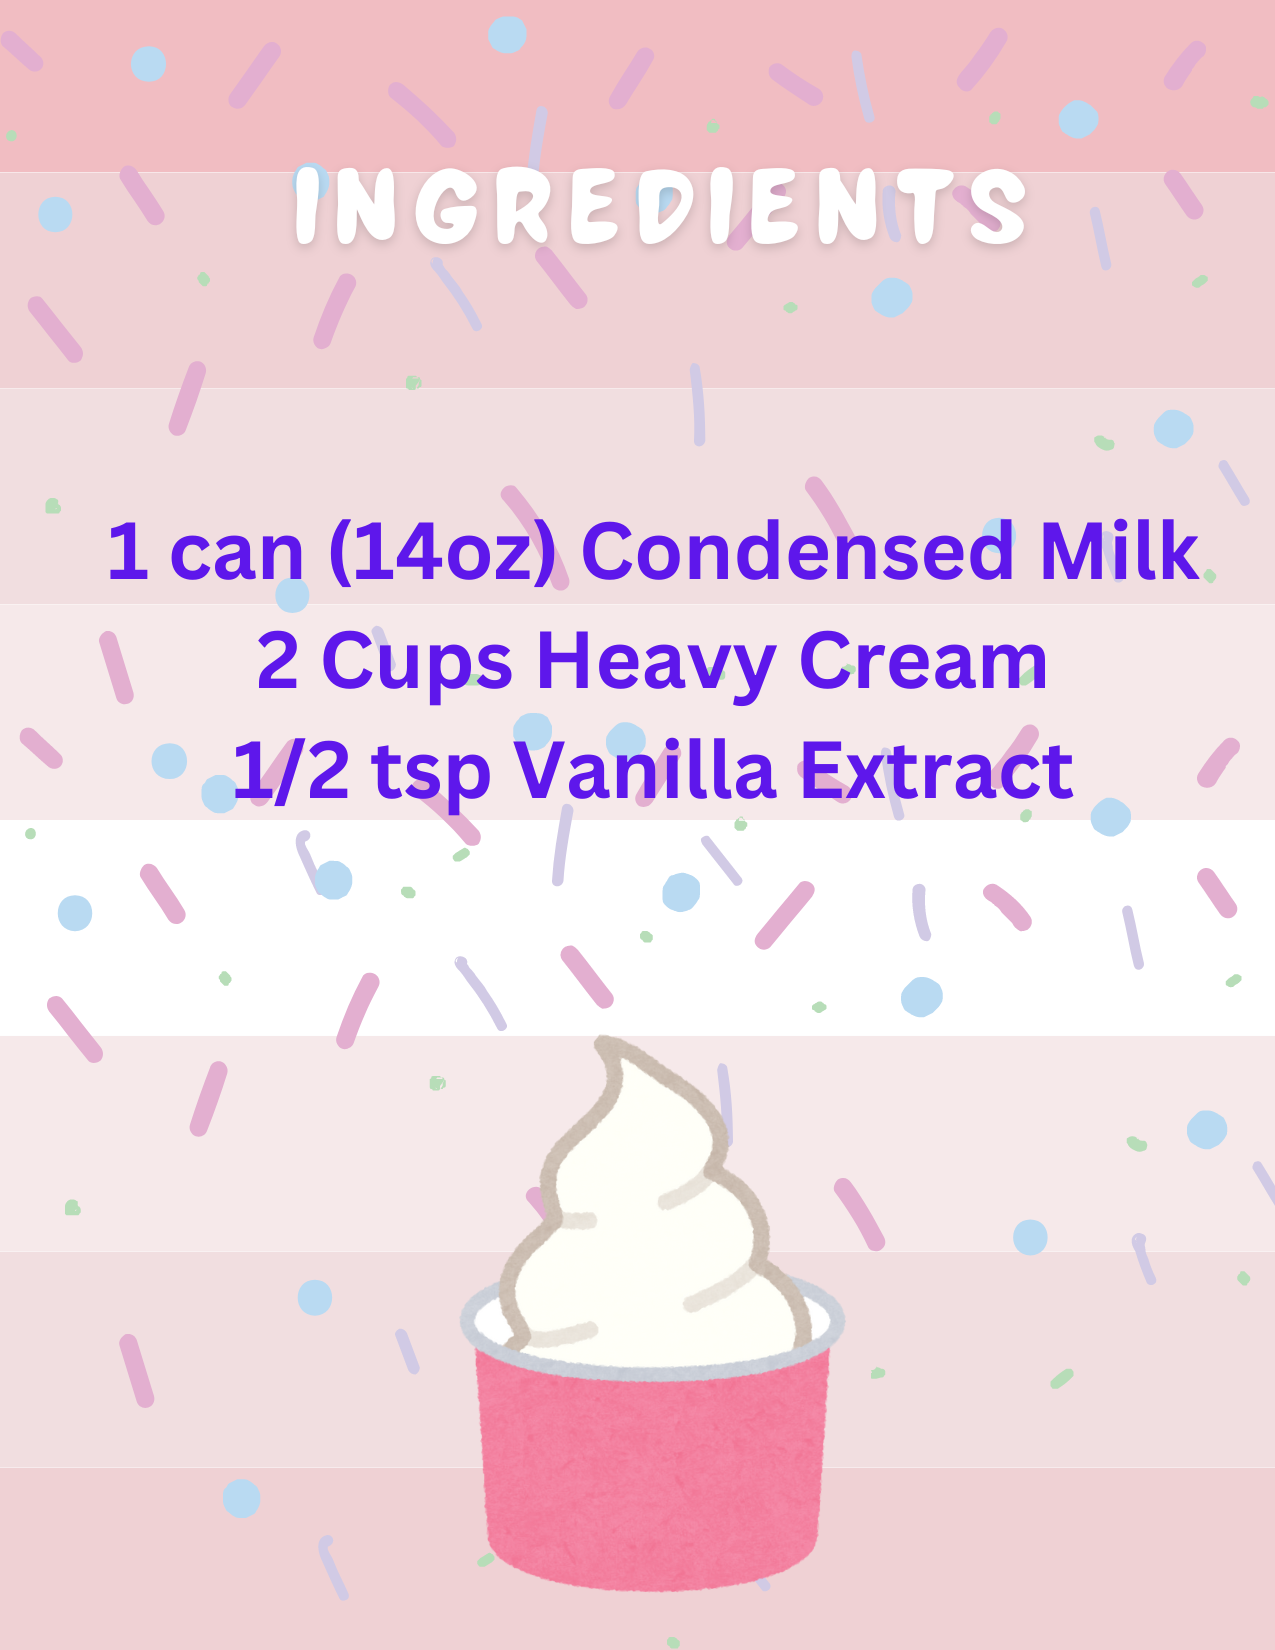
The base ingredients for this recipe is condensed milk and heavy cream to make ice cream. It also includes 1/2 tsp vanilla extract (so really three ingredients — maybe?) You can add any other mix-ins/extracts that you’d like to make your own flavor of ice cream. You can add jam, chocolate chips, almond extract or sprinkles! For ours, I stuck with vanilla for a lightly sweet flavor.

The Process
Step 1:
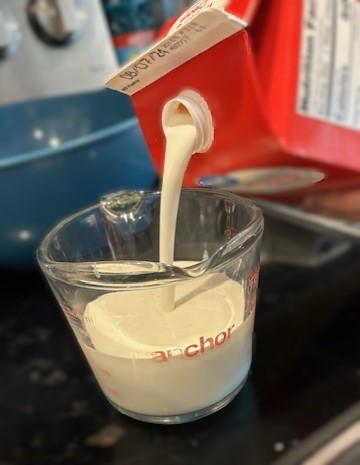
We began by pouring 2 cups of heavy cream into a measuring cup. My 6-year-old loved this! Then, empty the 2 cups into a big bowl.
Step 2:
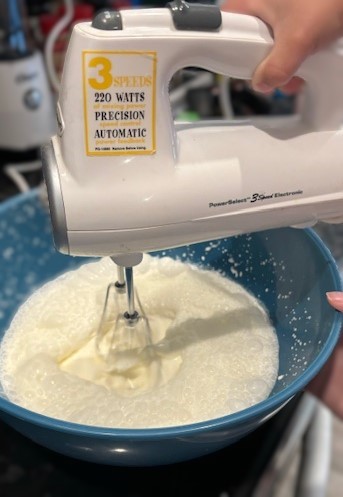
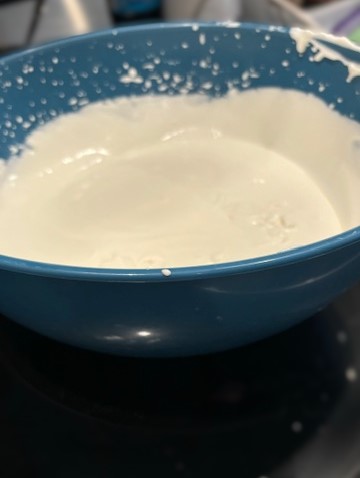
Use a whisk or a hand mixer to mix the heavy cream until the cream begins to peak. We decided to use a hand mixer for ours. I think it may have helped speed up the process. Then, add in the full can of condensed milk and any other mix-ins of your choice. Continue to whisk until blended.
Step 3:
Cover and freeze. Recommended freezing time is 6-8 hours. We decided to leave ours overnight. After the allotted time, the ice cream should be ready to eat.
Taste time:
After 24 hours, it was time to give our vanilla ice cream a taste test. We pulled our bowl out of the freezer and let it thaw for about 5 minutes. Then, with my son’s mighty strength, scooped out the ice cream. You can use any toppings you’d like. We decided to add hot fudge to our bowls. With our toppings added, it was tasting time.

Vegan options
Does your family have dietary needs that would do best without dairy or eggs? While the recipe above is not inclusive to those with a dairy sensitivity or allergy, the article linked here highlights vegan options for making ice cream. There are a multitude of bases that could be used instead of the dairy as described above.
There are also several options within the library to check out for making dairy-free ice cream for the family. Two examples are below:

This book offers over 90 recipes to choose from within the pages. Available to checkout as paperback.
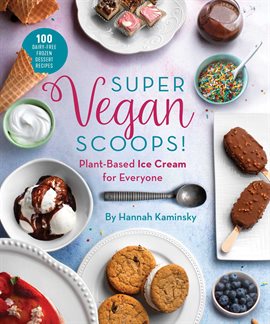
Offered as an eBook through Hoopla, this also provides numerous recipes for not only ice cream but also a variety of other ice cream-based treats.
Most Importantly — Was the Ice Cream Tasty?
My 6-year-old’s bowl was empty! So to conclude…it was a win in our house! Give this a try to see if it is something you’d like for your family.