Did you know paper mache originated in ancient China? Artisans from the Han Dynasty coated wood pulp and glue with many layers of lacquer to construct warrior helmets, as well as pieces like ceremonial masks and lids for pots. Cultures around the world have created or adapted their own forms of papier-mâché (French for “chewed paper”). In Mexico, paper mache is called cartonería, meaning “cardboard,” and is a very important element in festivals, parades and parties (think: Día de los Muertos skeletons). While the craft in this blog uses a straightforward paste (glue and water) to mold paper strips into a nest, people throughout history have used materials like mashed potatoes, rice flour and gelatin as binding agents to create practical and decorative objects. (I’d much rather eat mashed potatoes, but it does sound like fun. ) Read on if you wish to make your own paper mache masterpiece!
Materials Needed
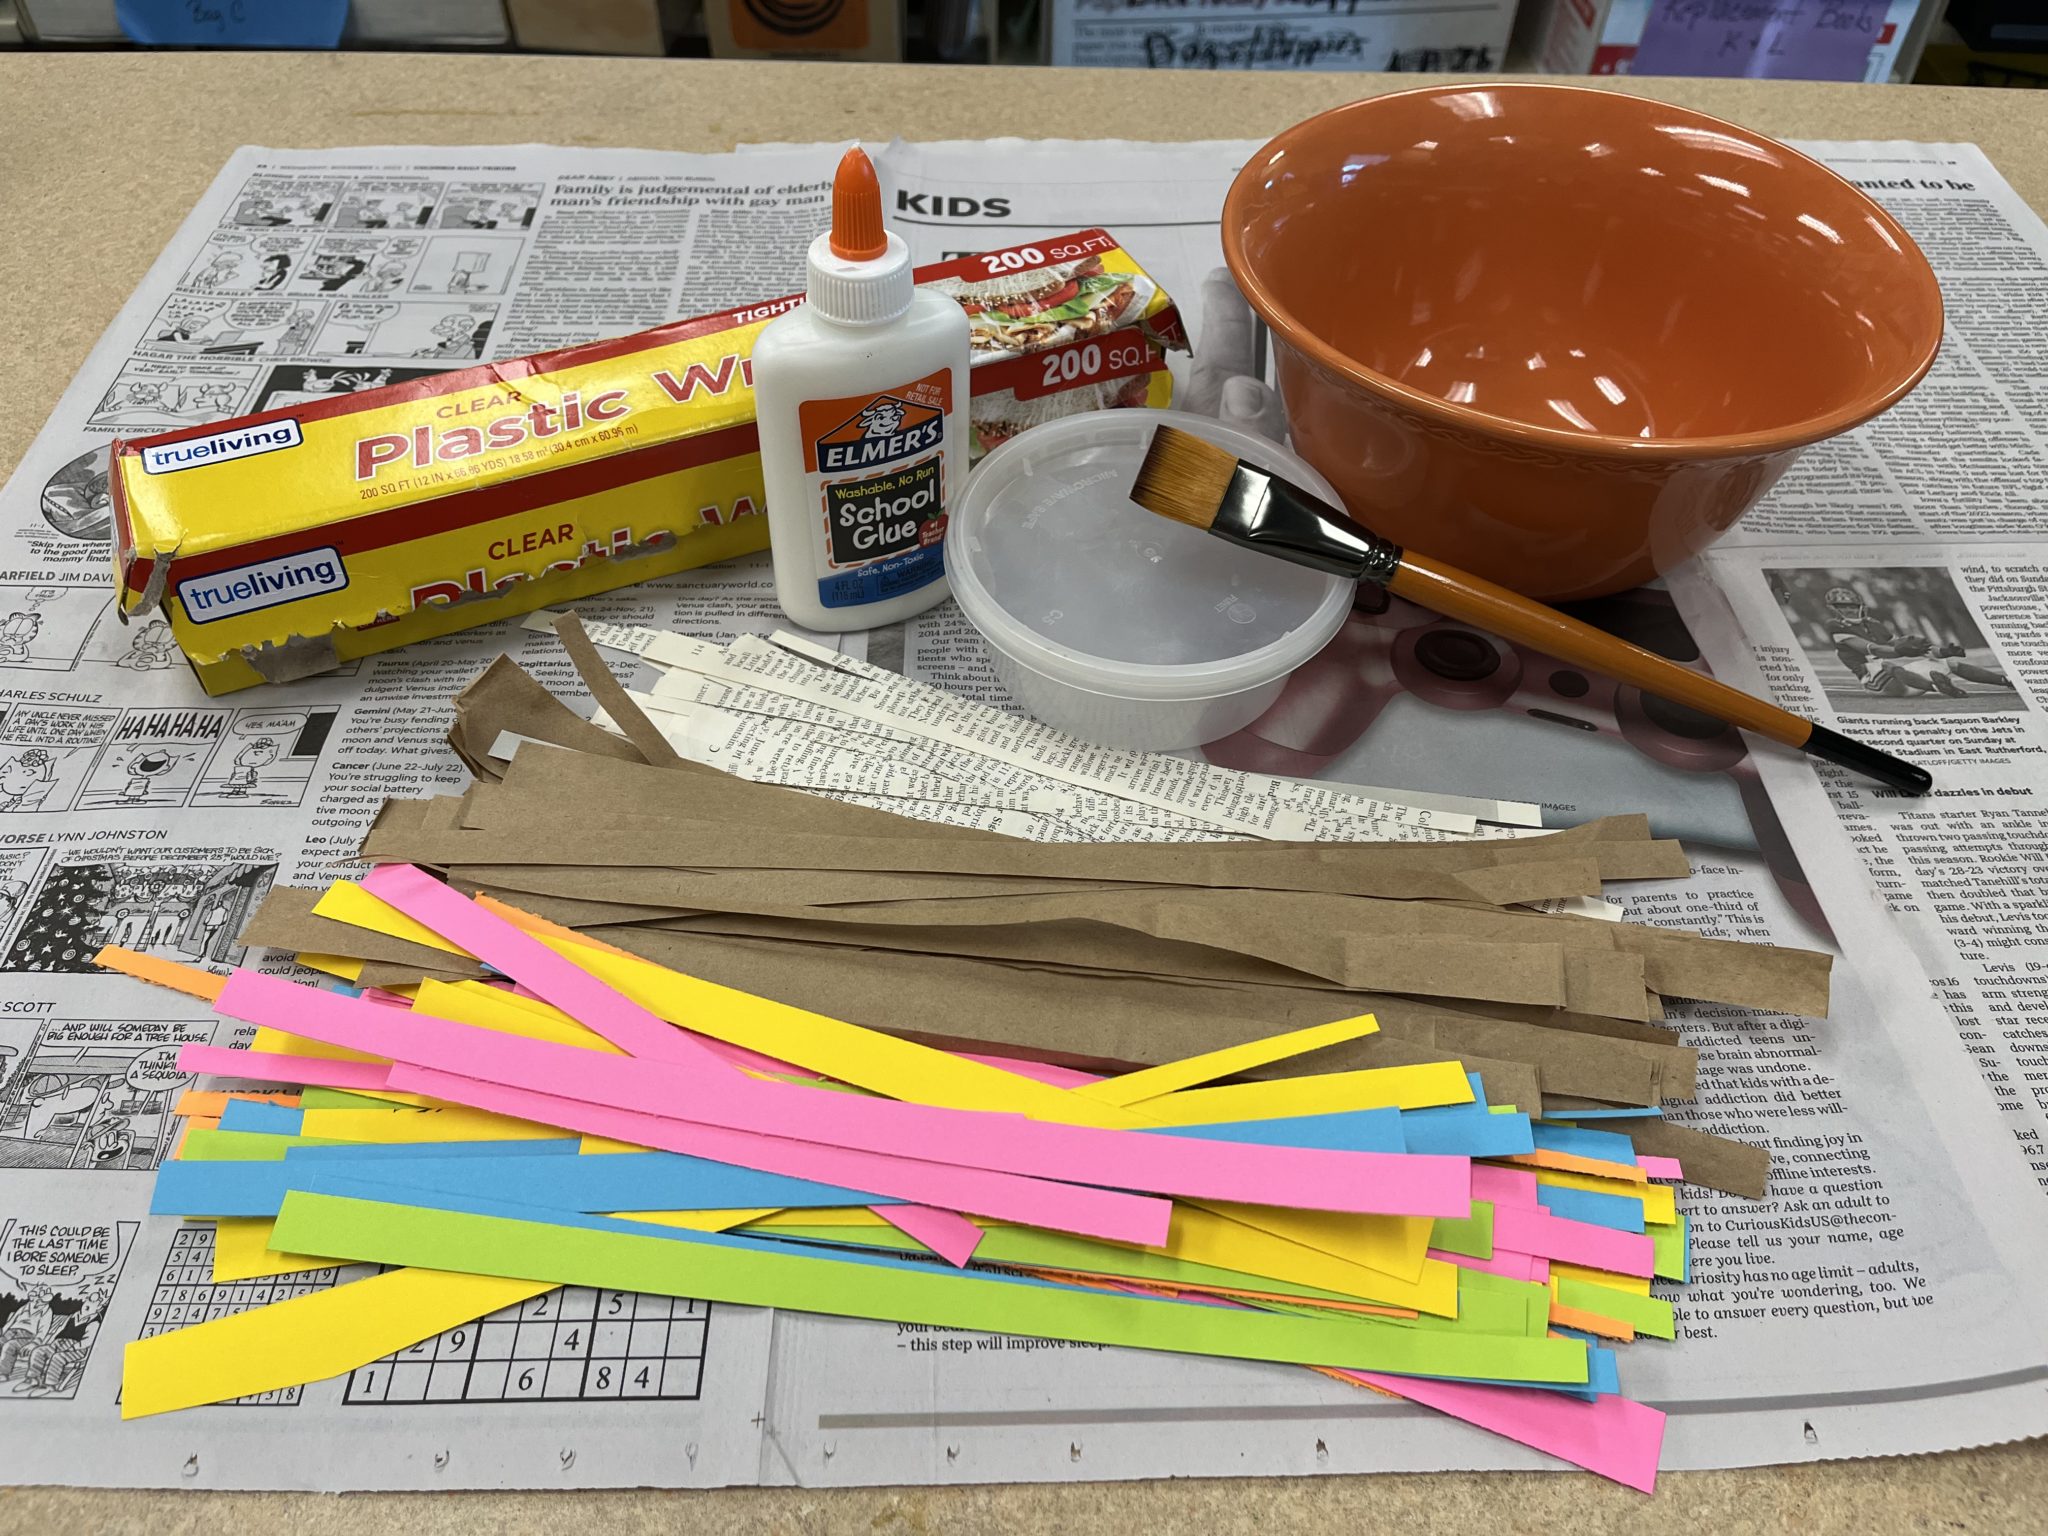
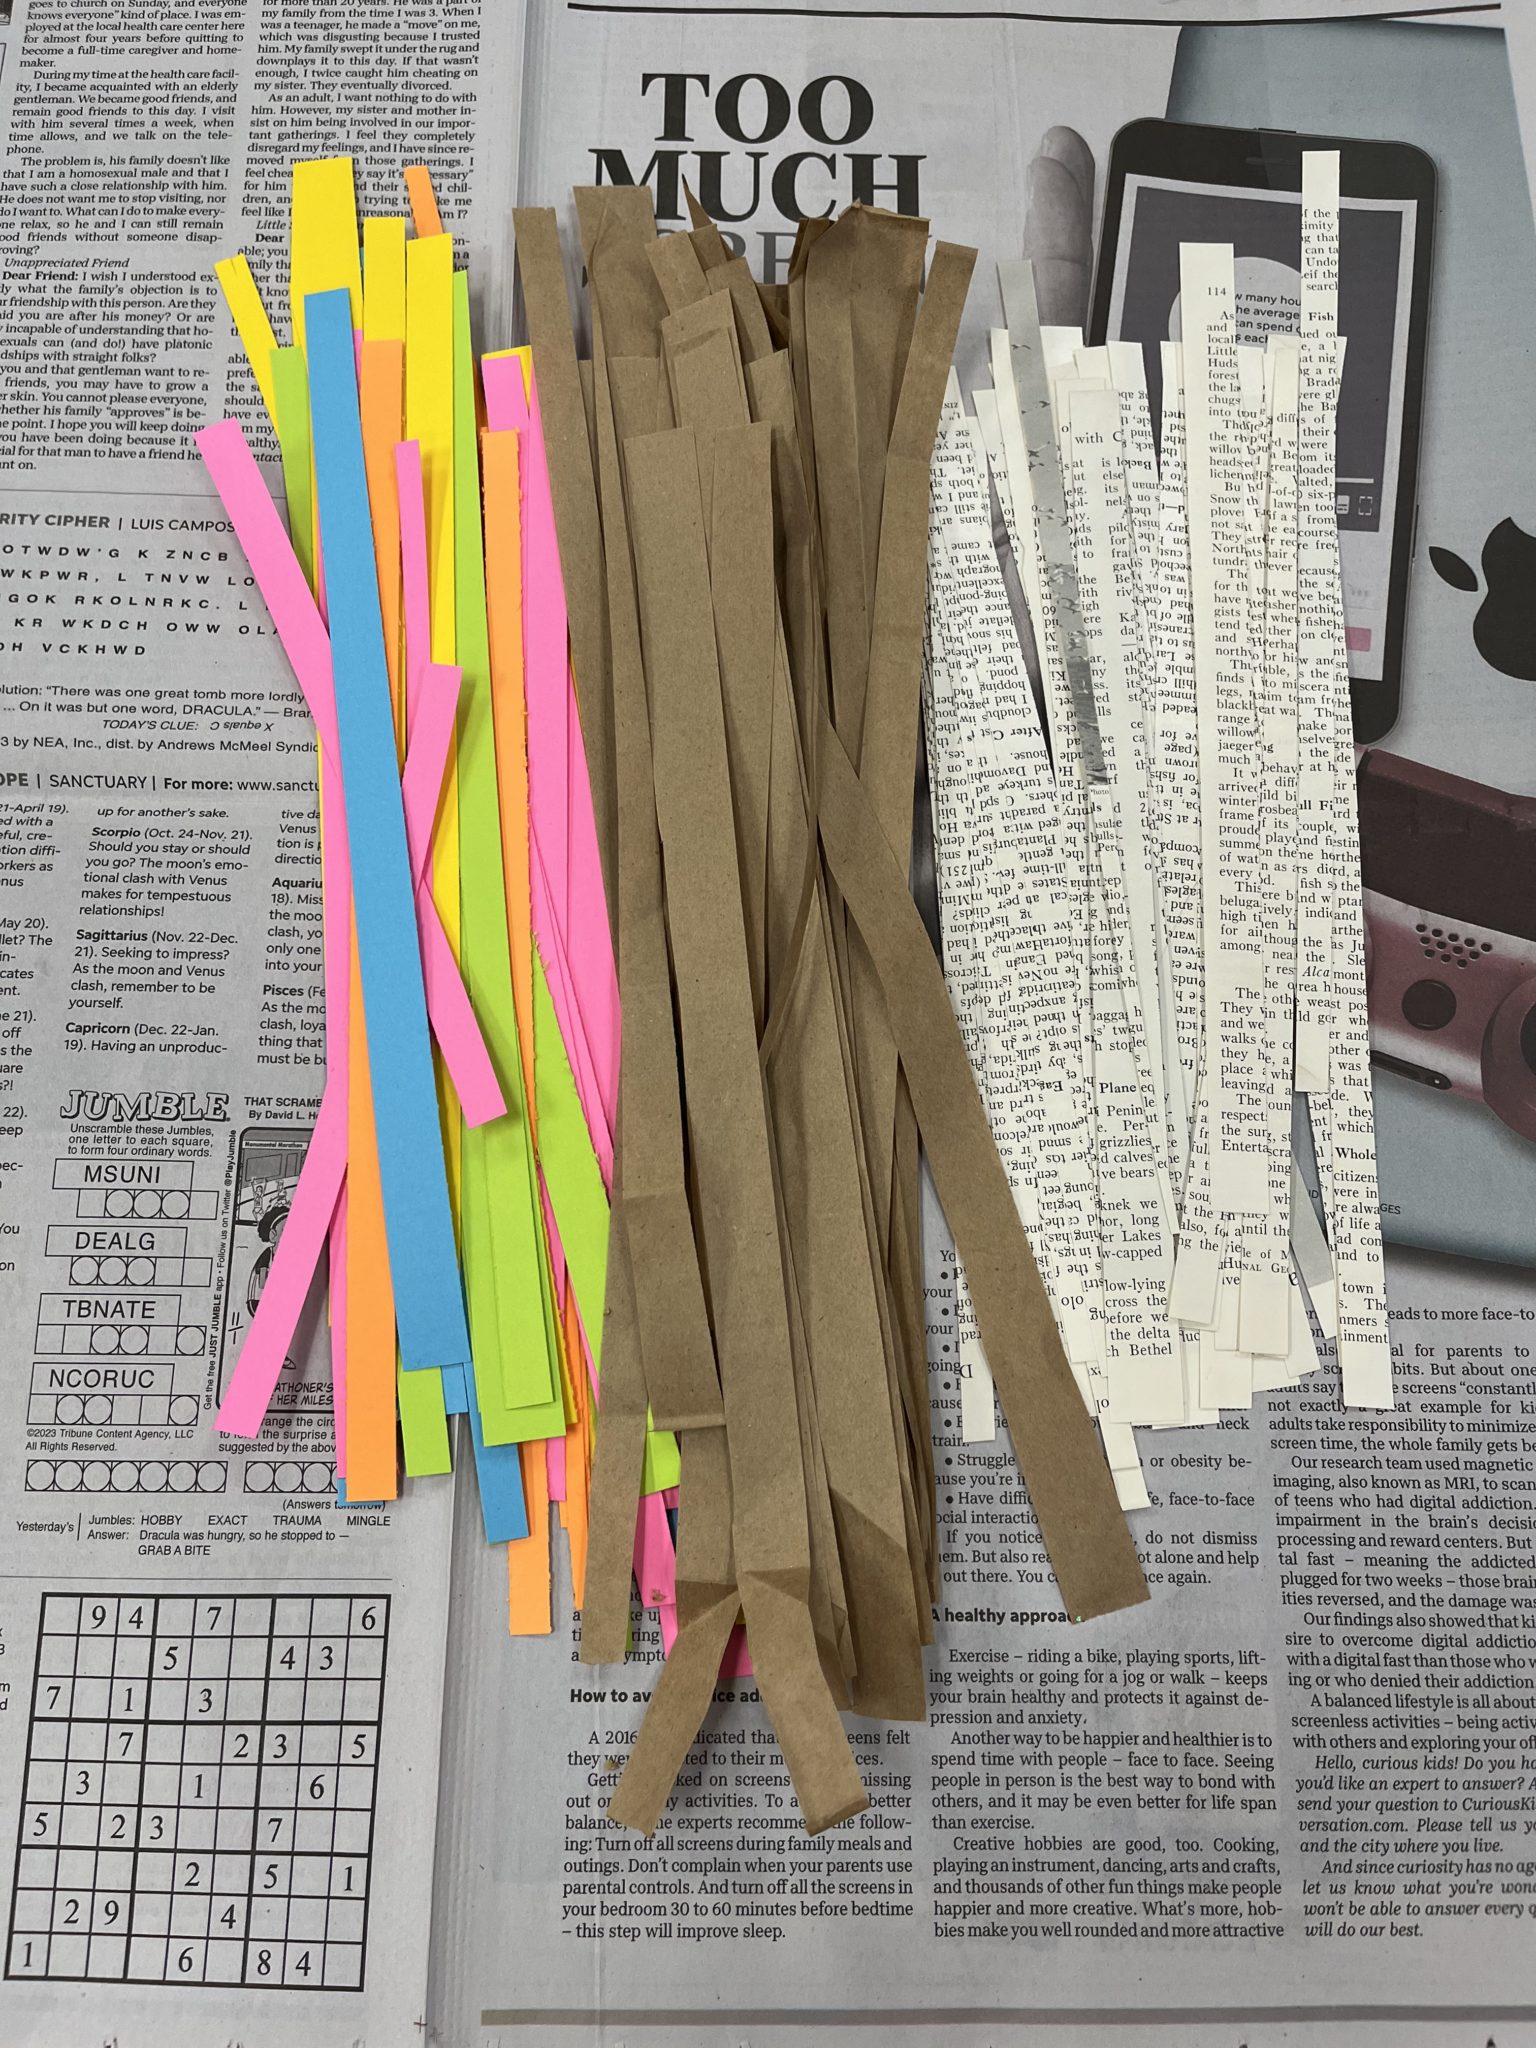
- Shredded paper
- White glue
- Paintbrush
- Plastic wrap
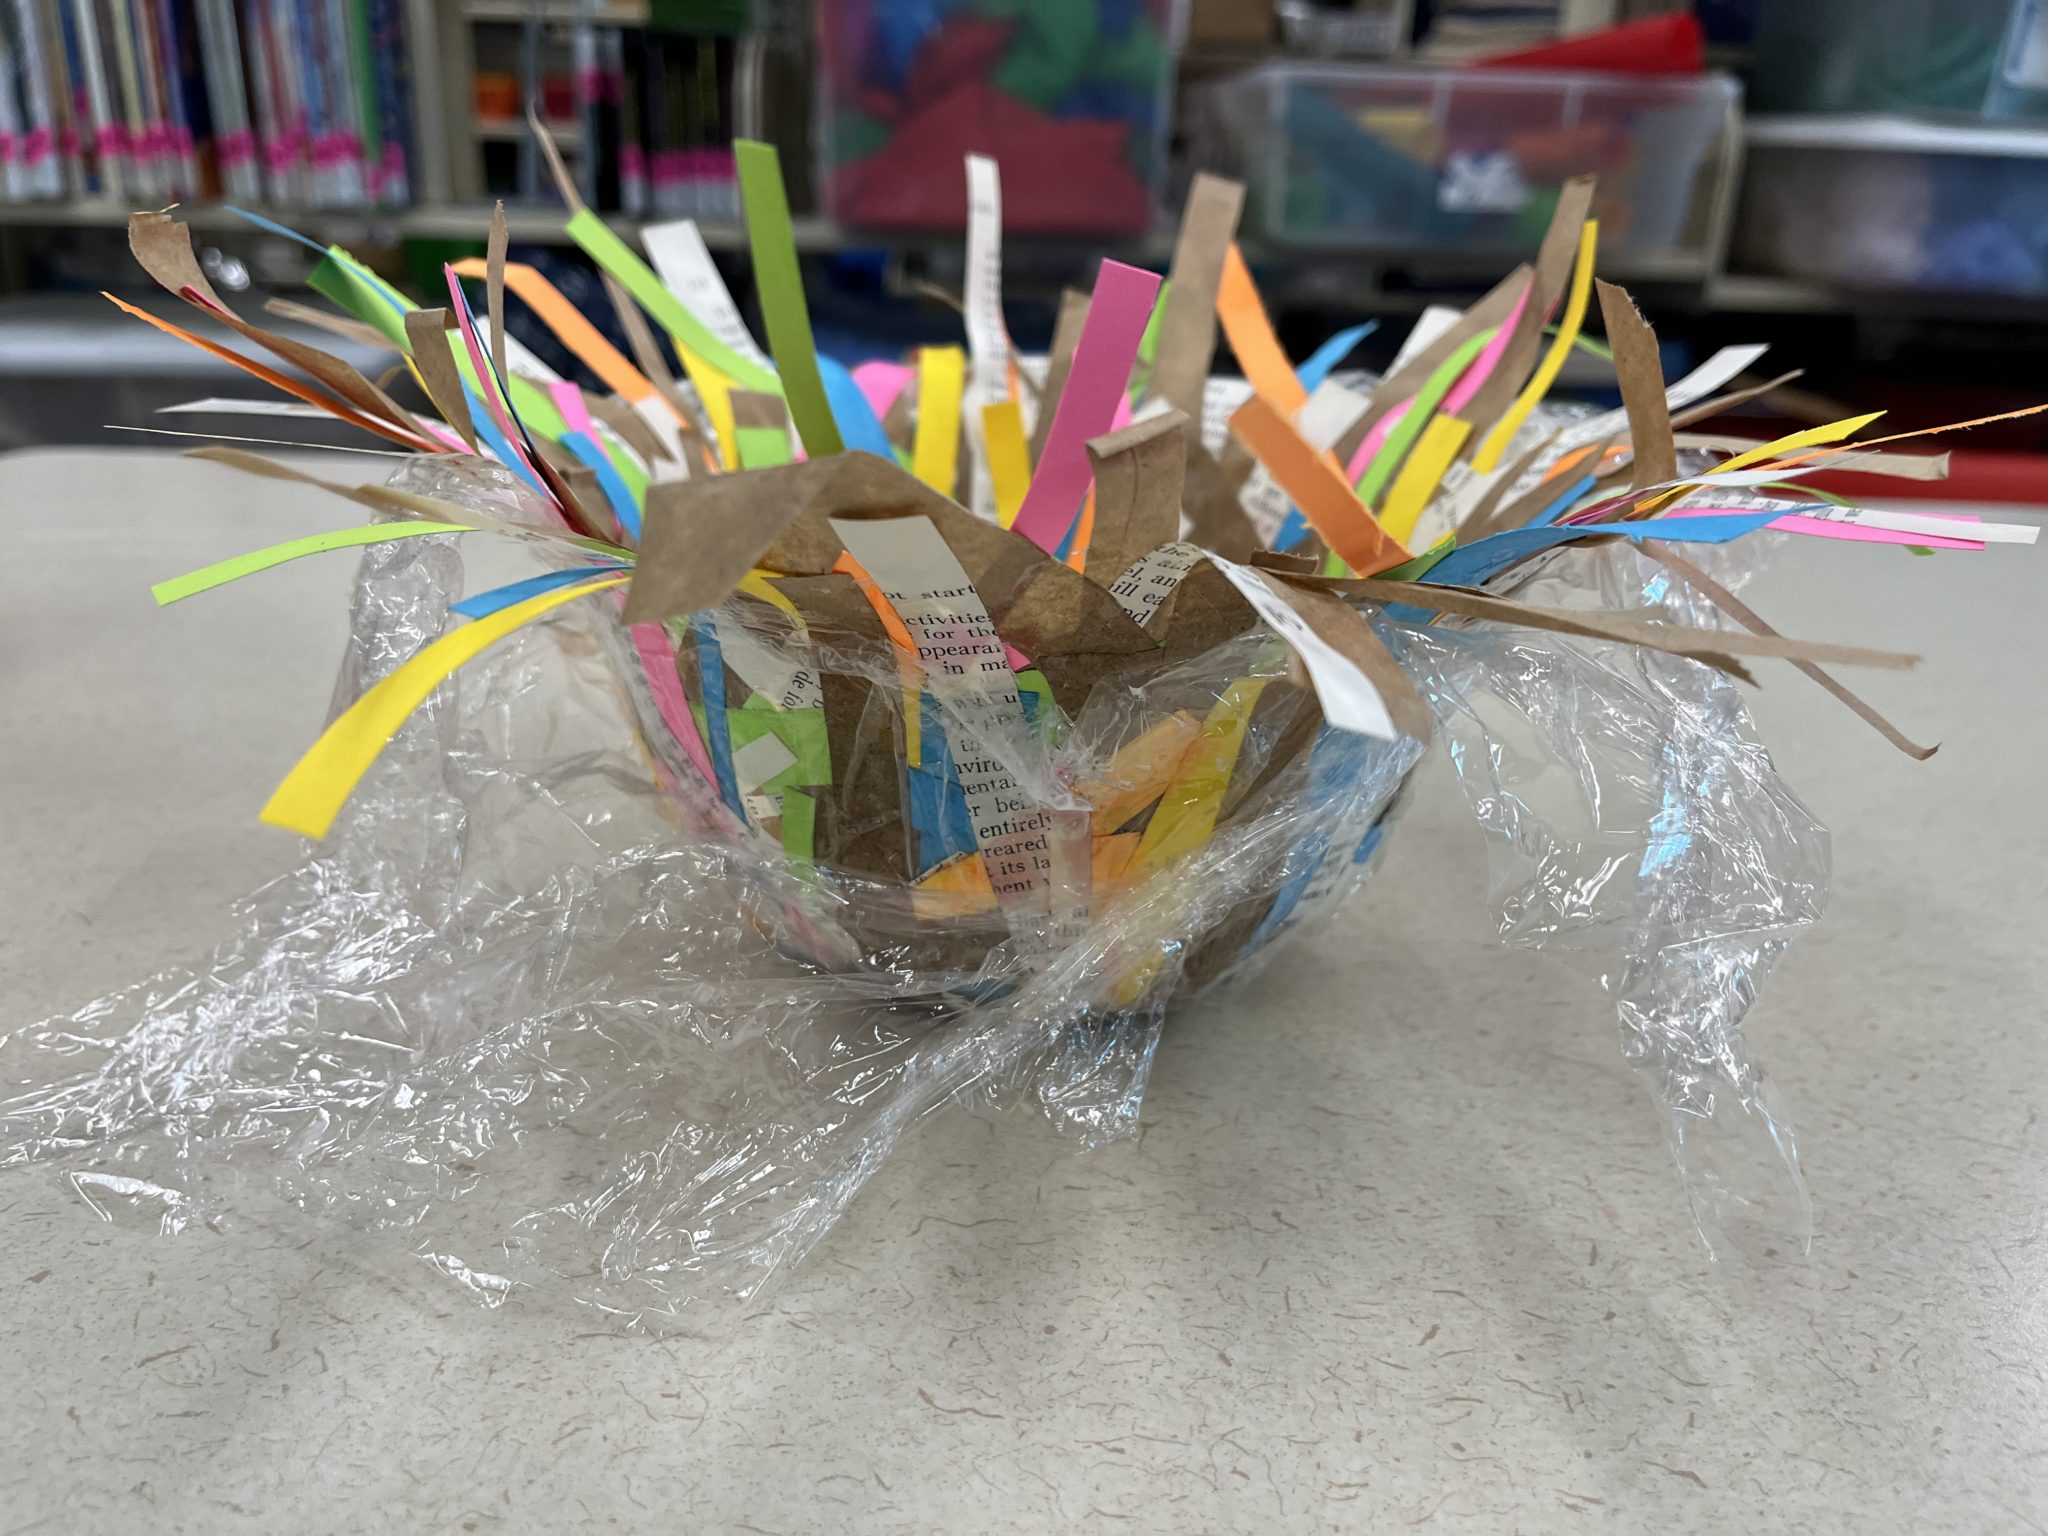
- Bowl to mold the nest in
- Small container for glue & water mixture
Tips
- Spread newspaper, an old tablecloth or something else to protect your working surface.
- Keep a wet paper towel nearby to wipe sticky fingers on as you go.
Steps:
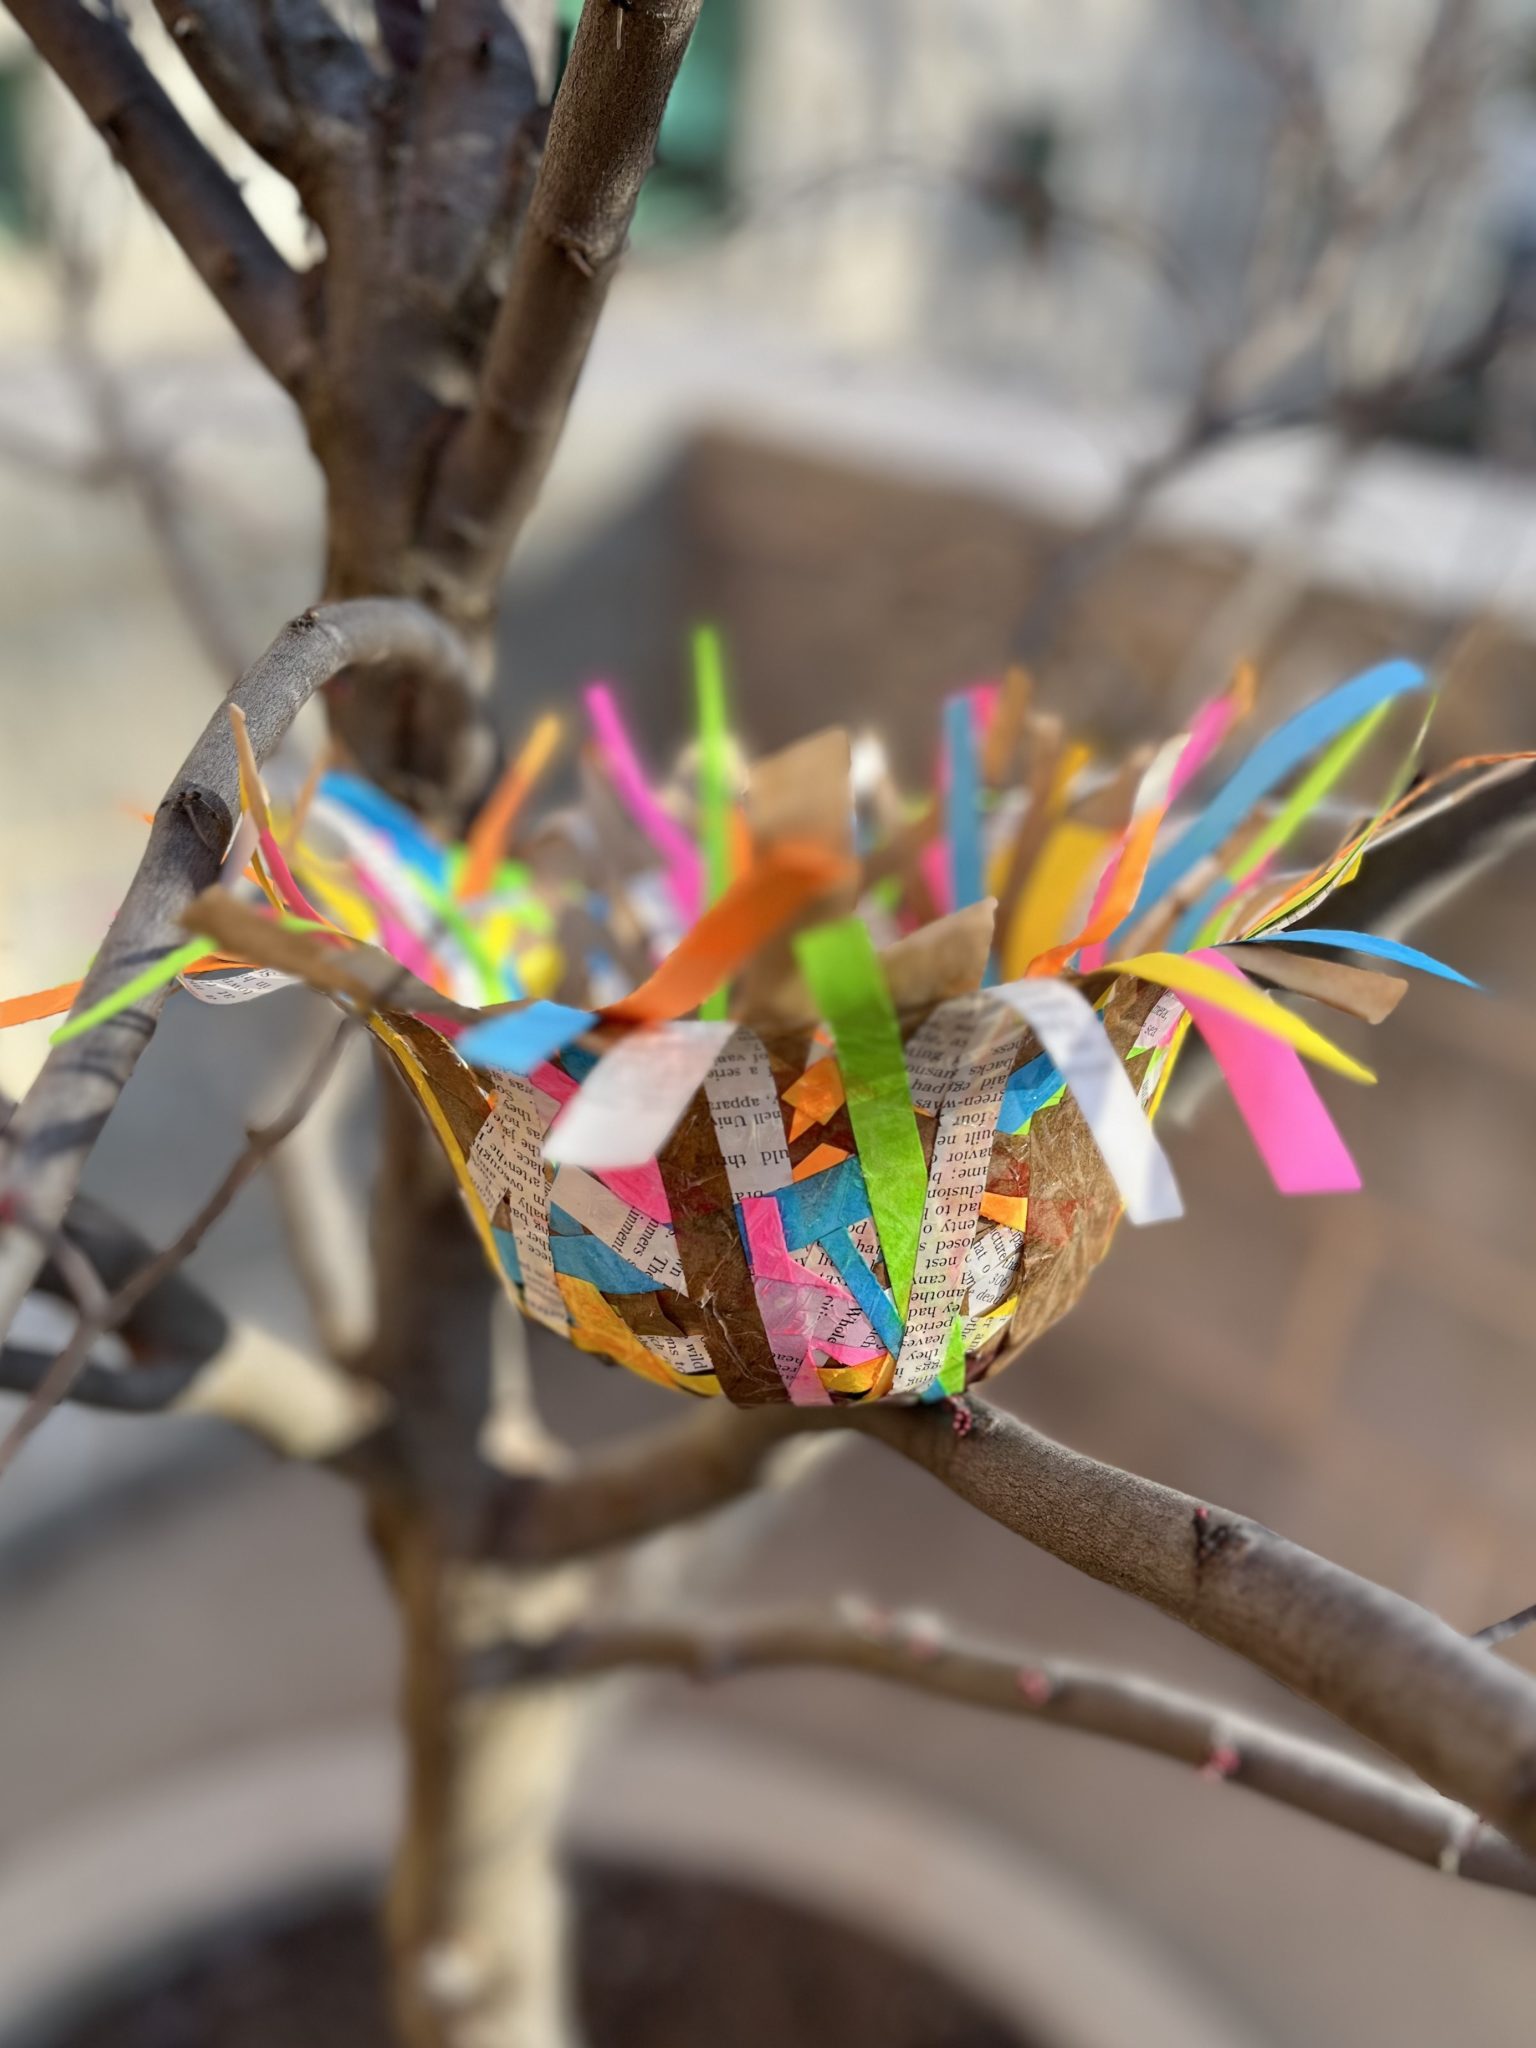
1. Cut the paper into strips. The strips can vary depending on your bowl size. I cut strips 6 to 12 inches long and 1/4 to 1/2 inch wide. You can use any kind of paper, including old magazines, mail, etc.
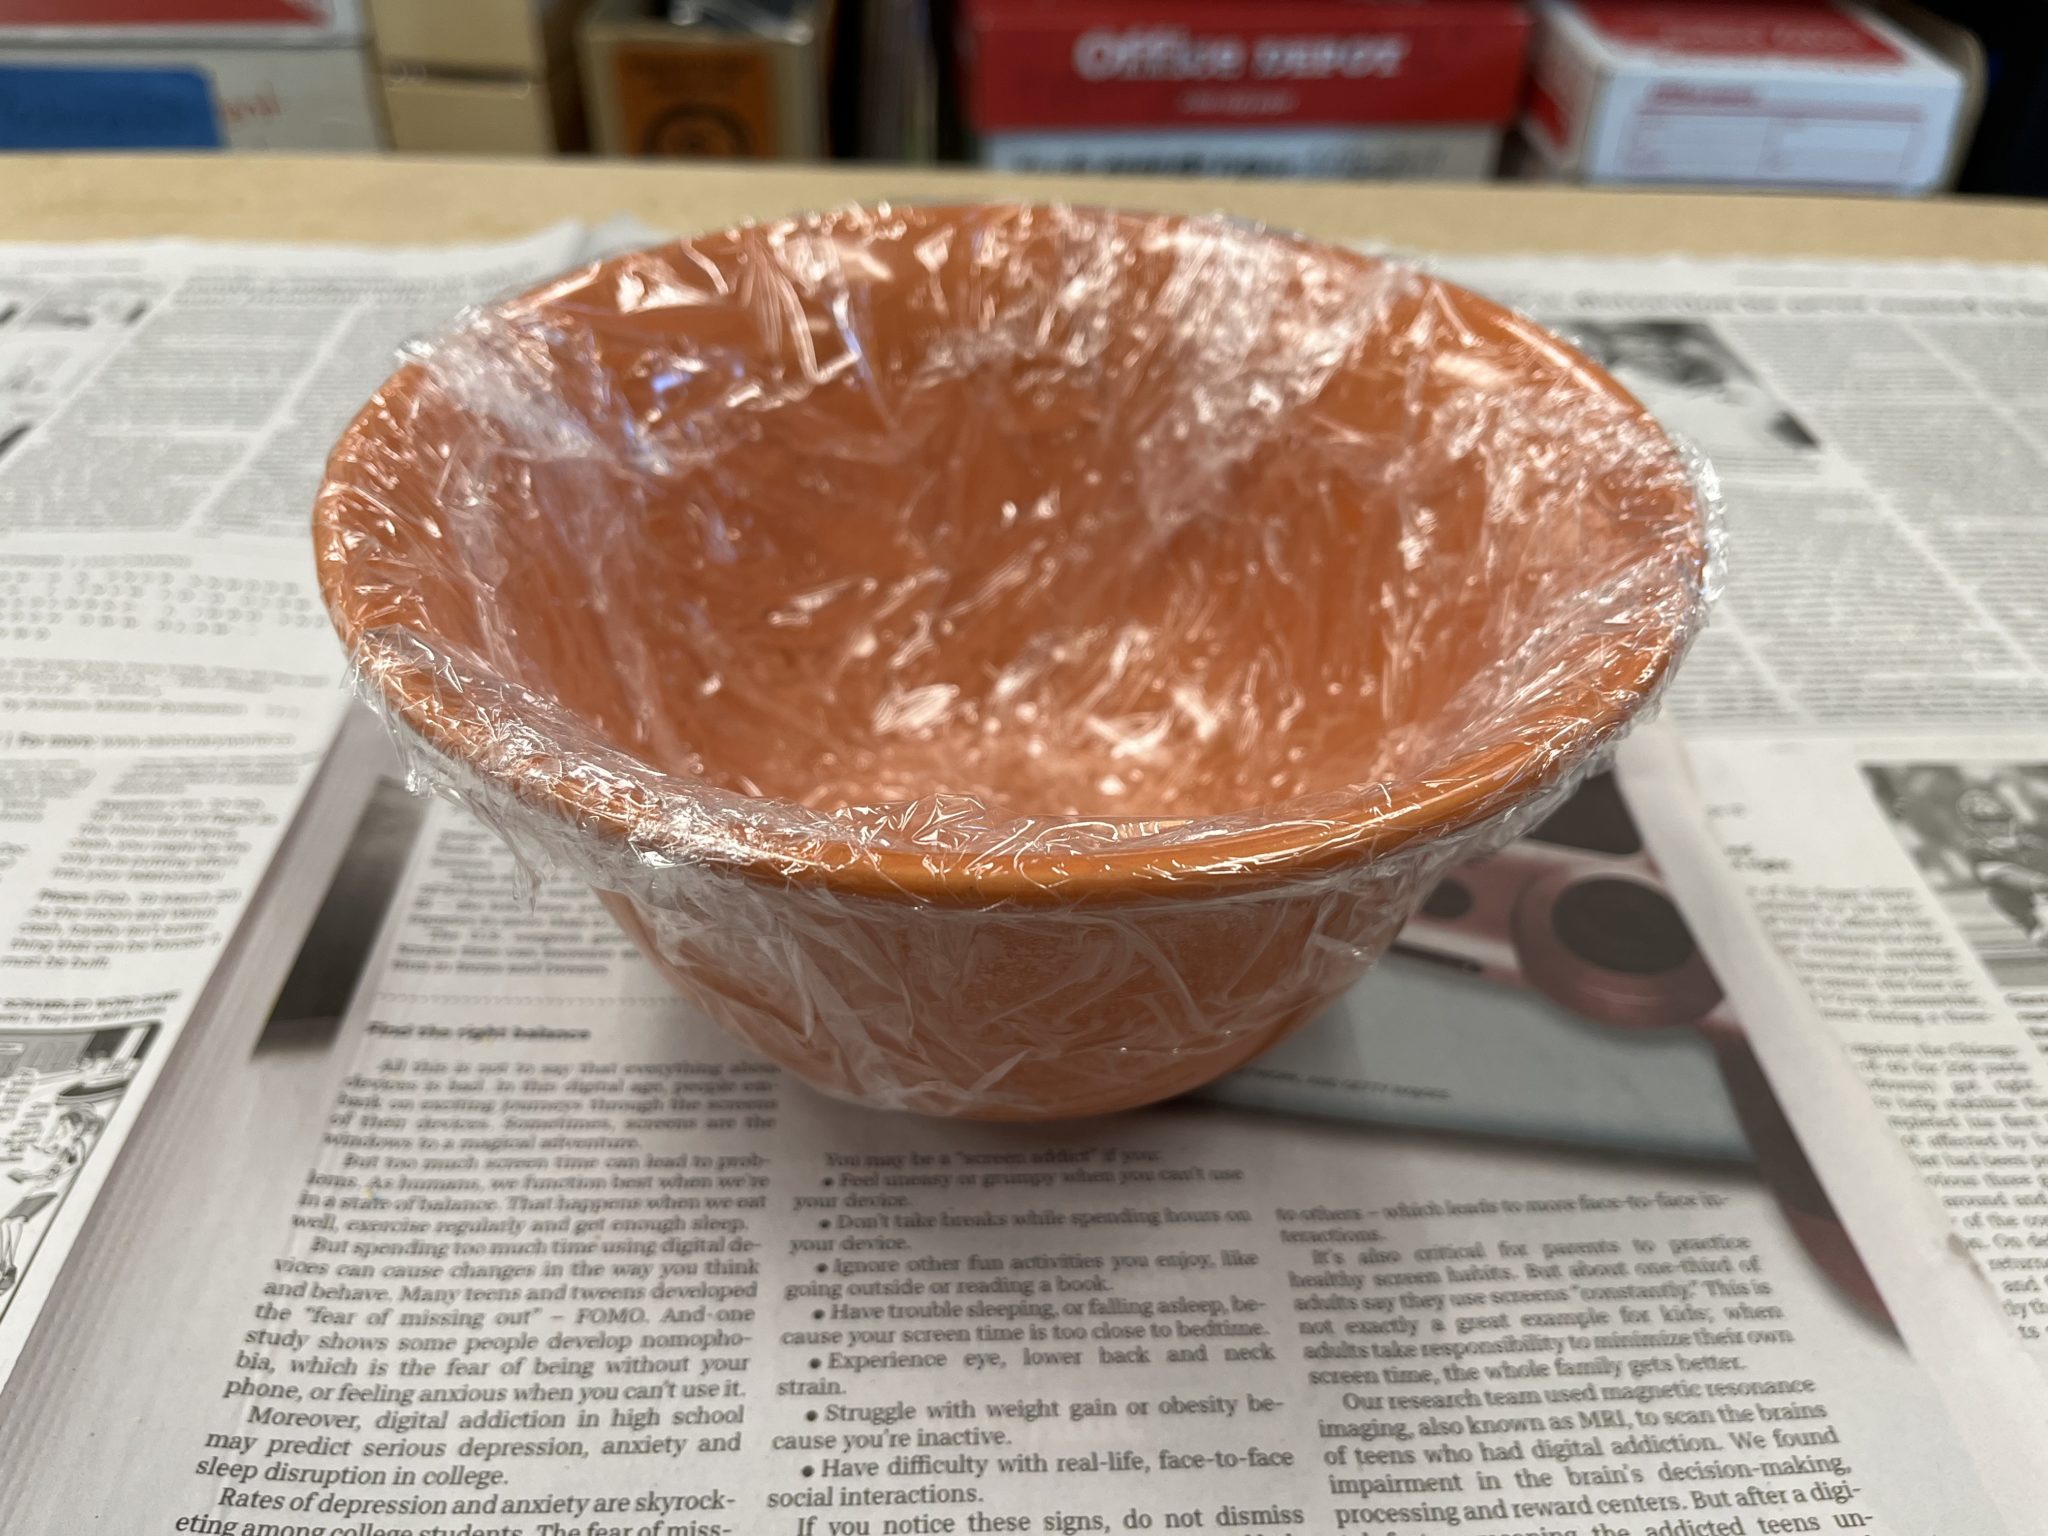
2. Place plastic wrap on the inside of the bowl and around the edge.
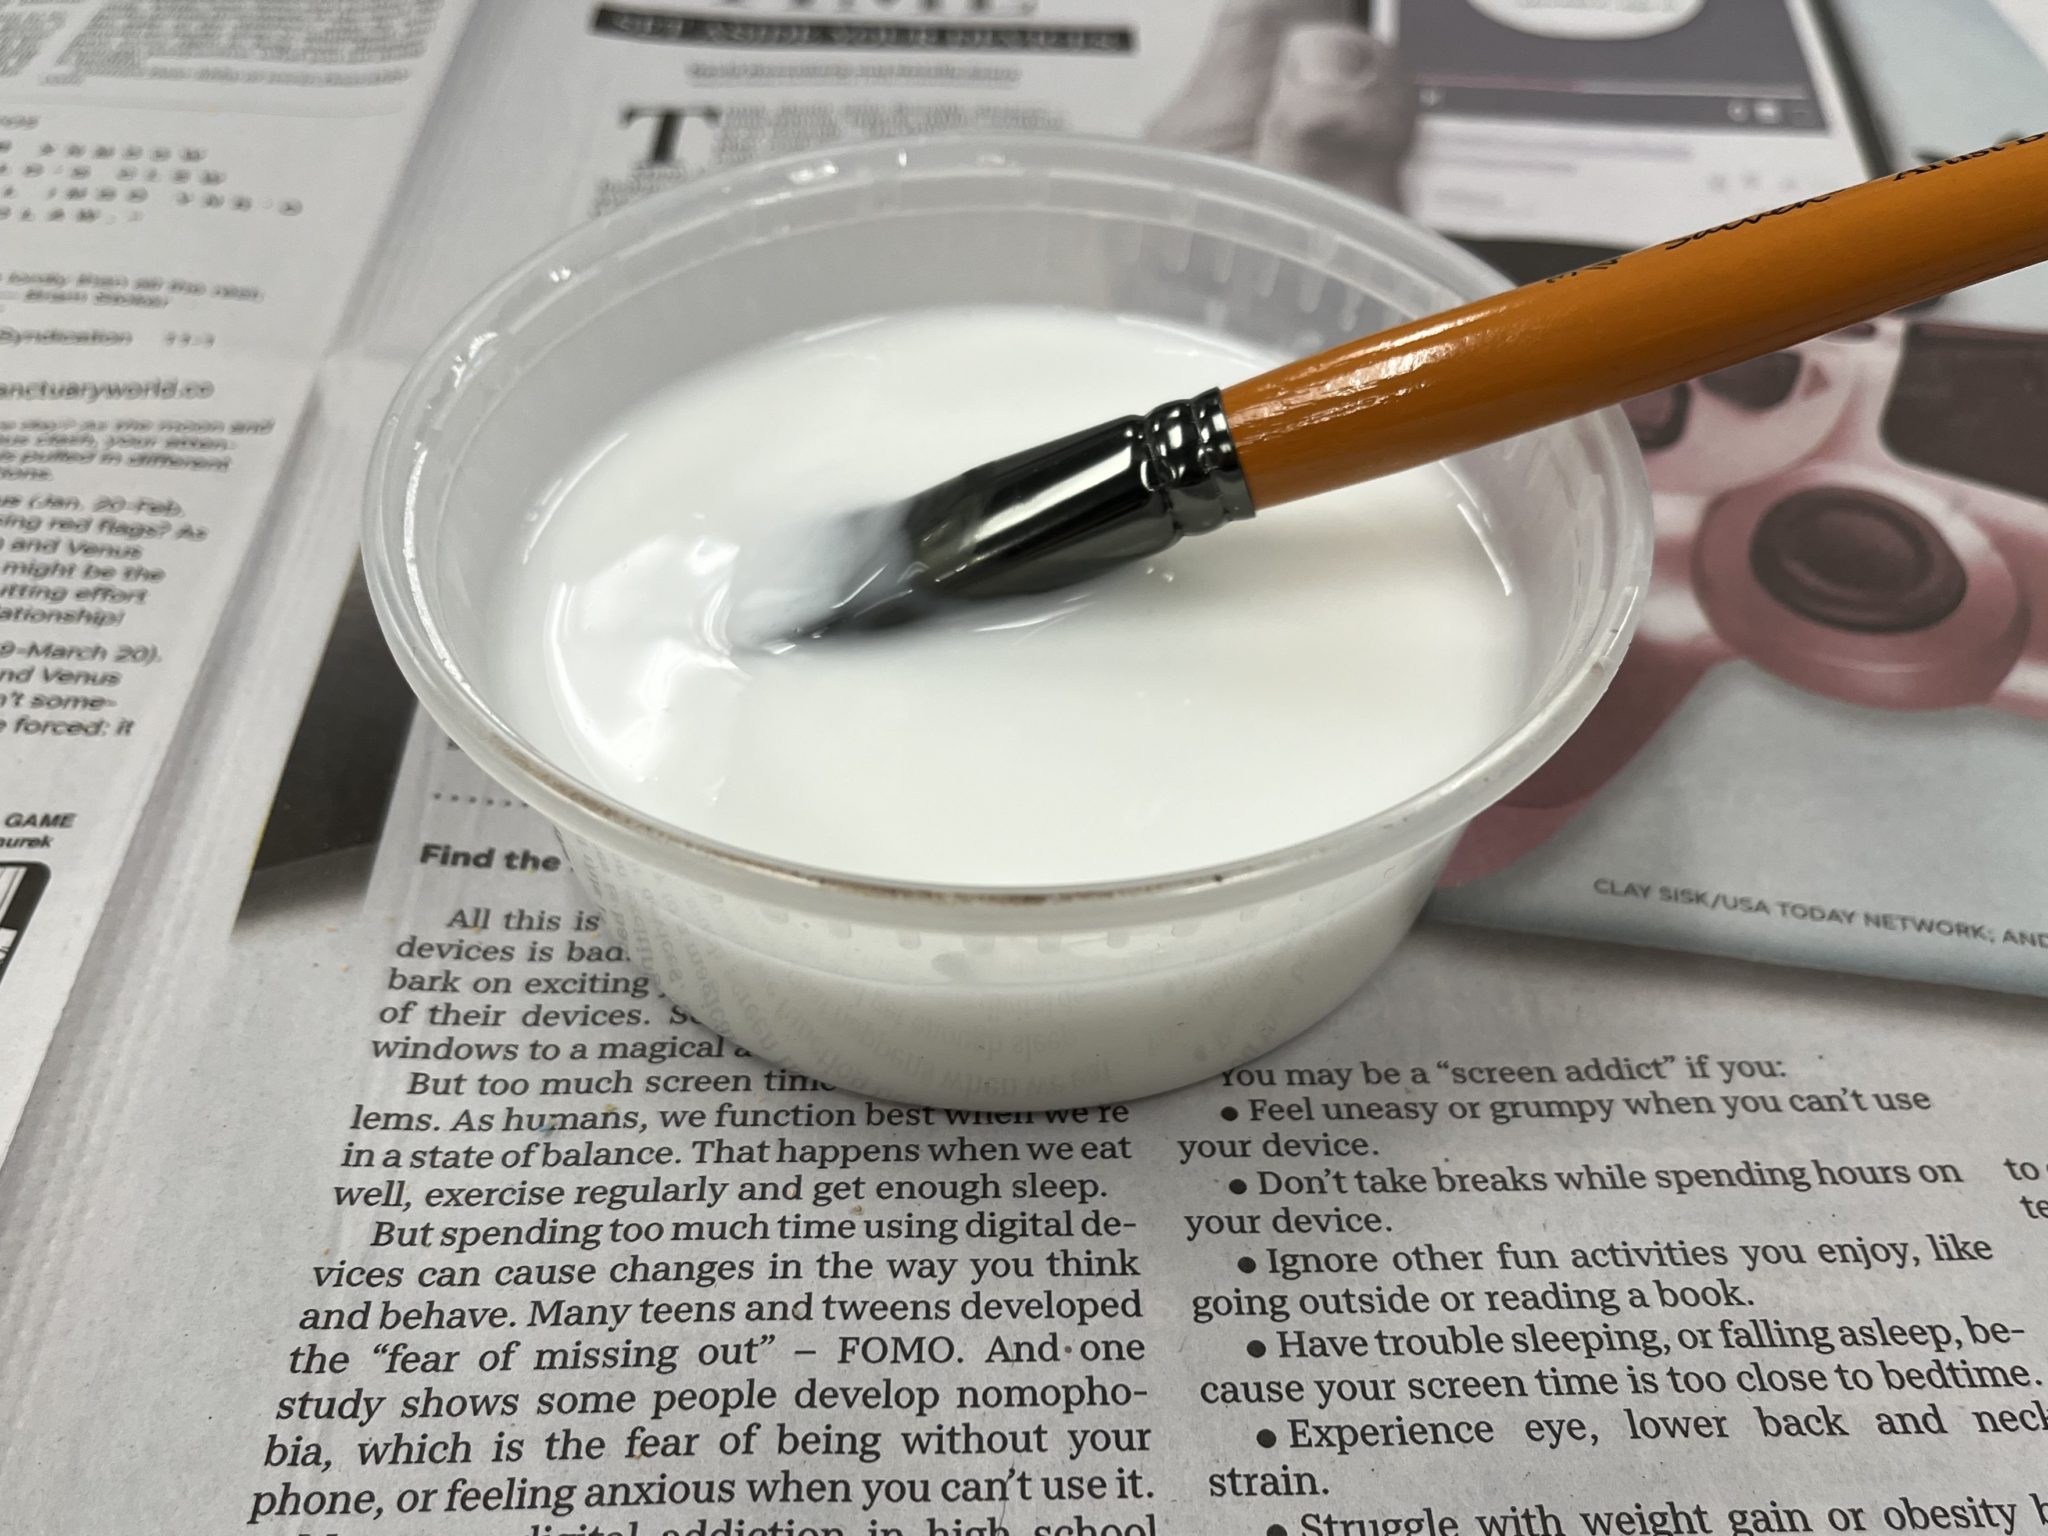
3. Mix glue with water, using 1 part glue and 1 part water. I used about 1/3 cup of each. Stir well.
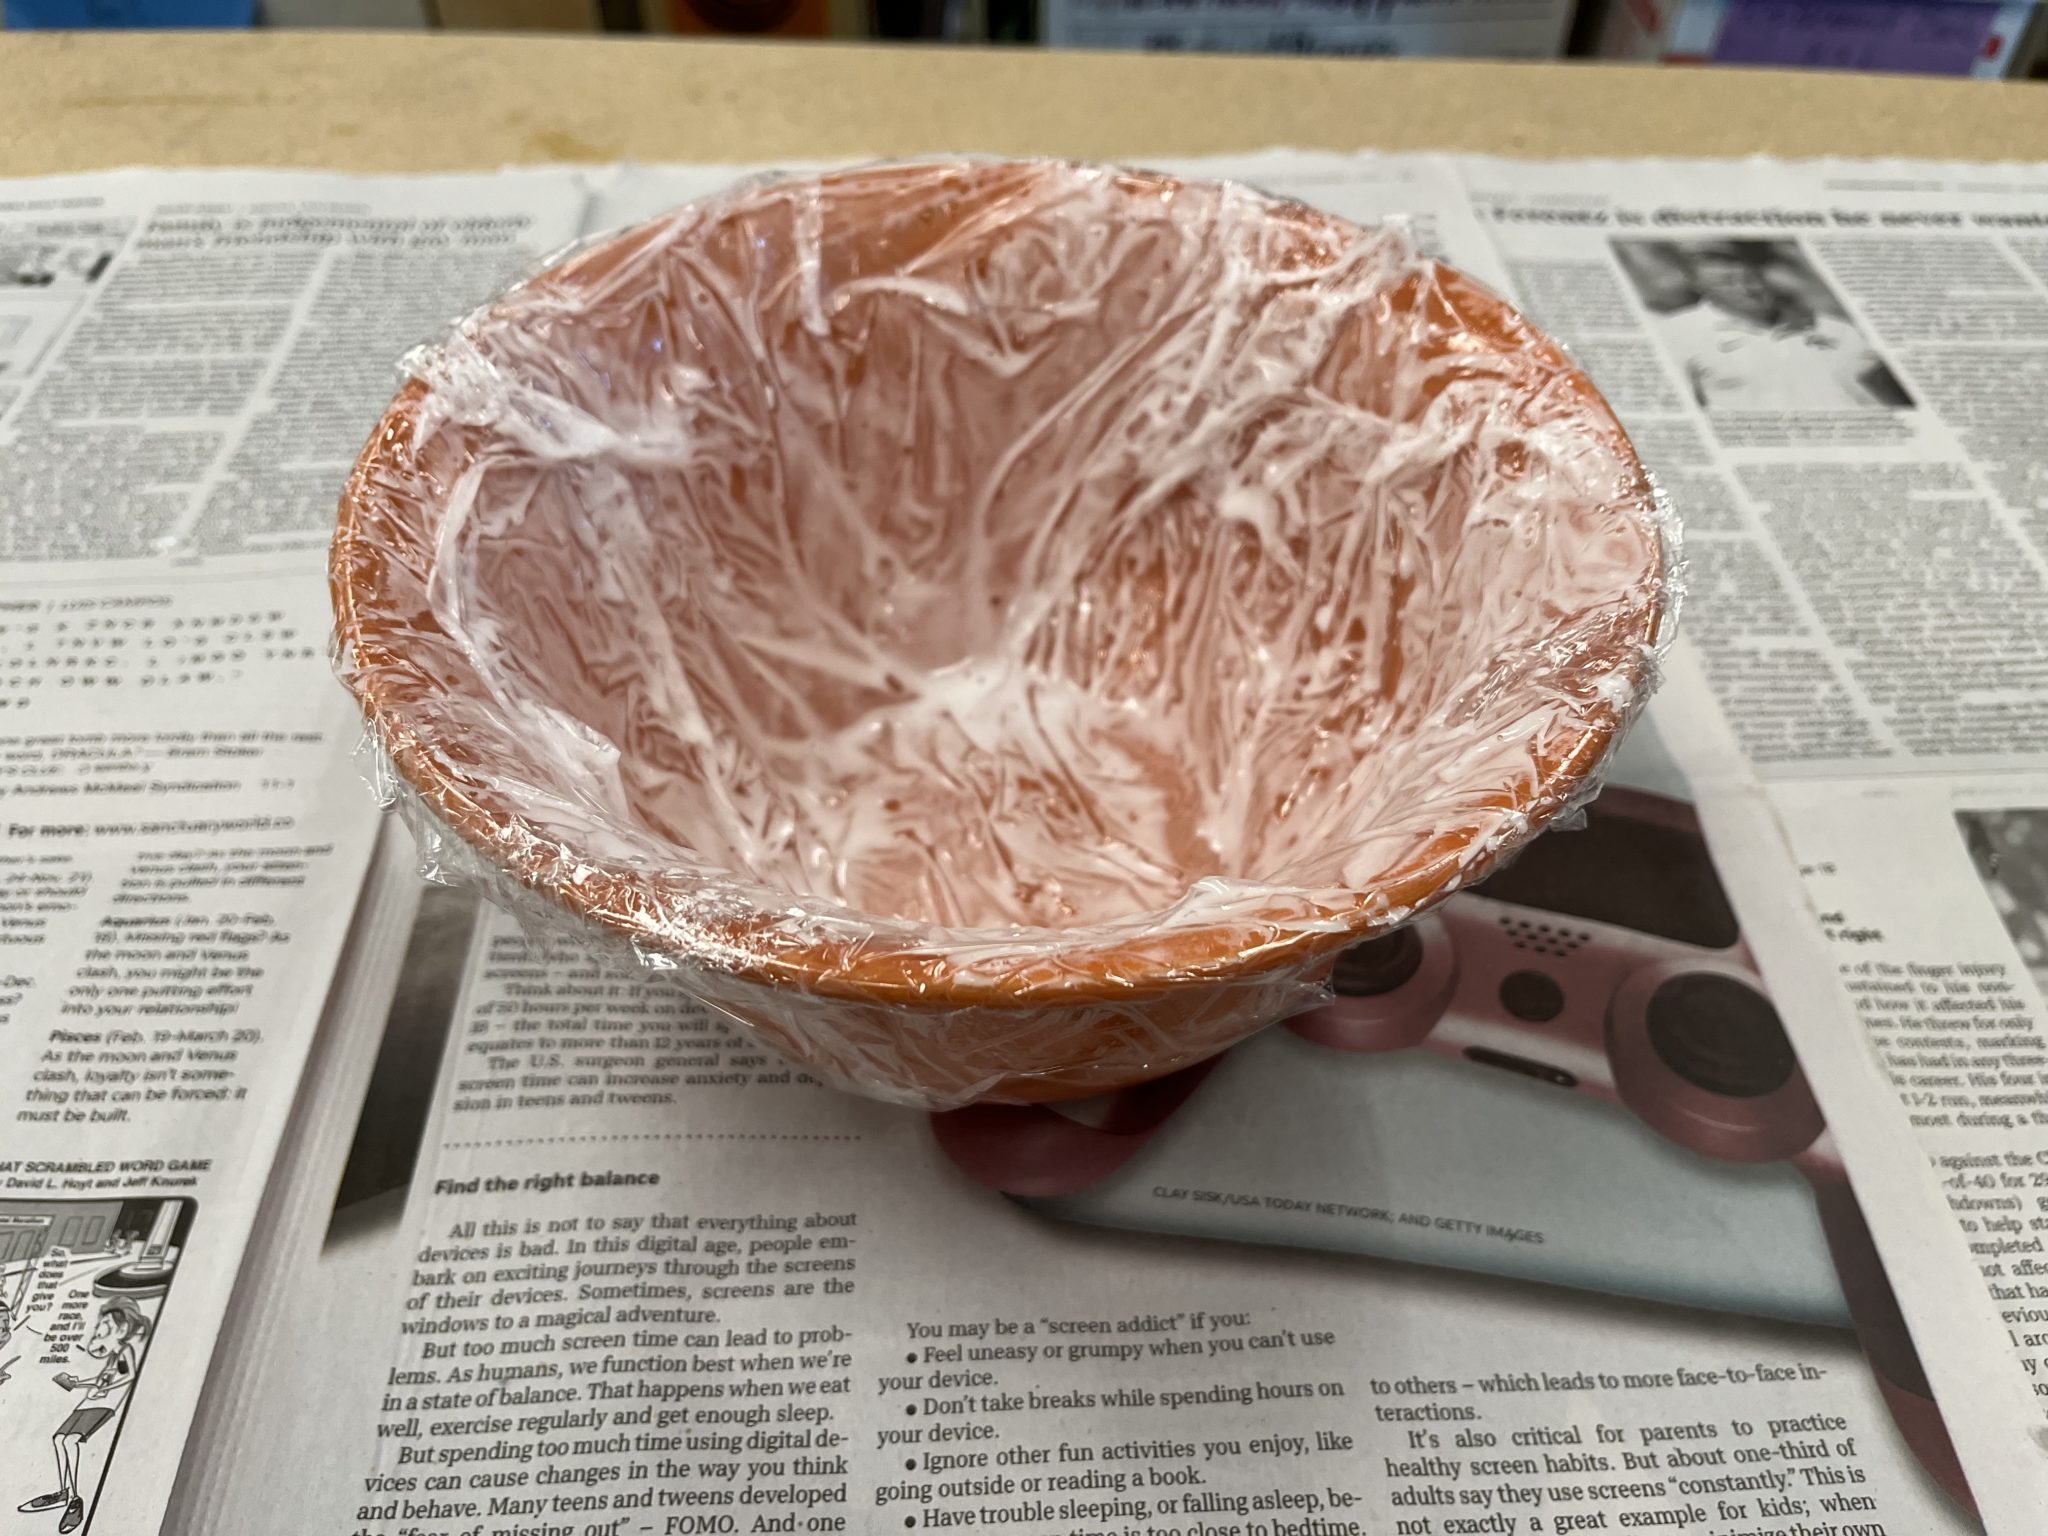
4. Brush the mixture all around the inside of the bowl on top of the plastic wrap. (Many online tutorials say to dip the paper strips in paper mache or glue first, but this can get very messy very quickly.)
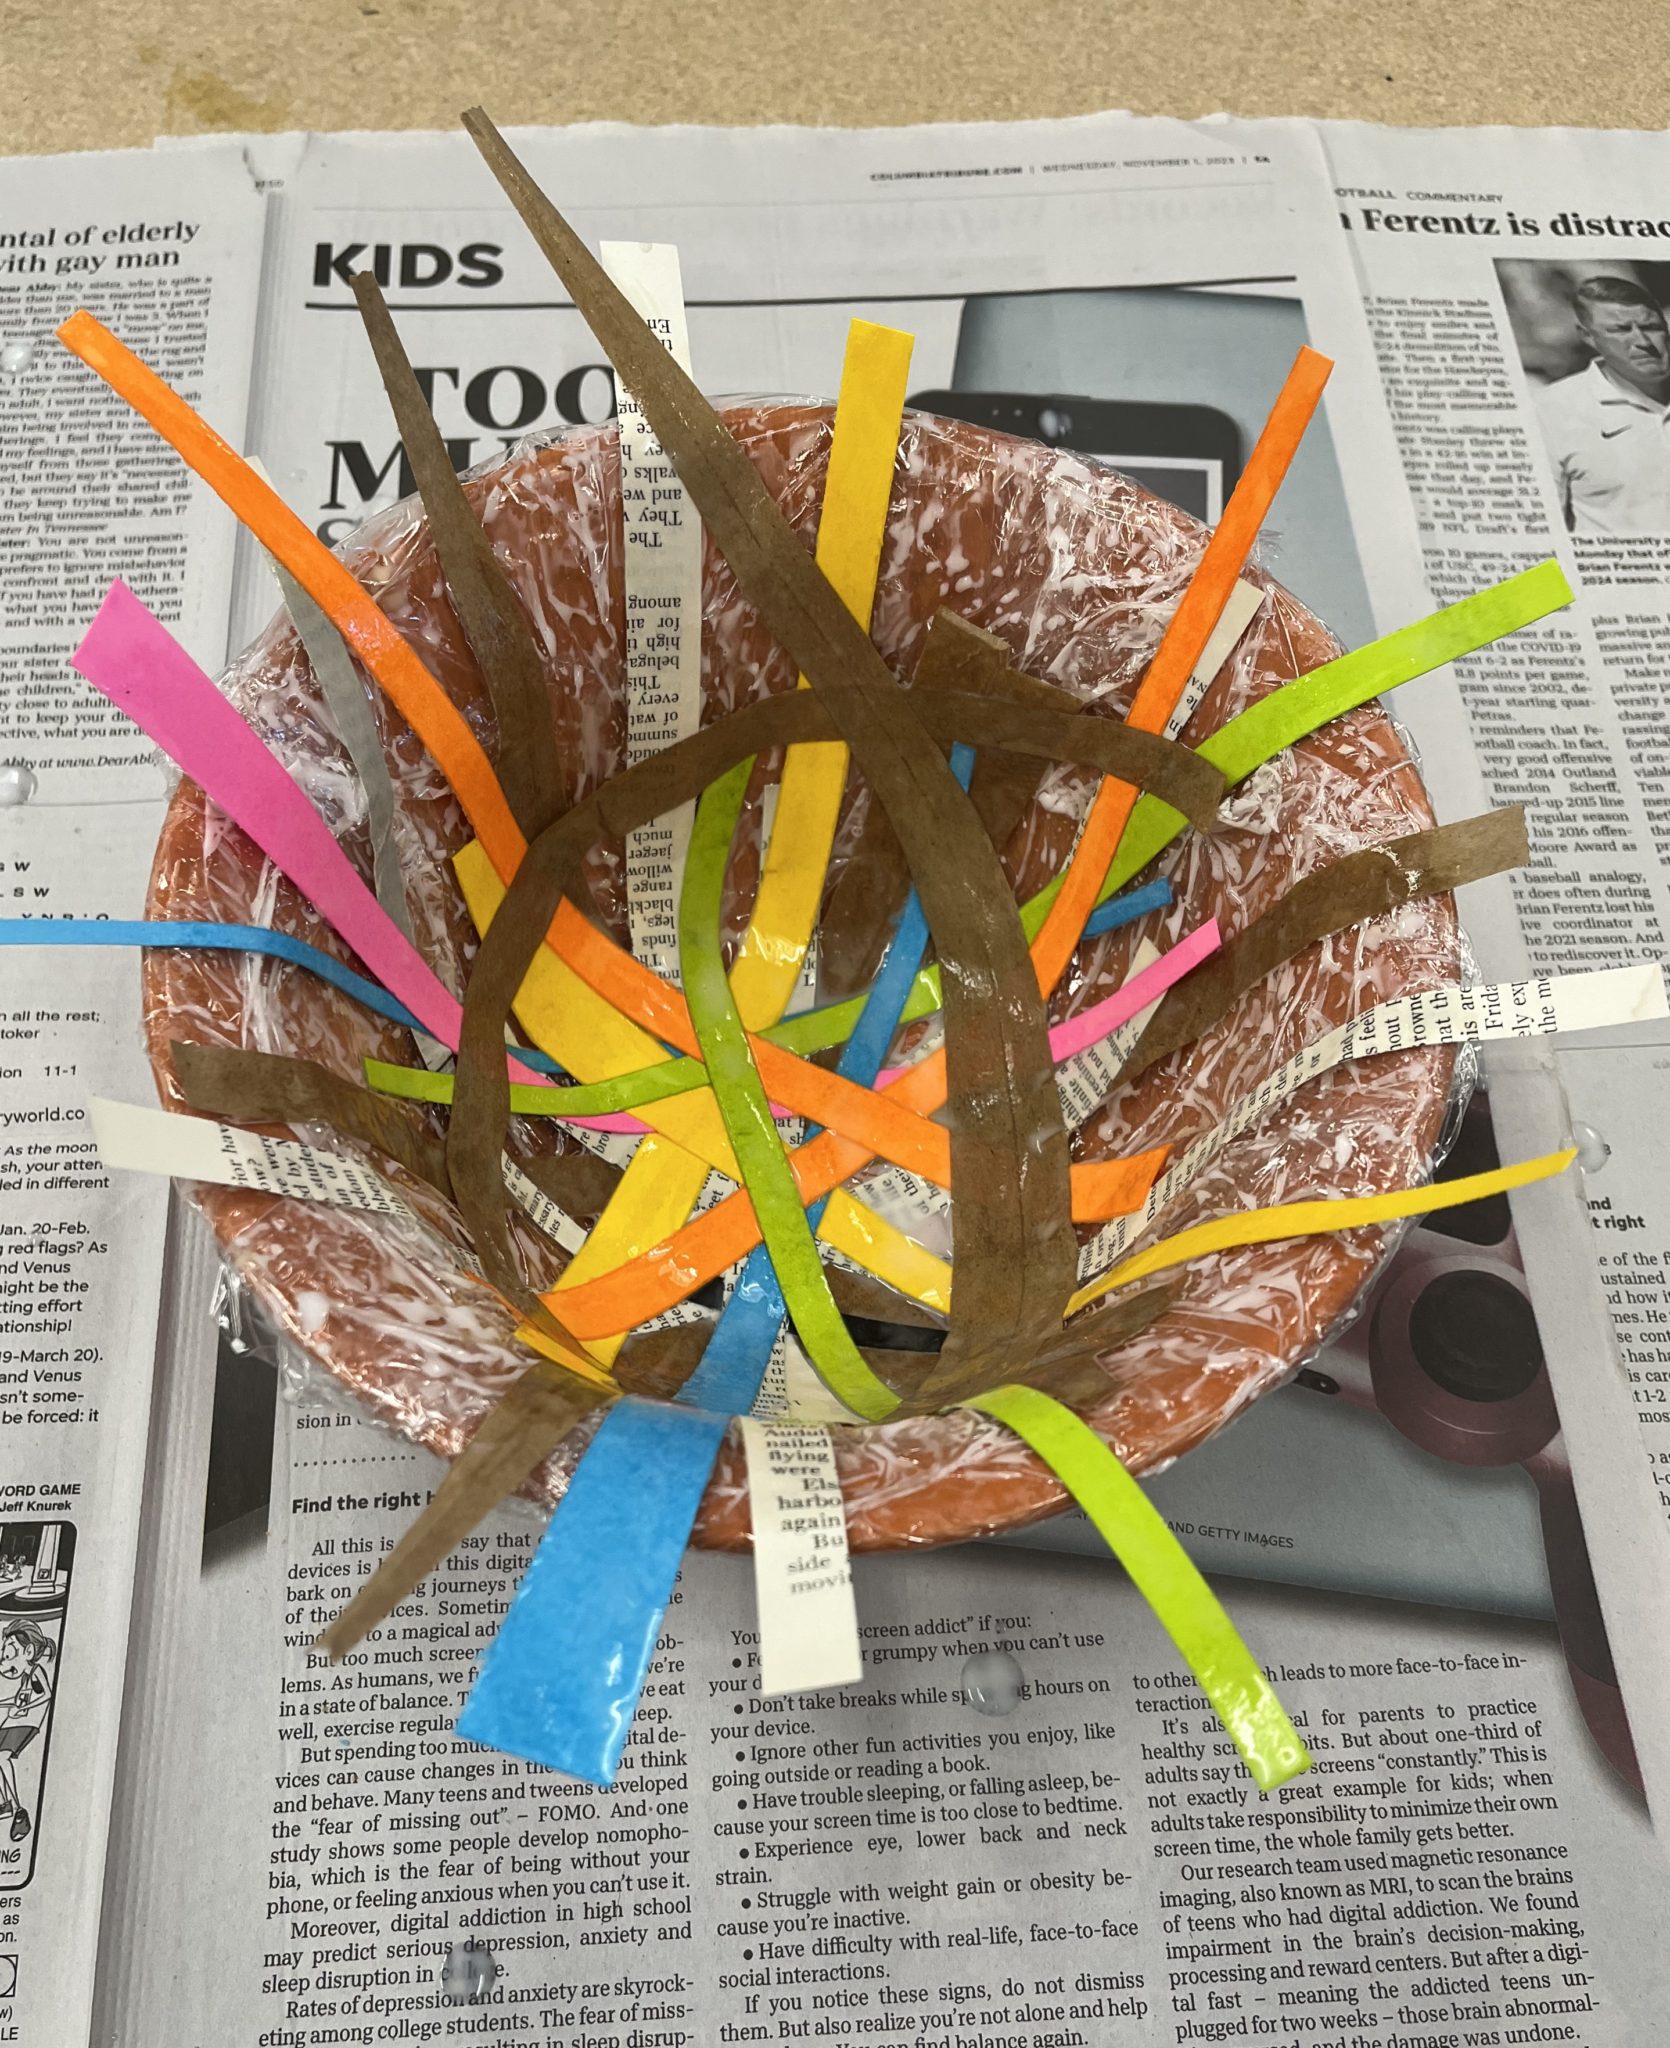
5. Take individual strips and arrange them so they crisscross around the bowl. You can also place strips horizontally around the bowl. Every now and then, lightly paint on more of the glue-water mixture to help keep the layers down. Add enough strips until about 3 or 4 layers are formed.
6. Let the nest dry in the bowl overnight. In the morning, gently lift the nest out of the bowl and peel off the plastic.
7. Enjoy your creation!