As of March 20, it is officially spring! There are many ways to mark this transition, including going on a walk in the woods, sketching a new-to-you plant or maybe even working with clay to form these adorable, slightly fantastical (because: colors) mushrooms.
Morel mushrooms begin to pop up from their underground network around this time of year when the soil warms and there is more moisture. And while morels are many foragers’ favorite fungus, mushroom hunting is not for amateurs. ⚠️There are morel “look-a-likes” that can be poisonous and even deadly.⚠️For some at-home learning, check out this fantastic blog and book list, “Meet the Mushrooms . . . and other fun-guys!”). And for hands-on fun for all ages (yes, grown-ups, too), create clay mushroom masterpieces with the steps below!
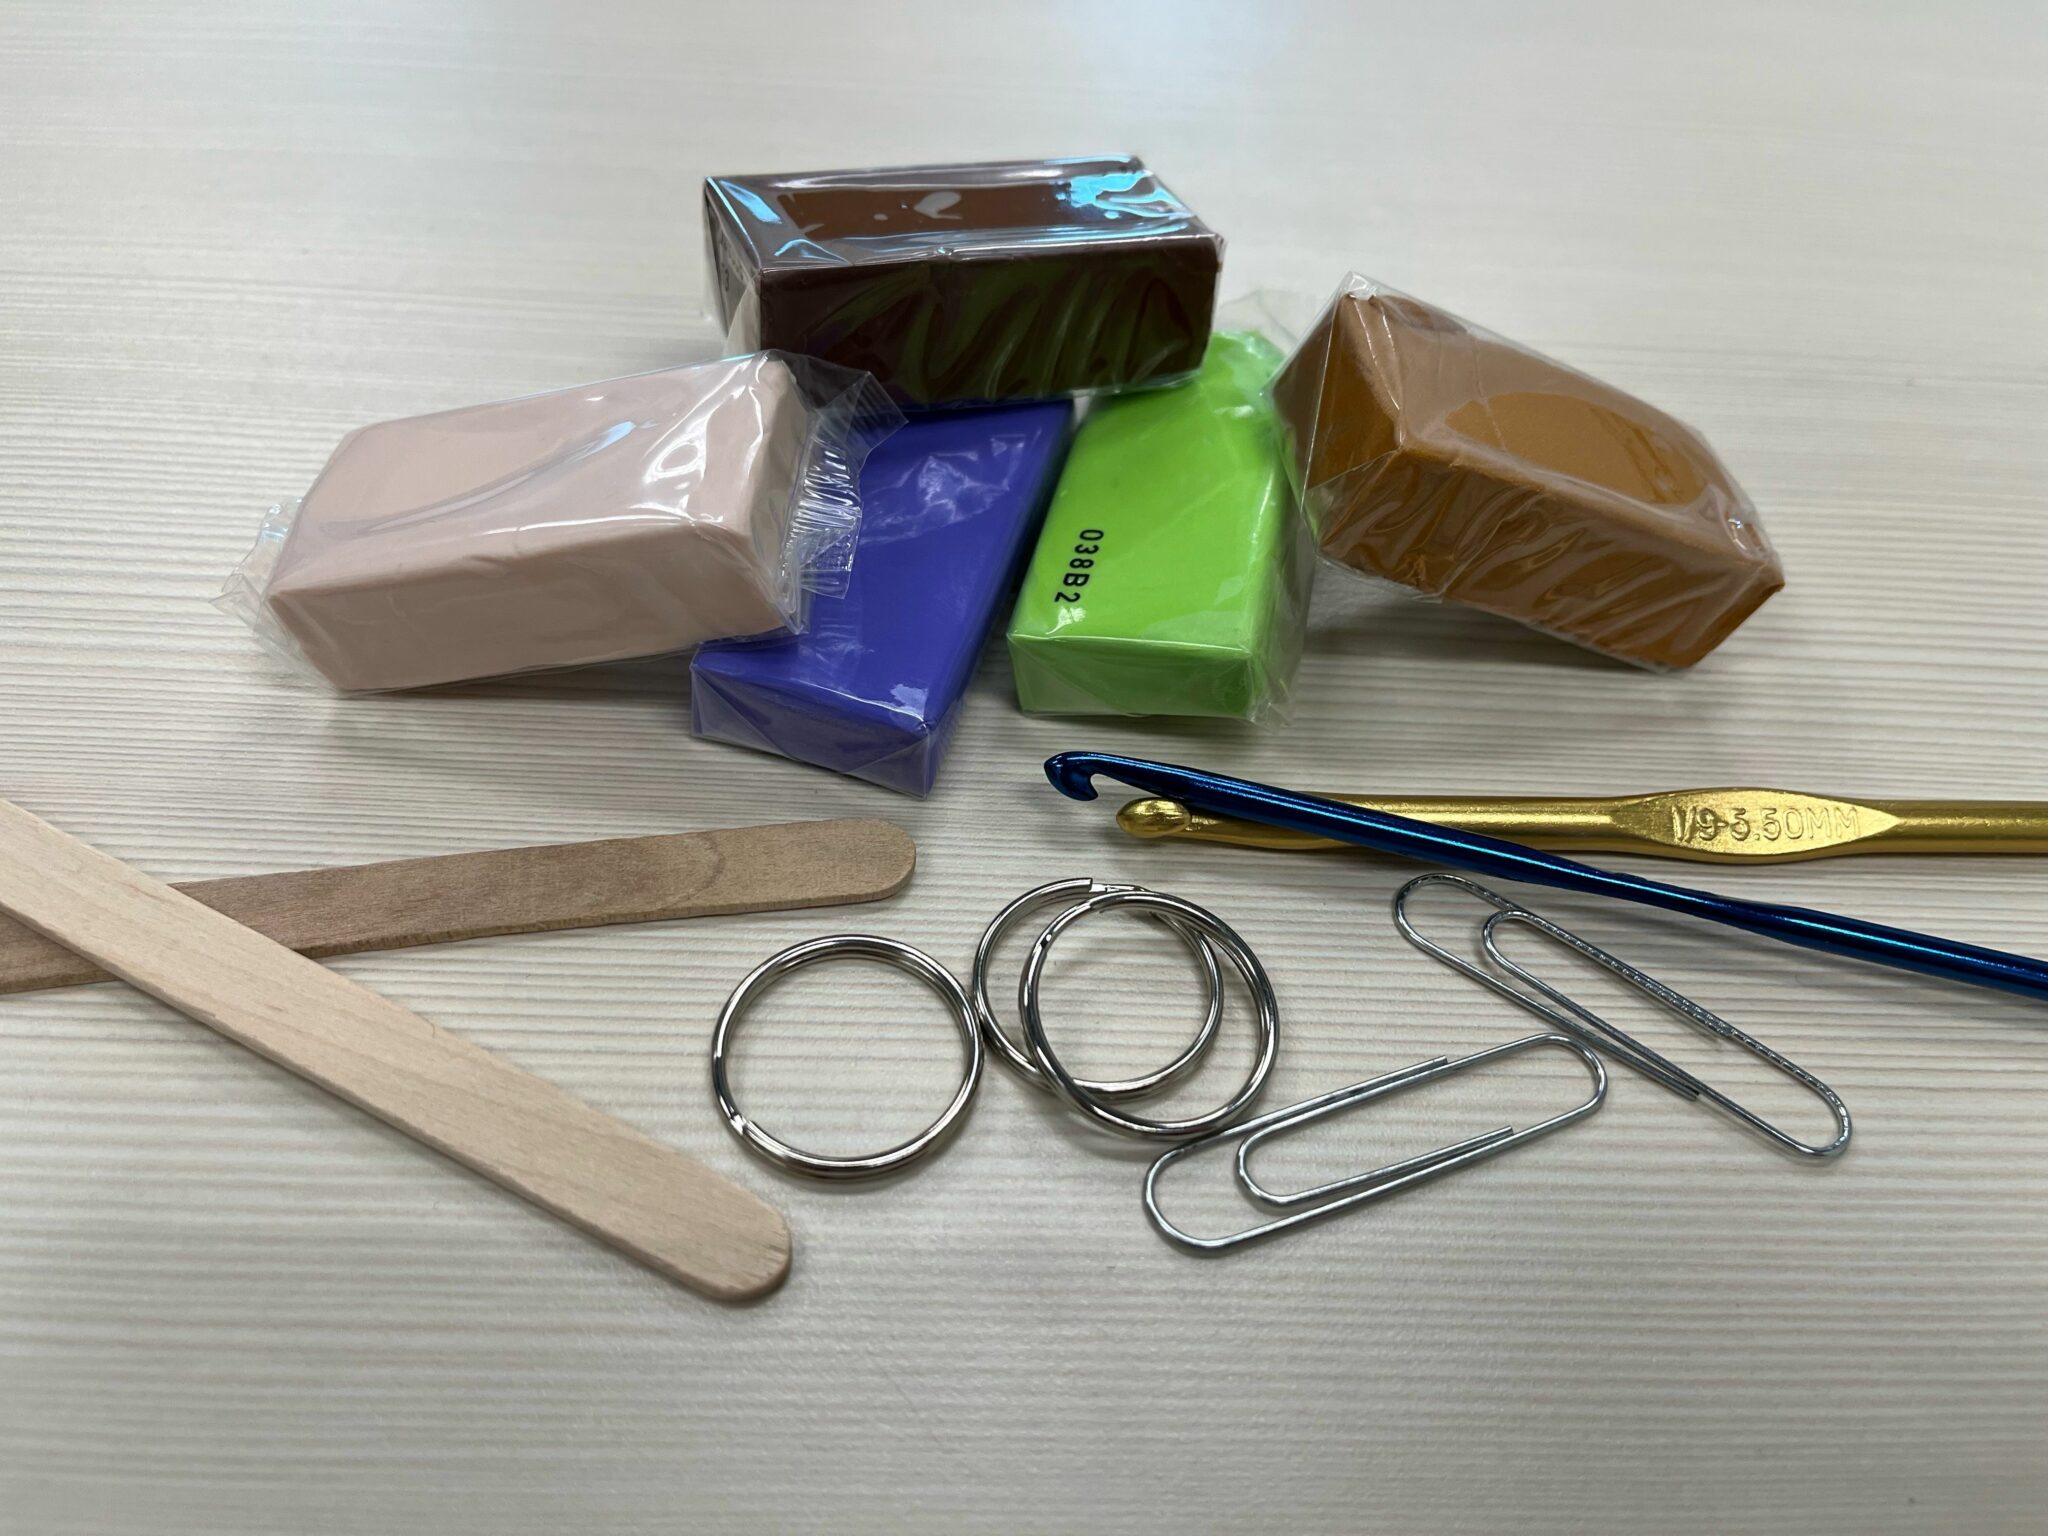
Supplies
- Polymer clay (each block will make one mushroom unless you decide to make mini or supersize mushrooms 😊)
- A tool to make imprints (I used the head of a crochet hook; you could also try using the eraser end of a pencil, a popsicle stick or something else)
- Parchment paper
- Optional (for key chains):
- Toothpick, straightened paper clip, etc. to make holes
- Keyrings or string
Instructions
There is more than one way to mold clay into a morel mushroom shape⭐
🍄Two different options are below🍄
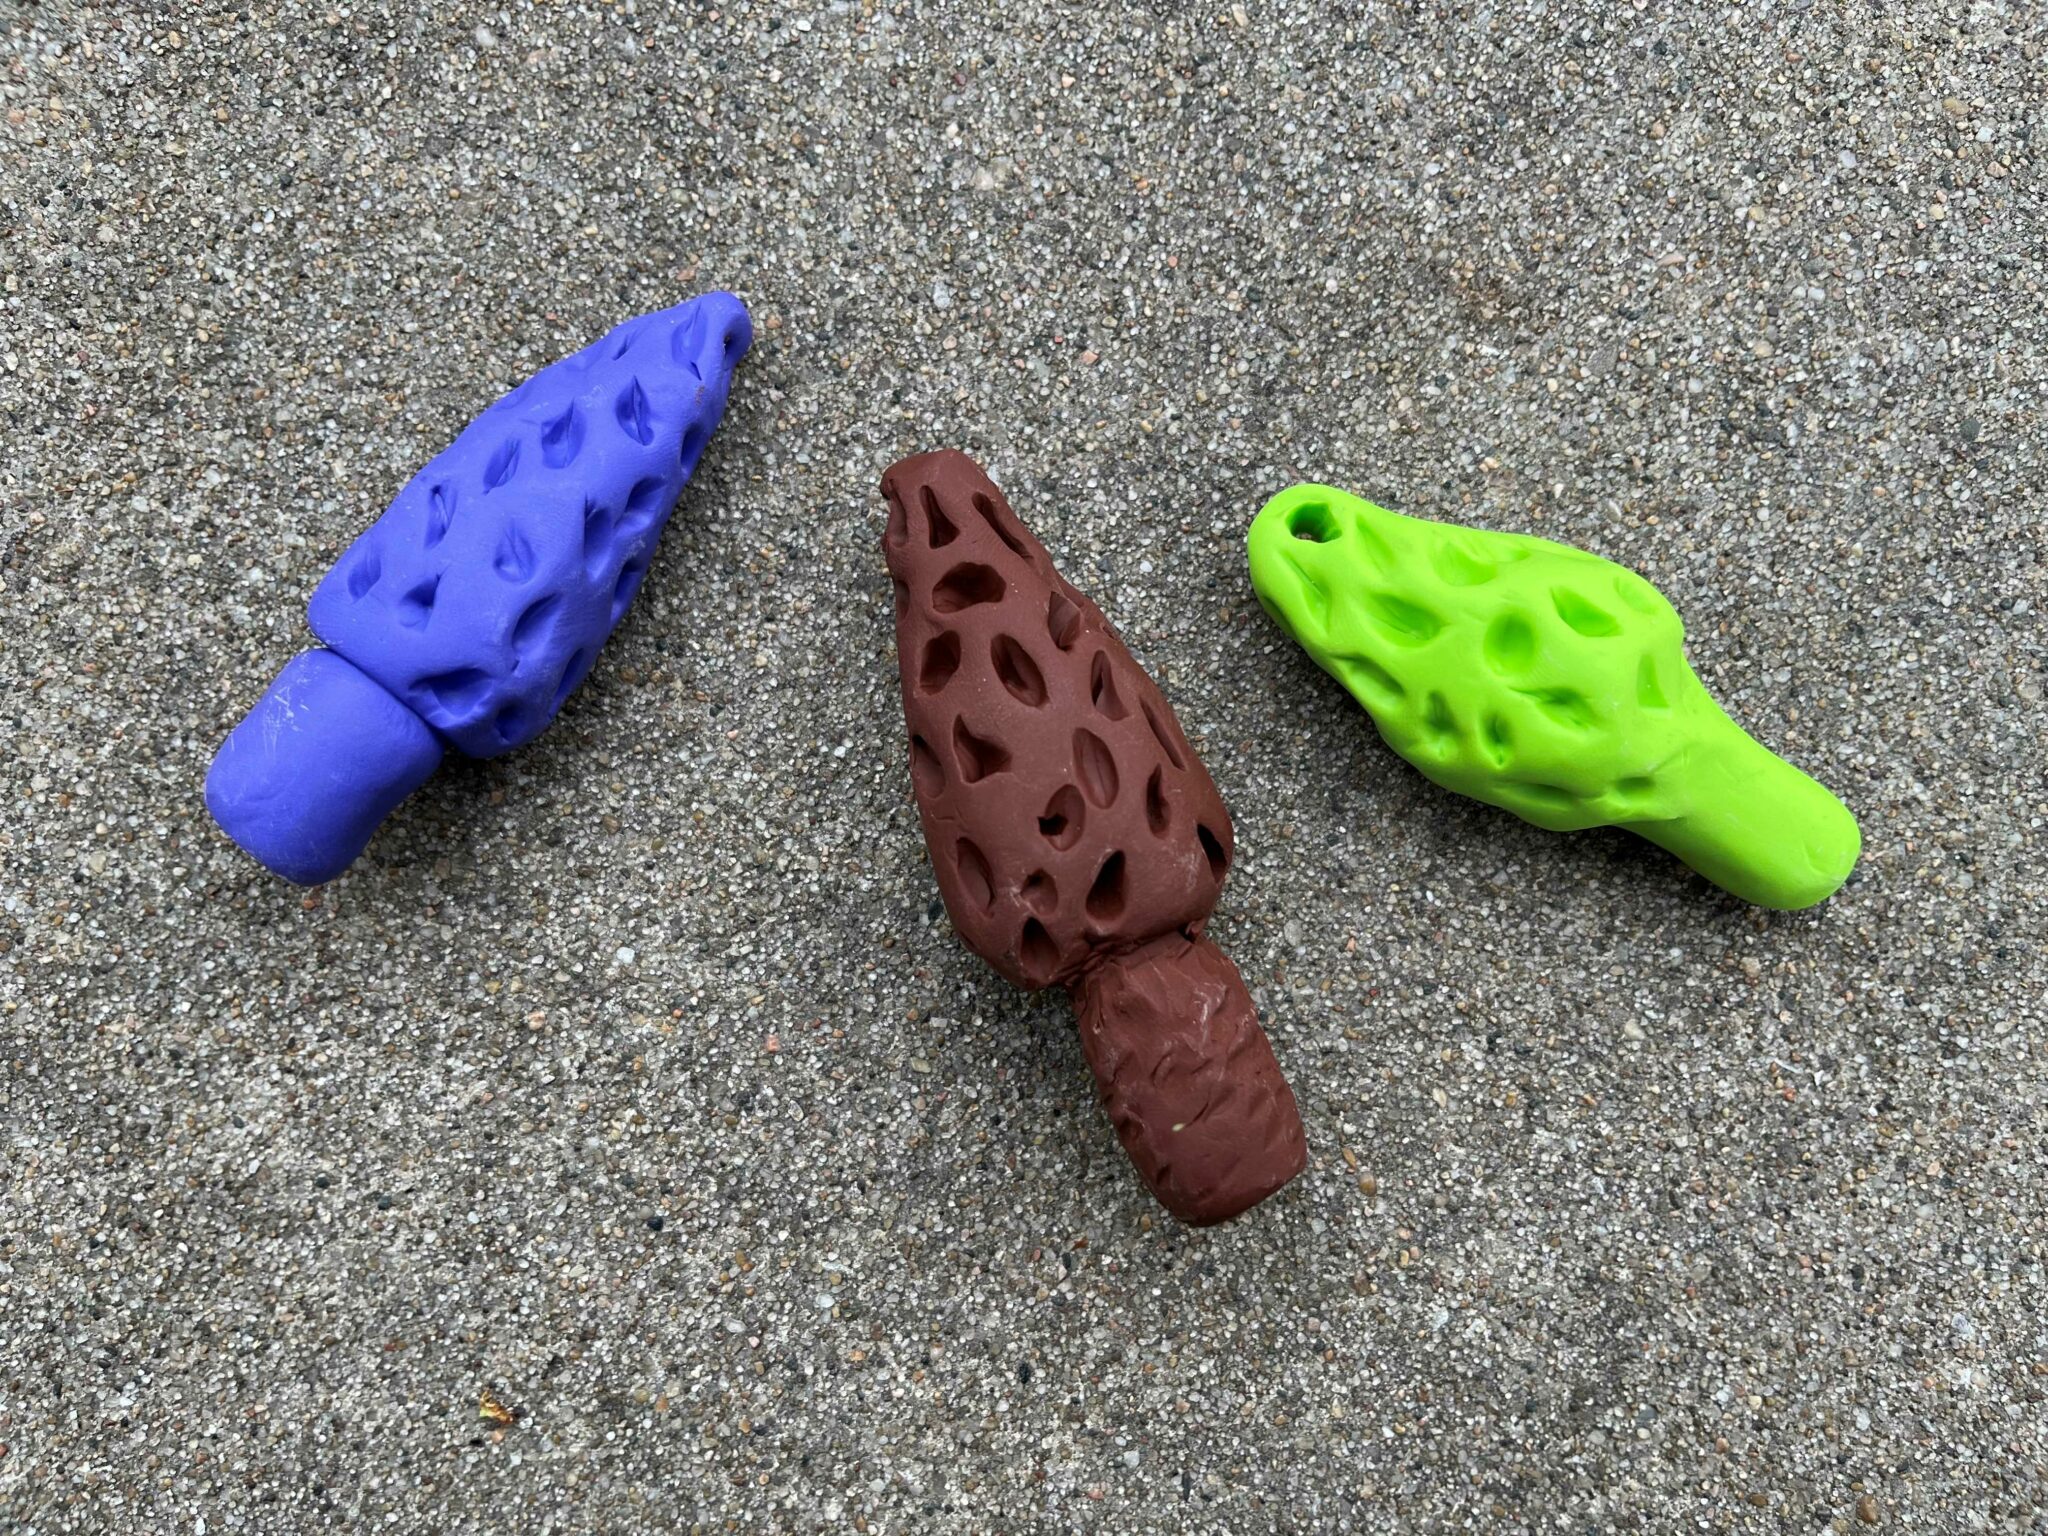
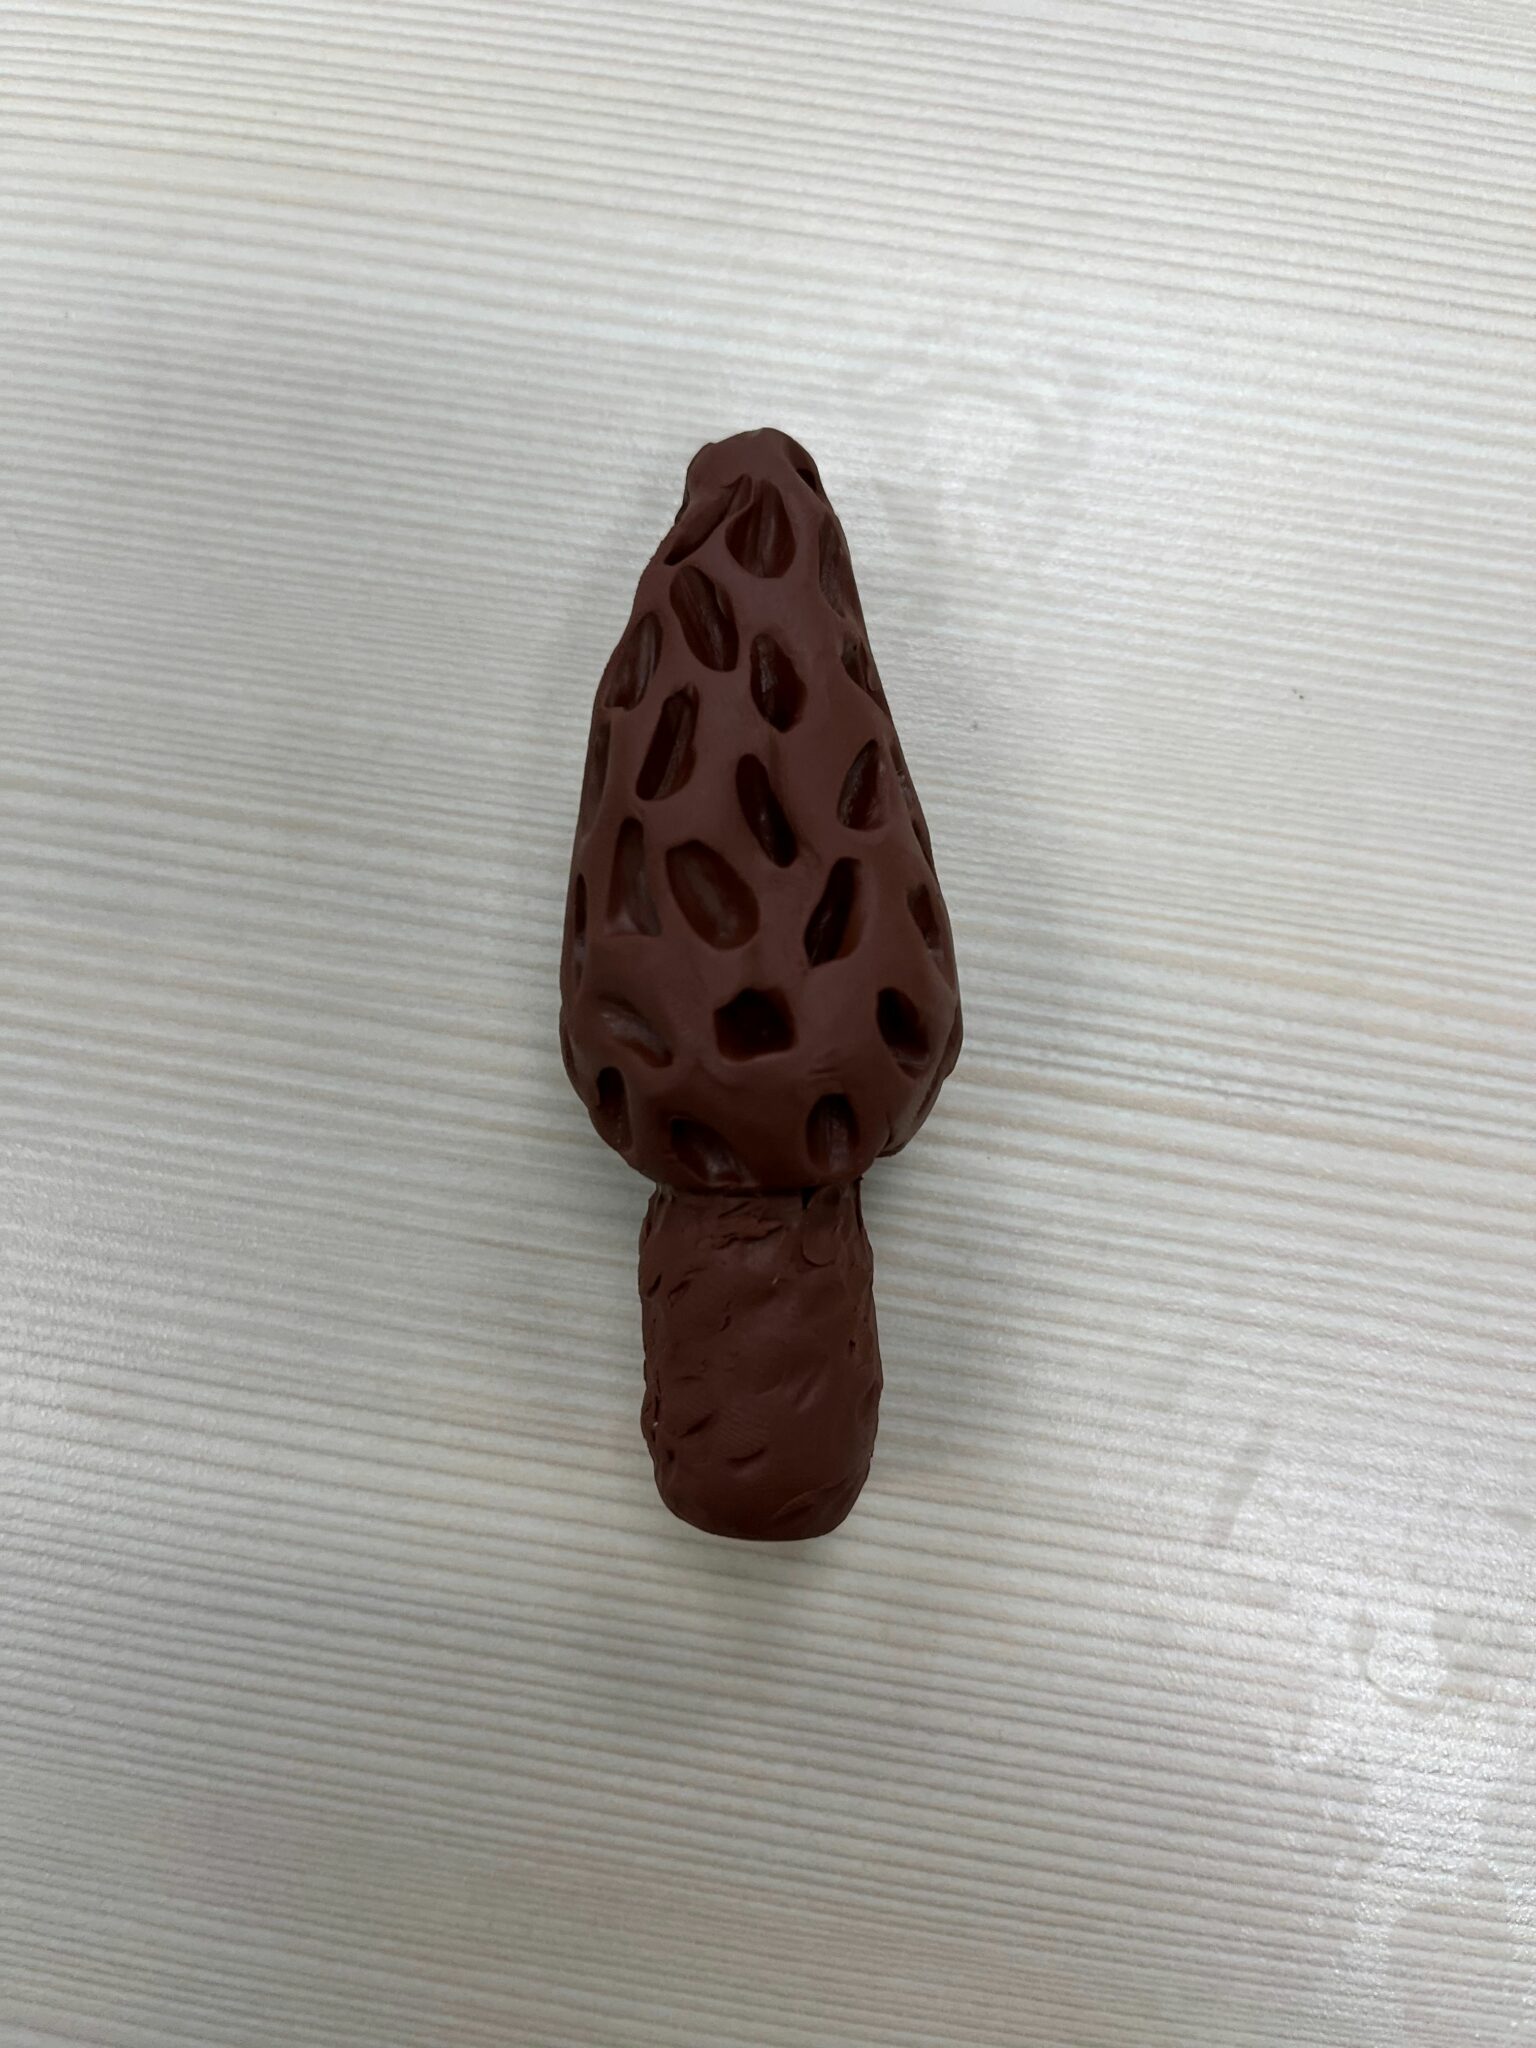
⭐Morel mushrooms grow in a variety of tan/brown hues, and generally have a cap with a wider base and a more narrow top but can also be more squat and rounded. Feel free to make any mushroom shape you wish.
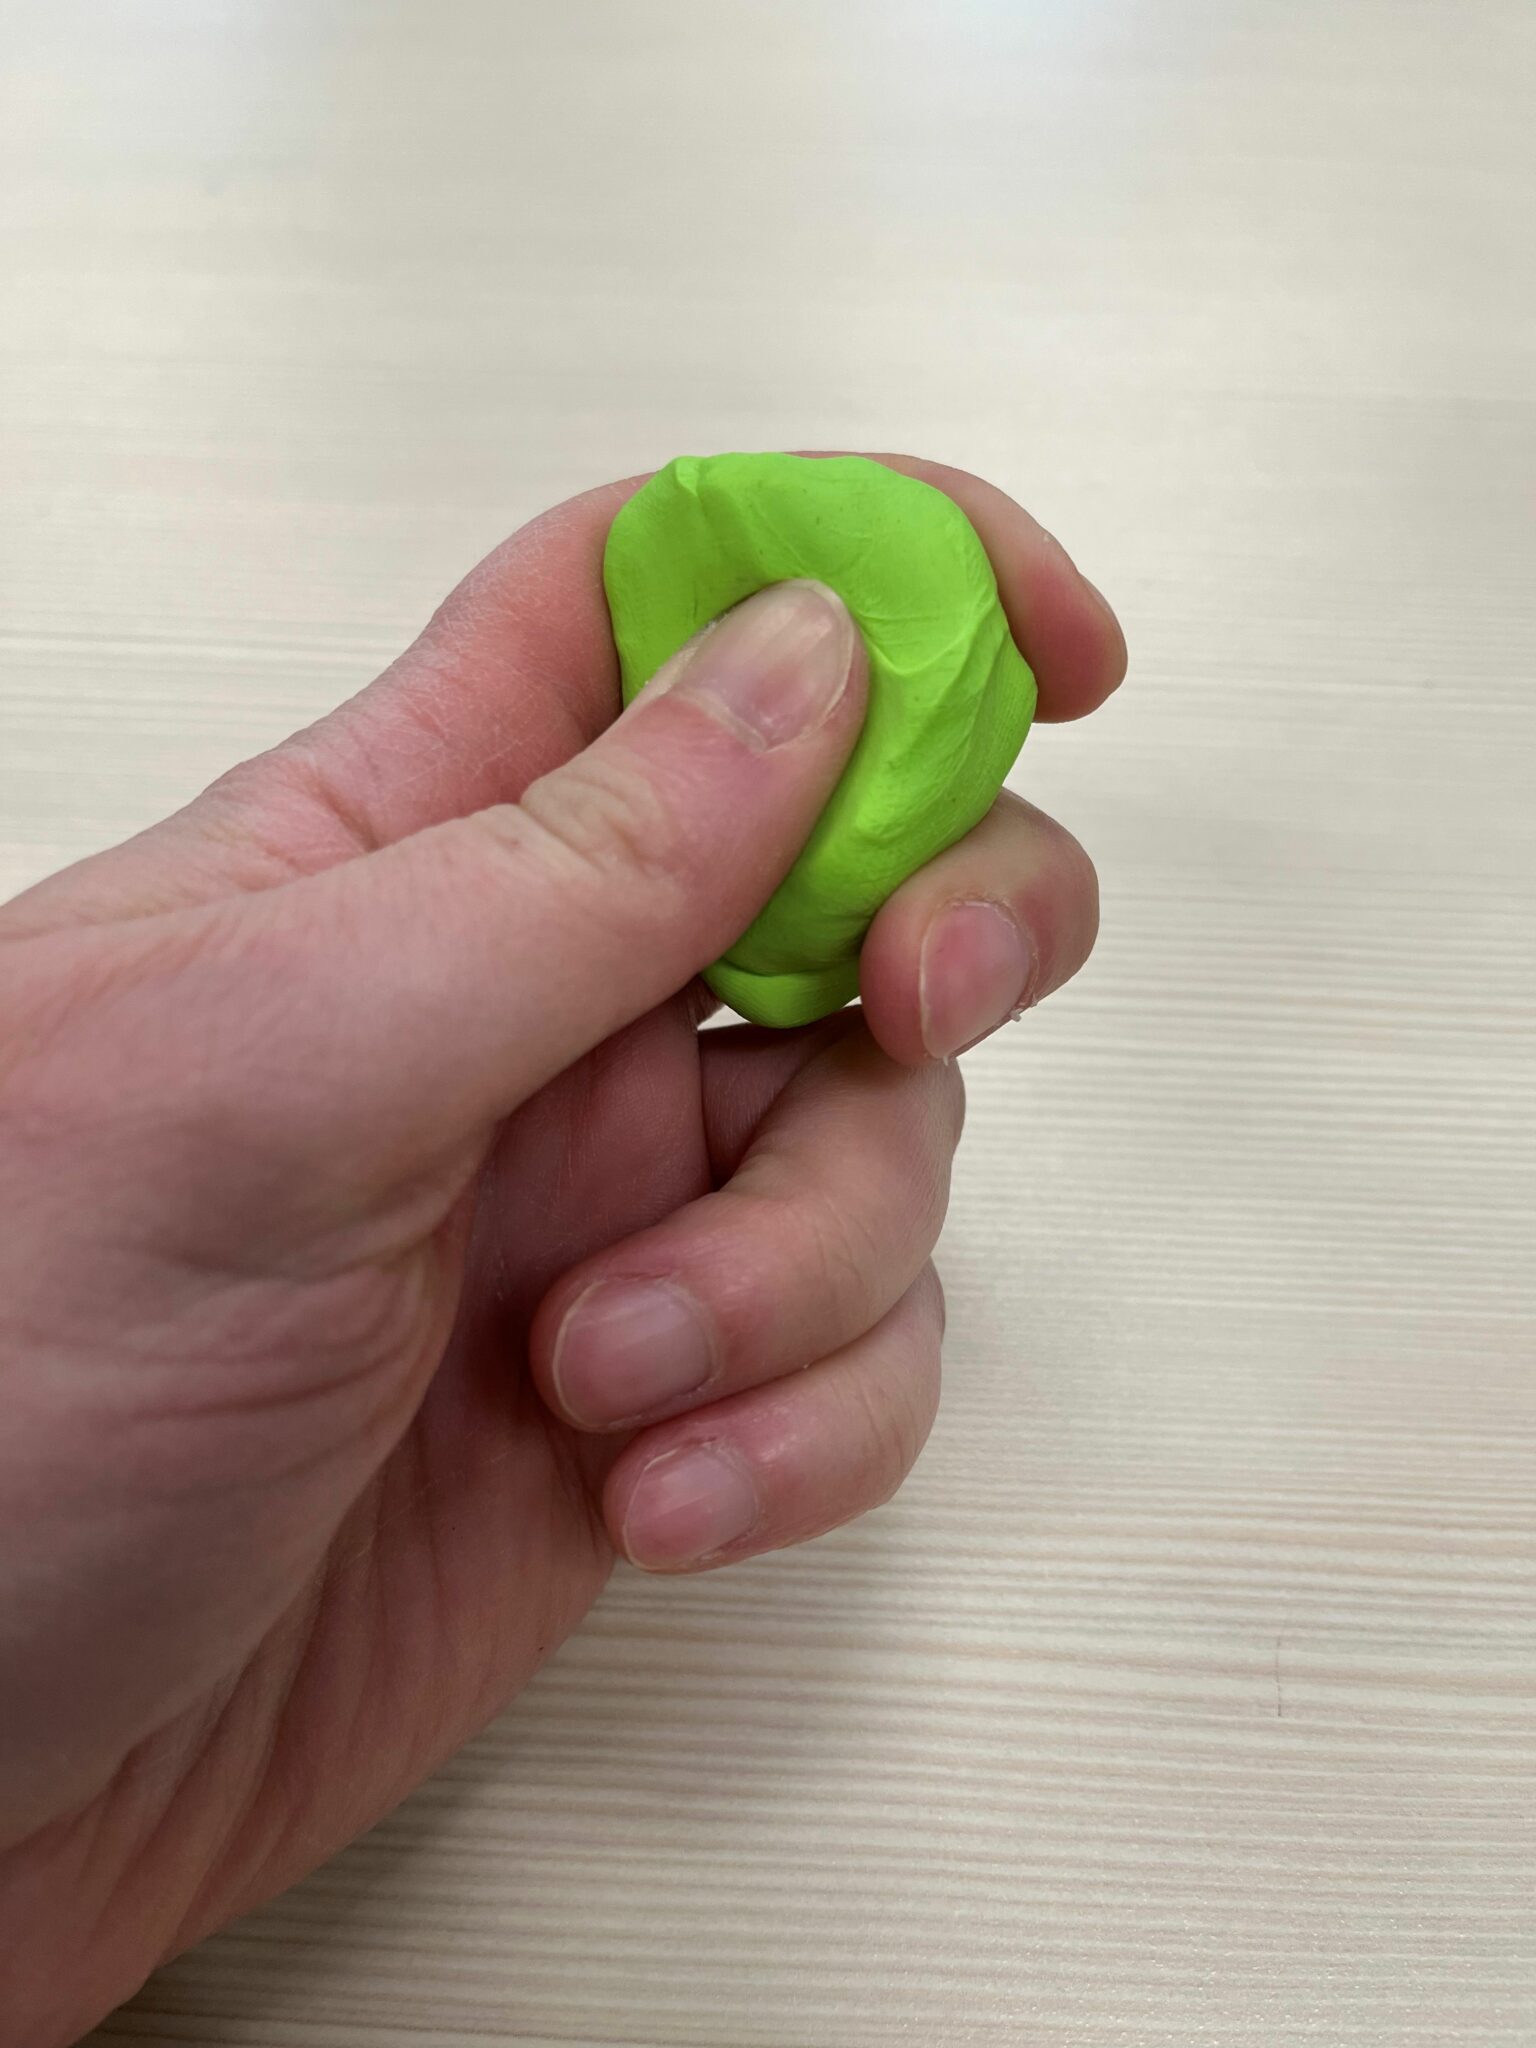
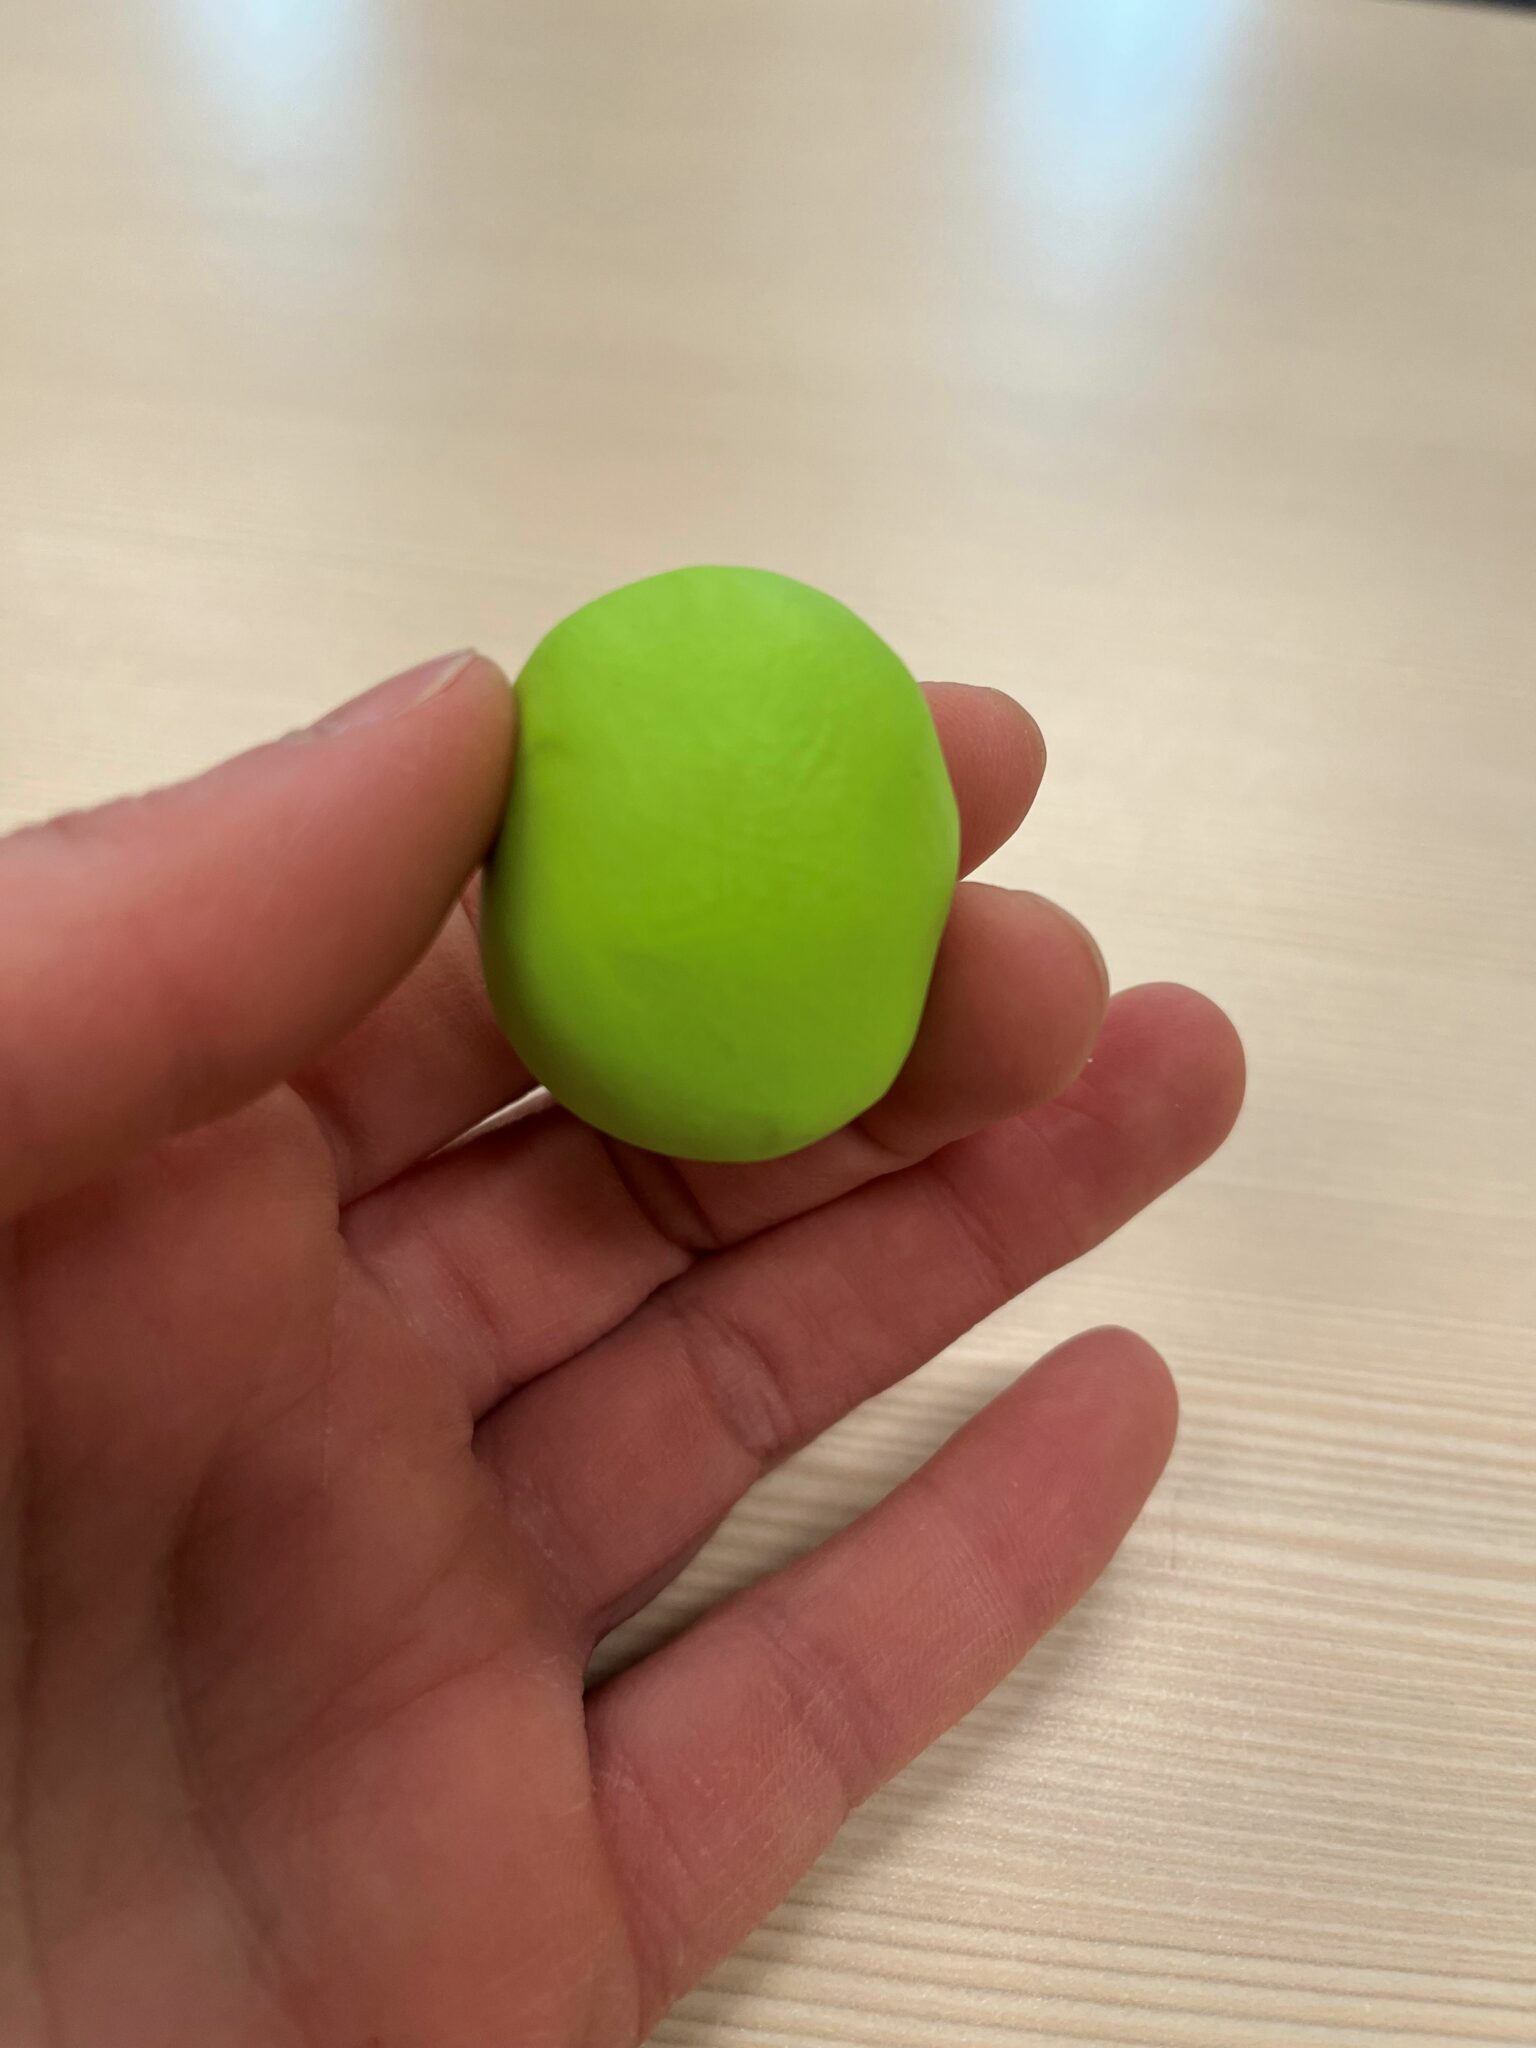
Warm up your clay
Take one rectangular block of clay for your first mushroom and warm it up between your hands to soften it. Try pinching with your fingers and pressing between your palms. Experiment! Depending on the age/moisture level of the clay, this can take a few minutes. Tip: if the clay is too soft, it will be harder to work with (and your imprints will lose their shape more easily).
Method 1
Start with a sphere shape by rolling the clay between your palms.
To begin to form the cap and stem, pinch the middle of the sphere, as if forming a “V” with your fingers. The goal is to make the bottom part narrow. Rotate, and pinch again on the two sides that haven’t been pinched yet.

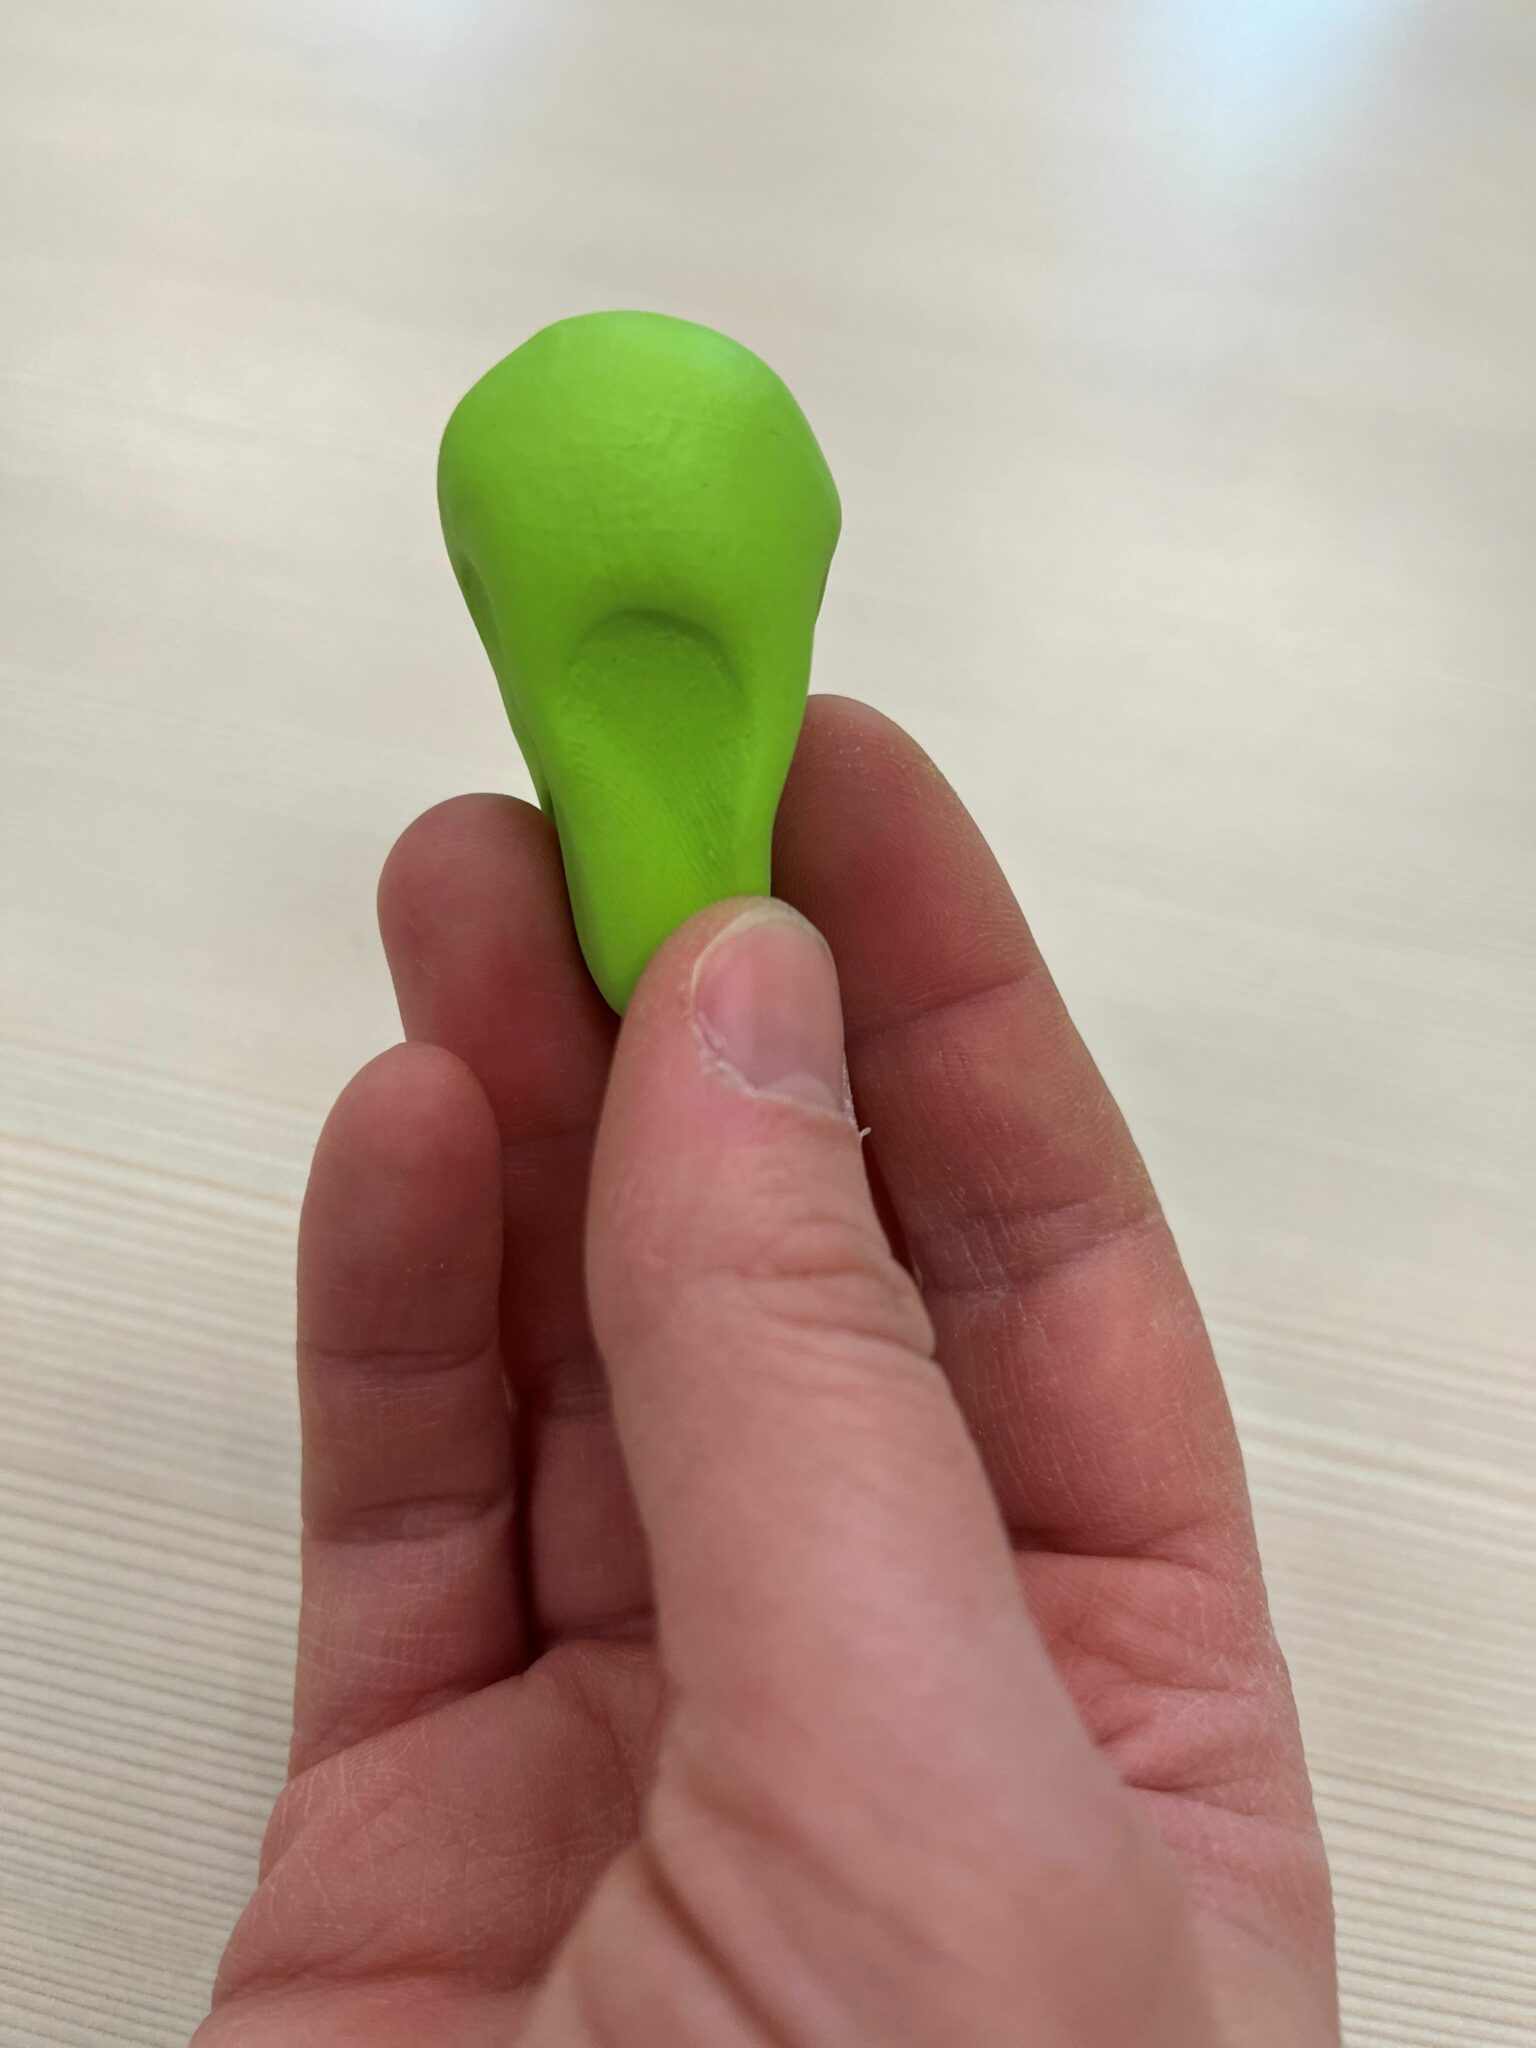
Next, shape the cap to have a narrow top and wider base. (Feel free to make any mushroom shape you wish!)
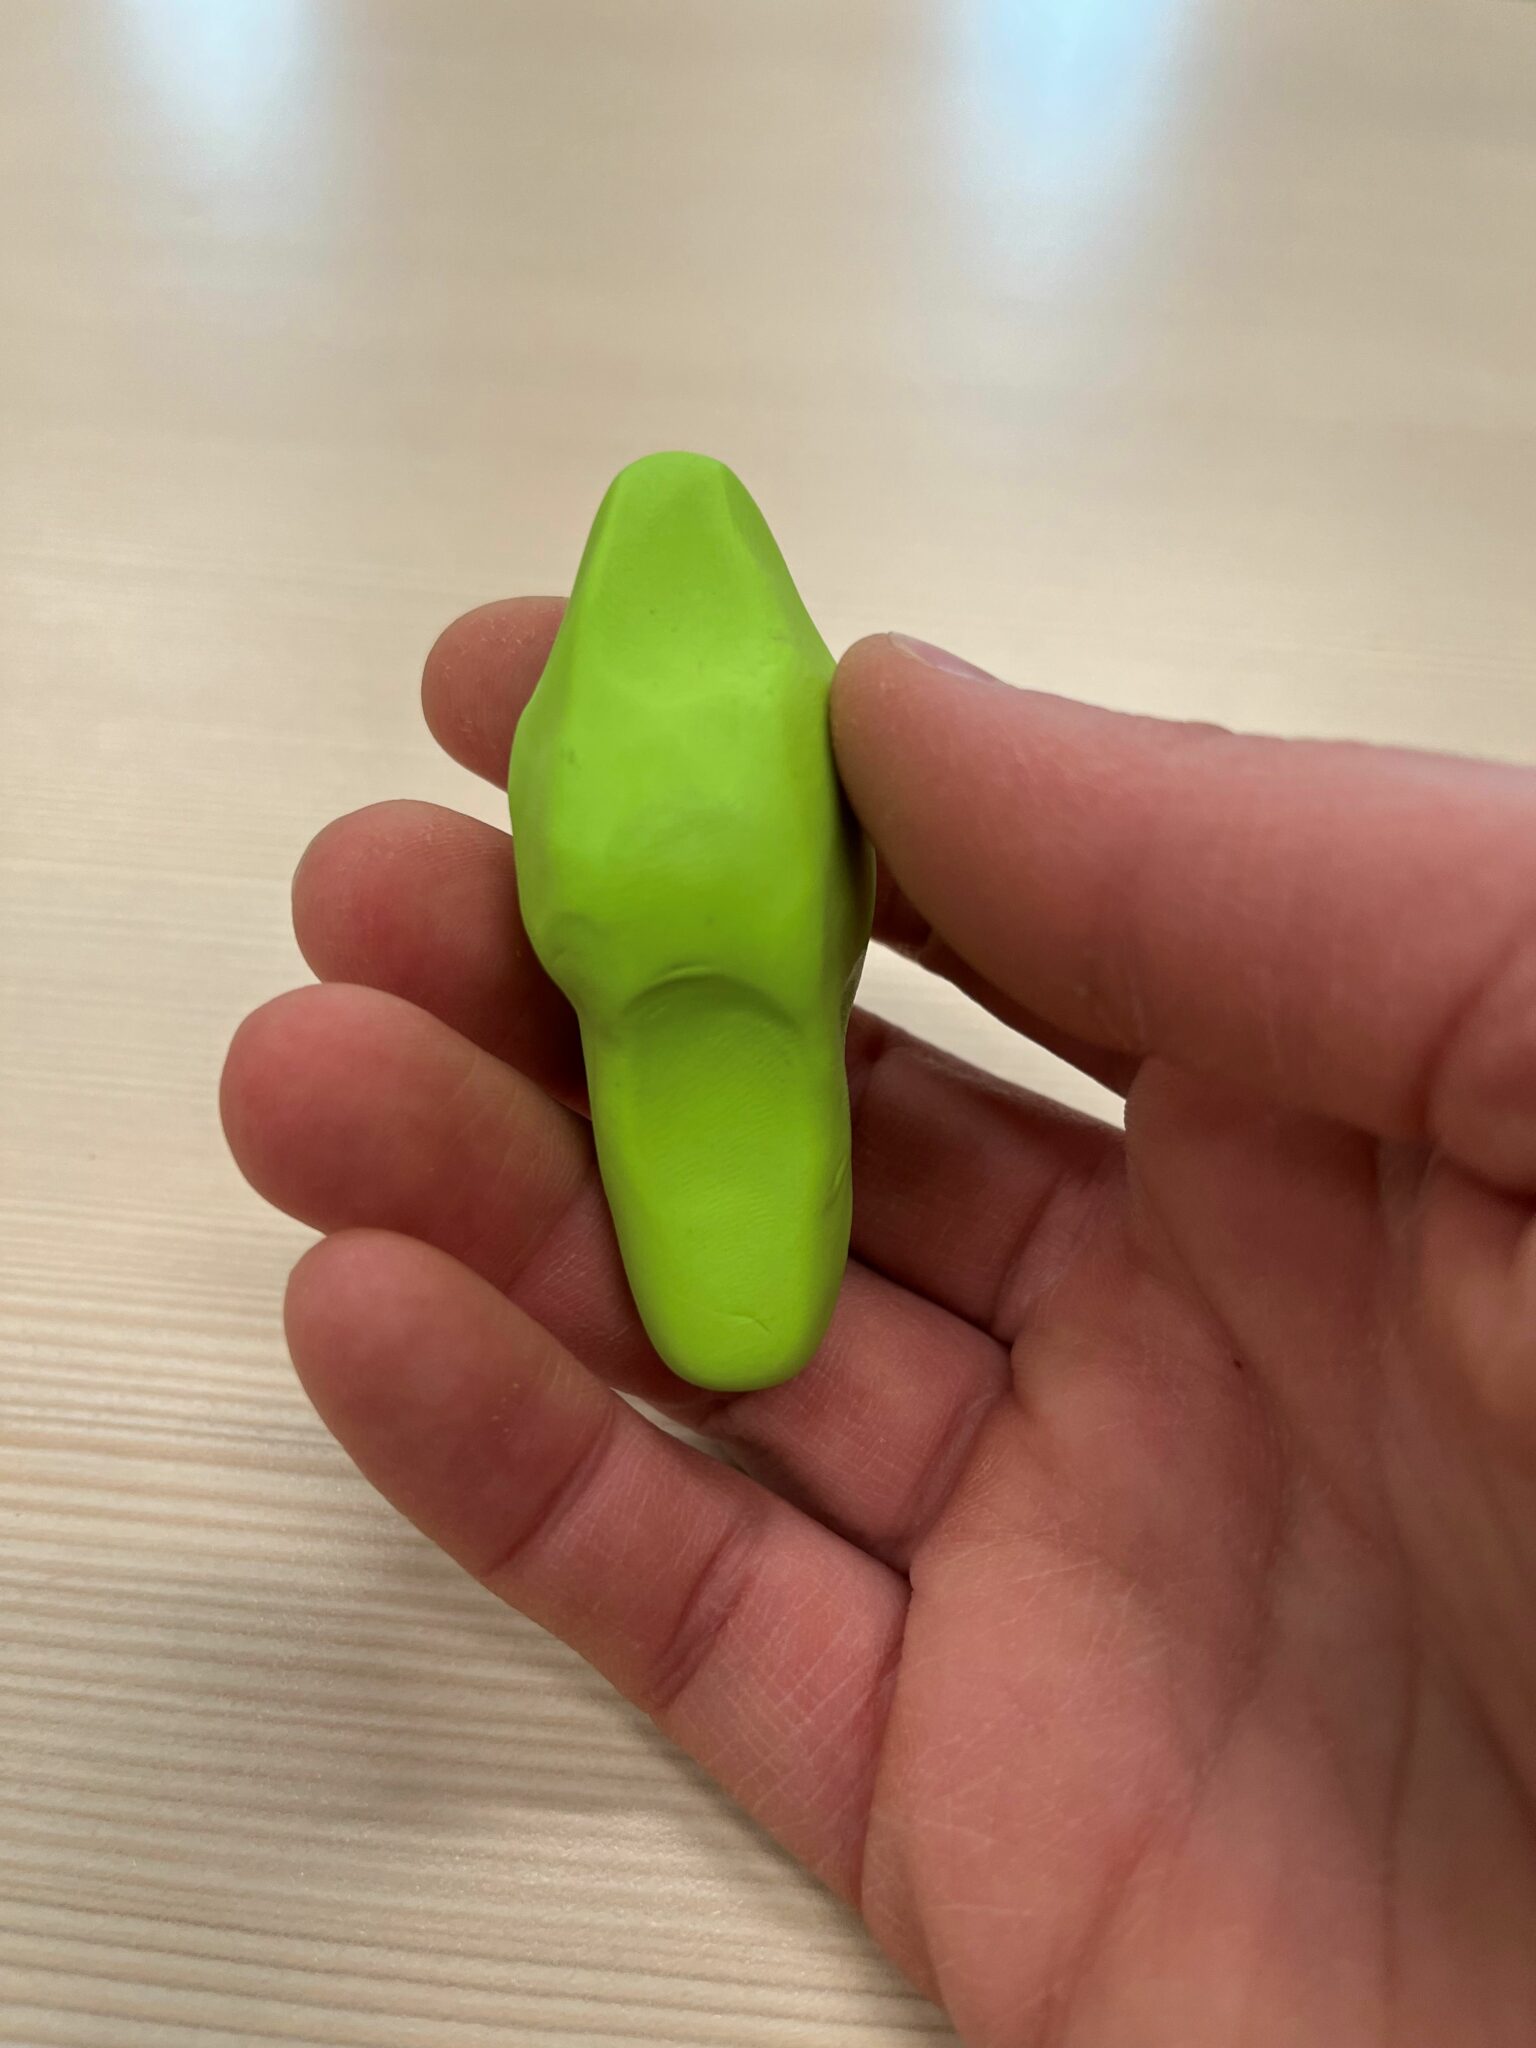
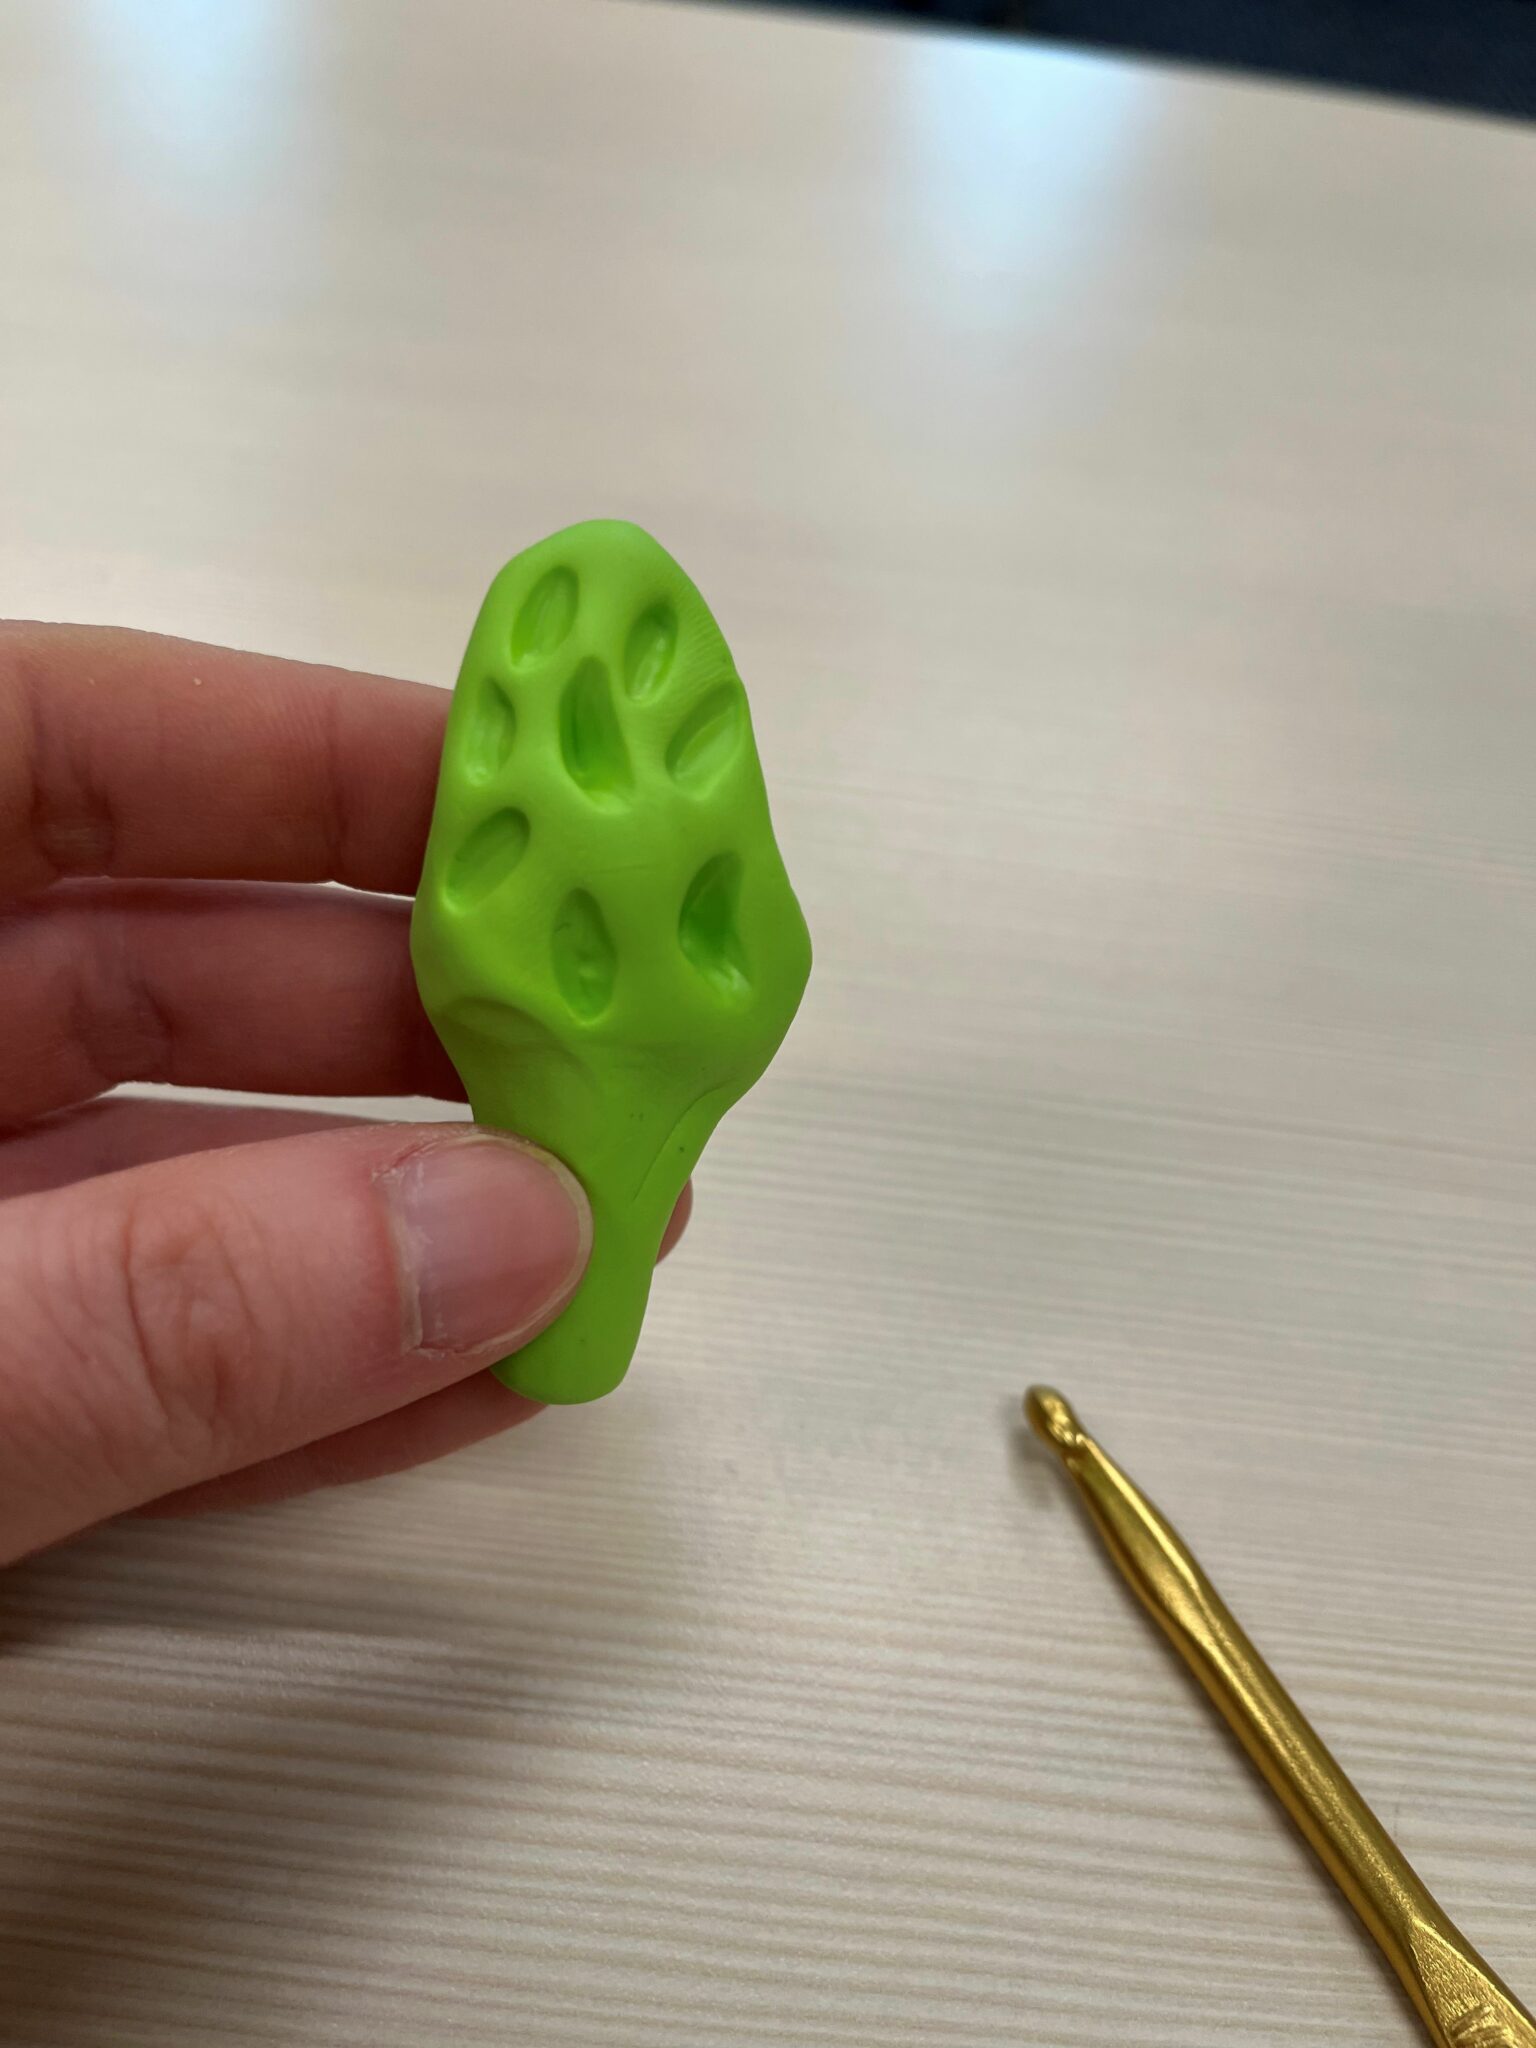
Once you’ve formed the general shape, make imprints (the “pits” of the mushroom) with your tool of choice. Using the round head of the crochet hook worked well for me!
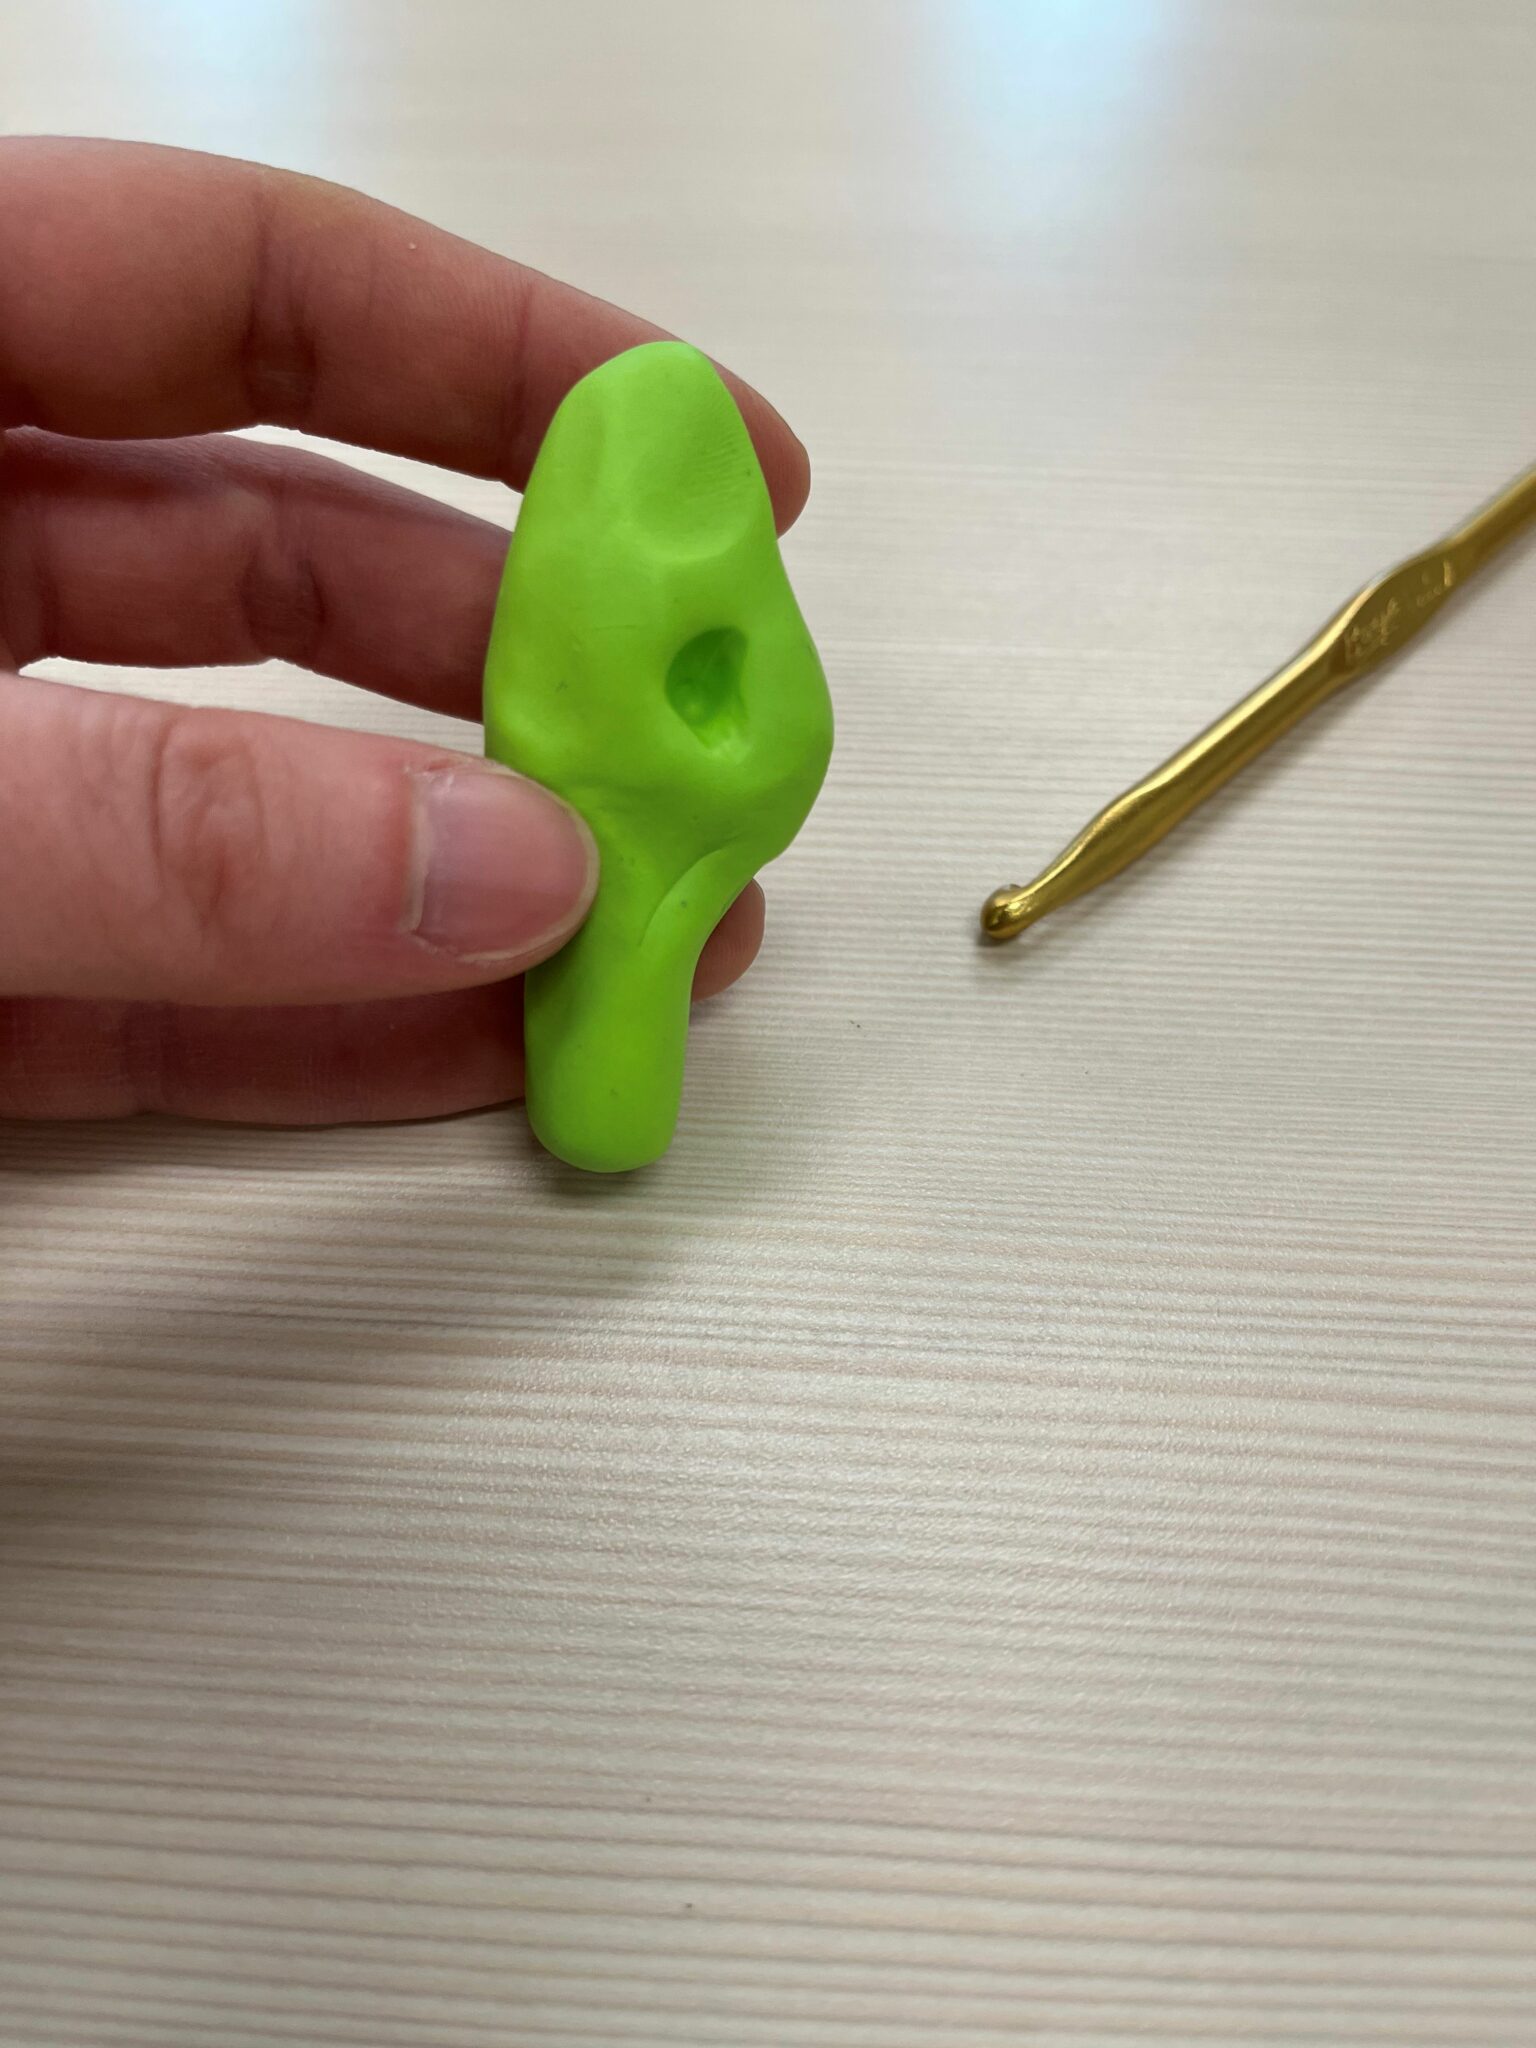
As you’re holding the mushroom in your hands or laying gently on the table, rotate as you press in imprints. Some of the imprints or “pits” will most likely close a bit. You can leave them or press into the space again.
Method 2
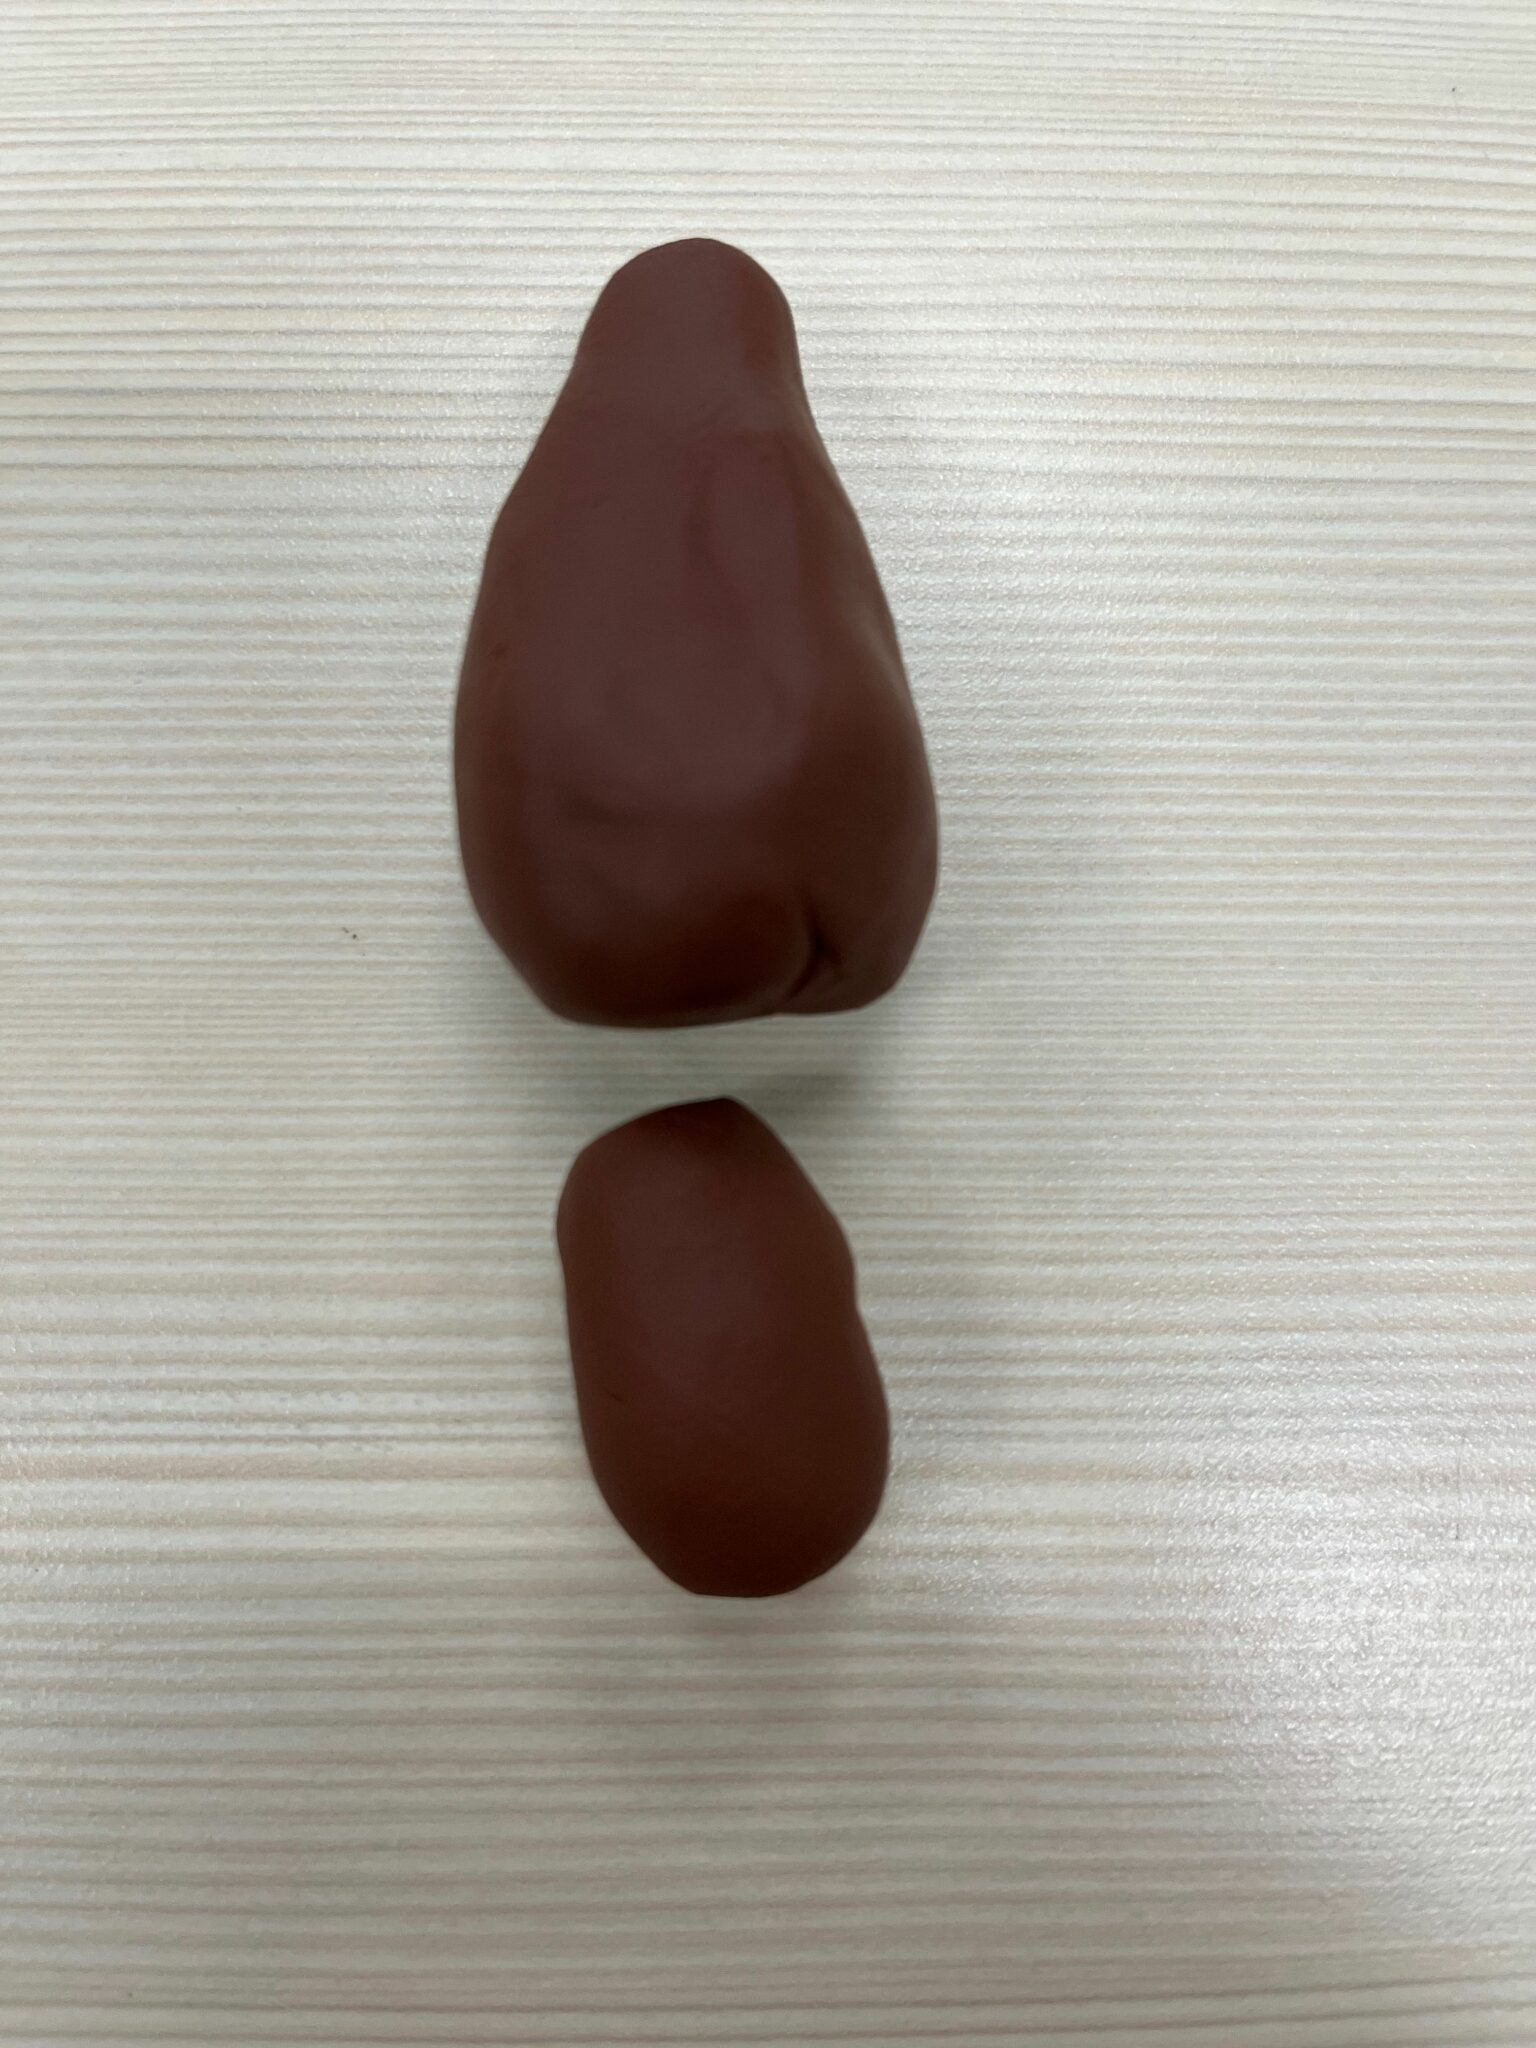
Taking a block of clay, break off 1/4 to form the mushroom stem and 3/4 for the cap. Shape spheres between your palms for both segments. Then, mold by rolling on the table or between your palms to lengthen the shapes. Experiment using your fingers to shape the cap. You can also try tapping the base of the cap on the table to widen and flatten.
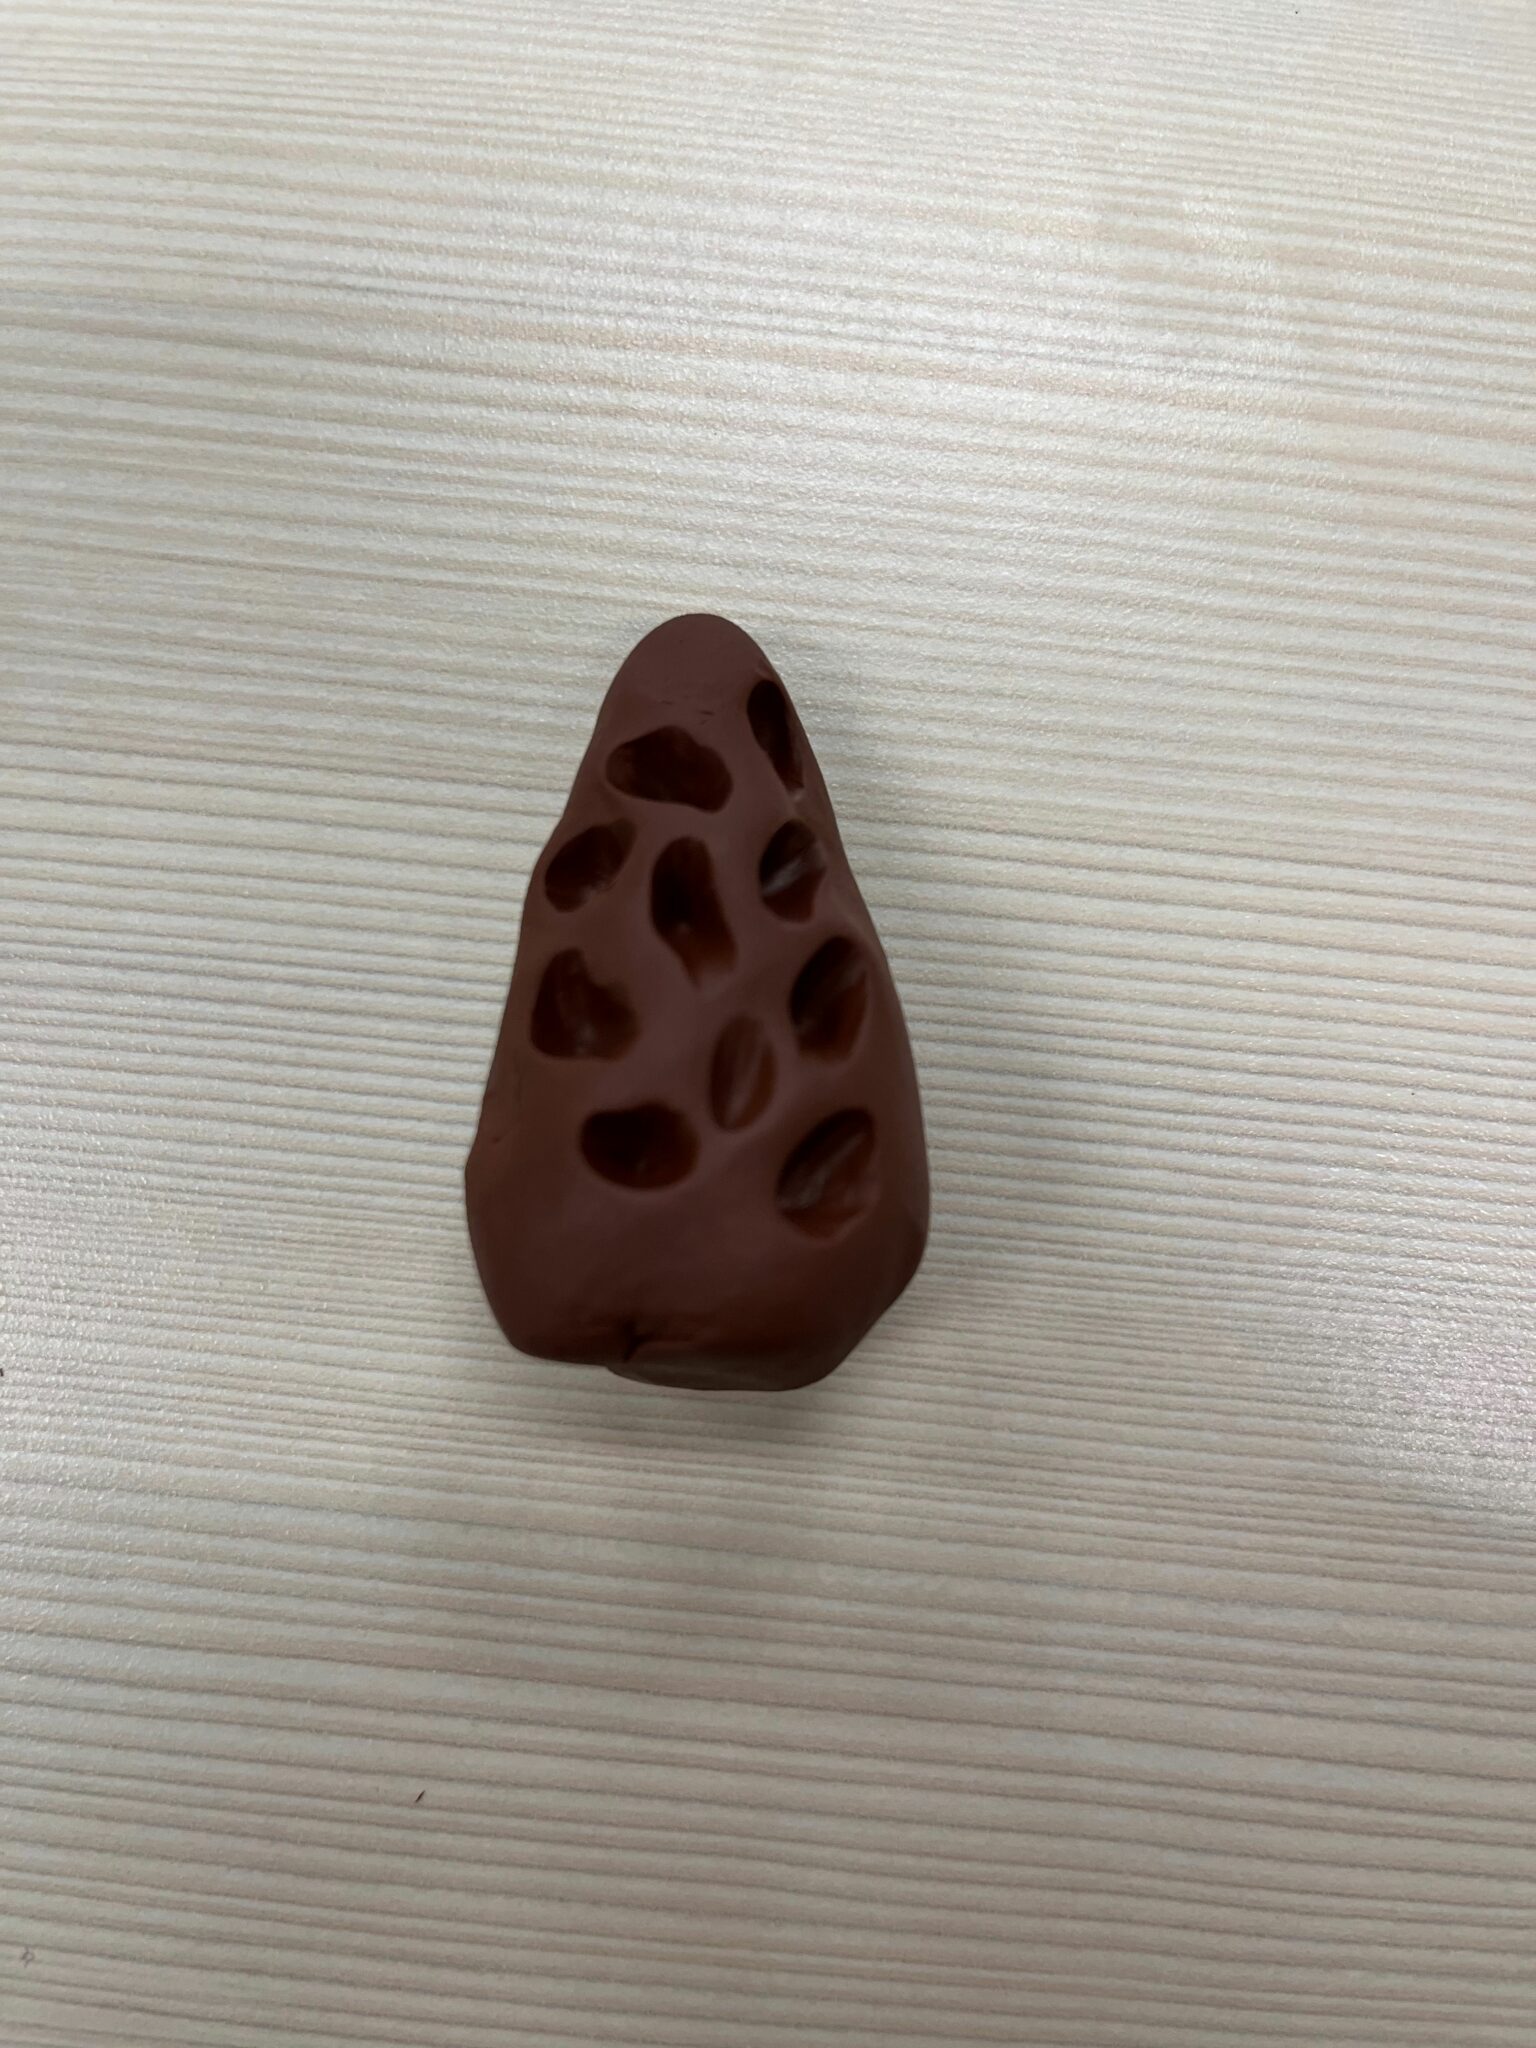
Make imprints (the “pits” of the mushroom) with your tool of choice. Using the round head of the crochet hook worked well for me! As you rotate the cap on the table—or in your palm—the pits may close a bit. You can leave them or press into the space again.
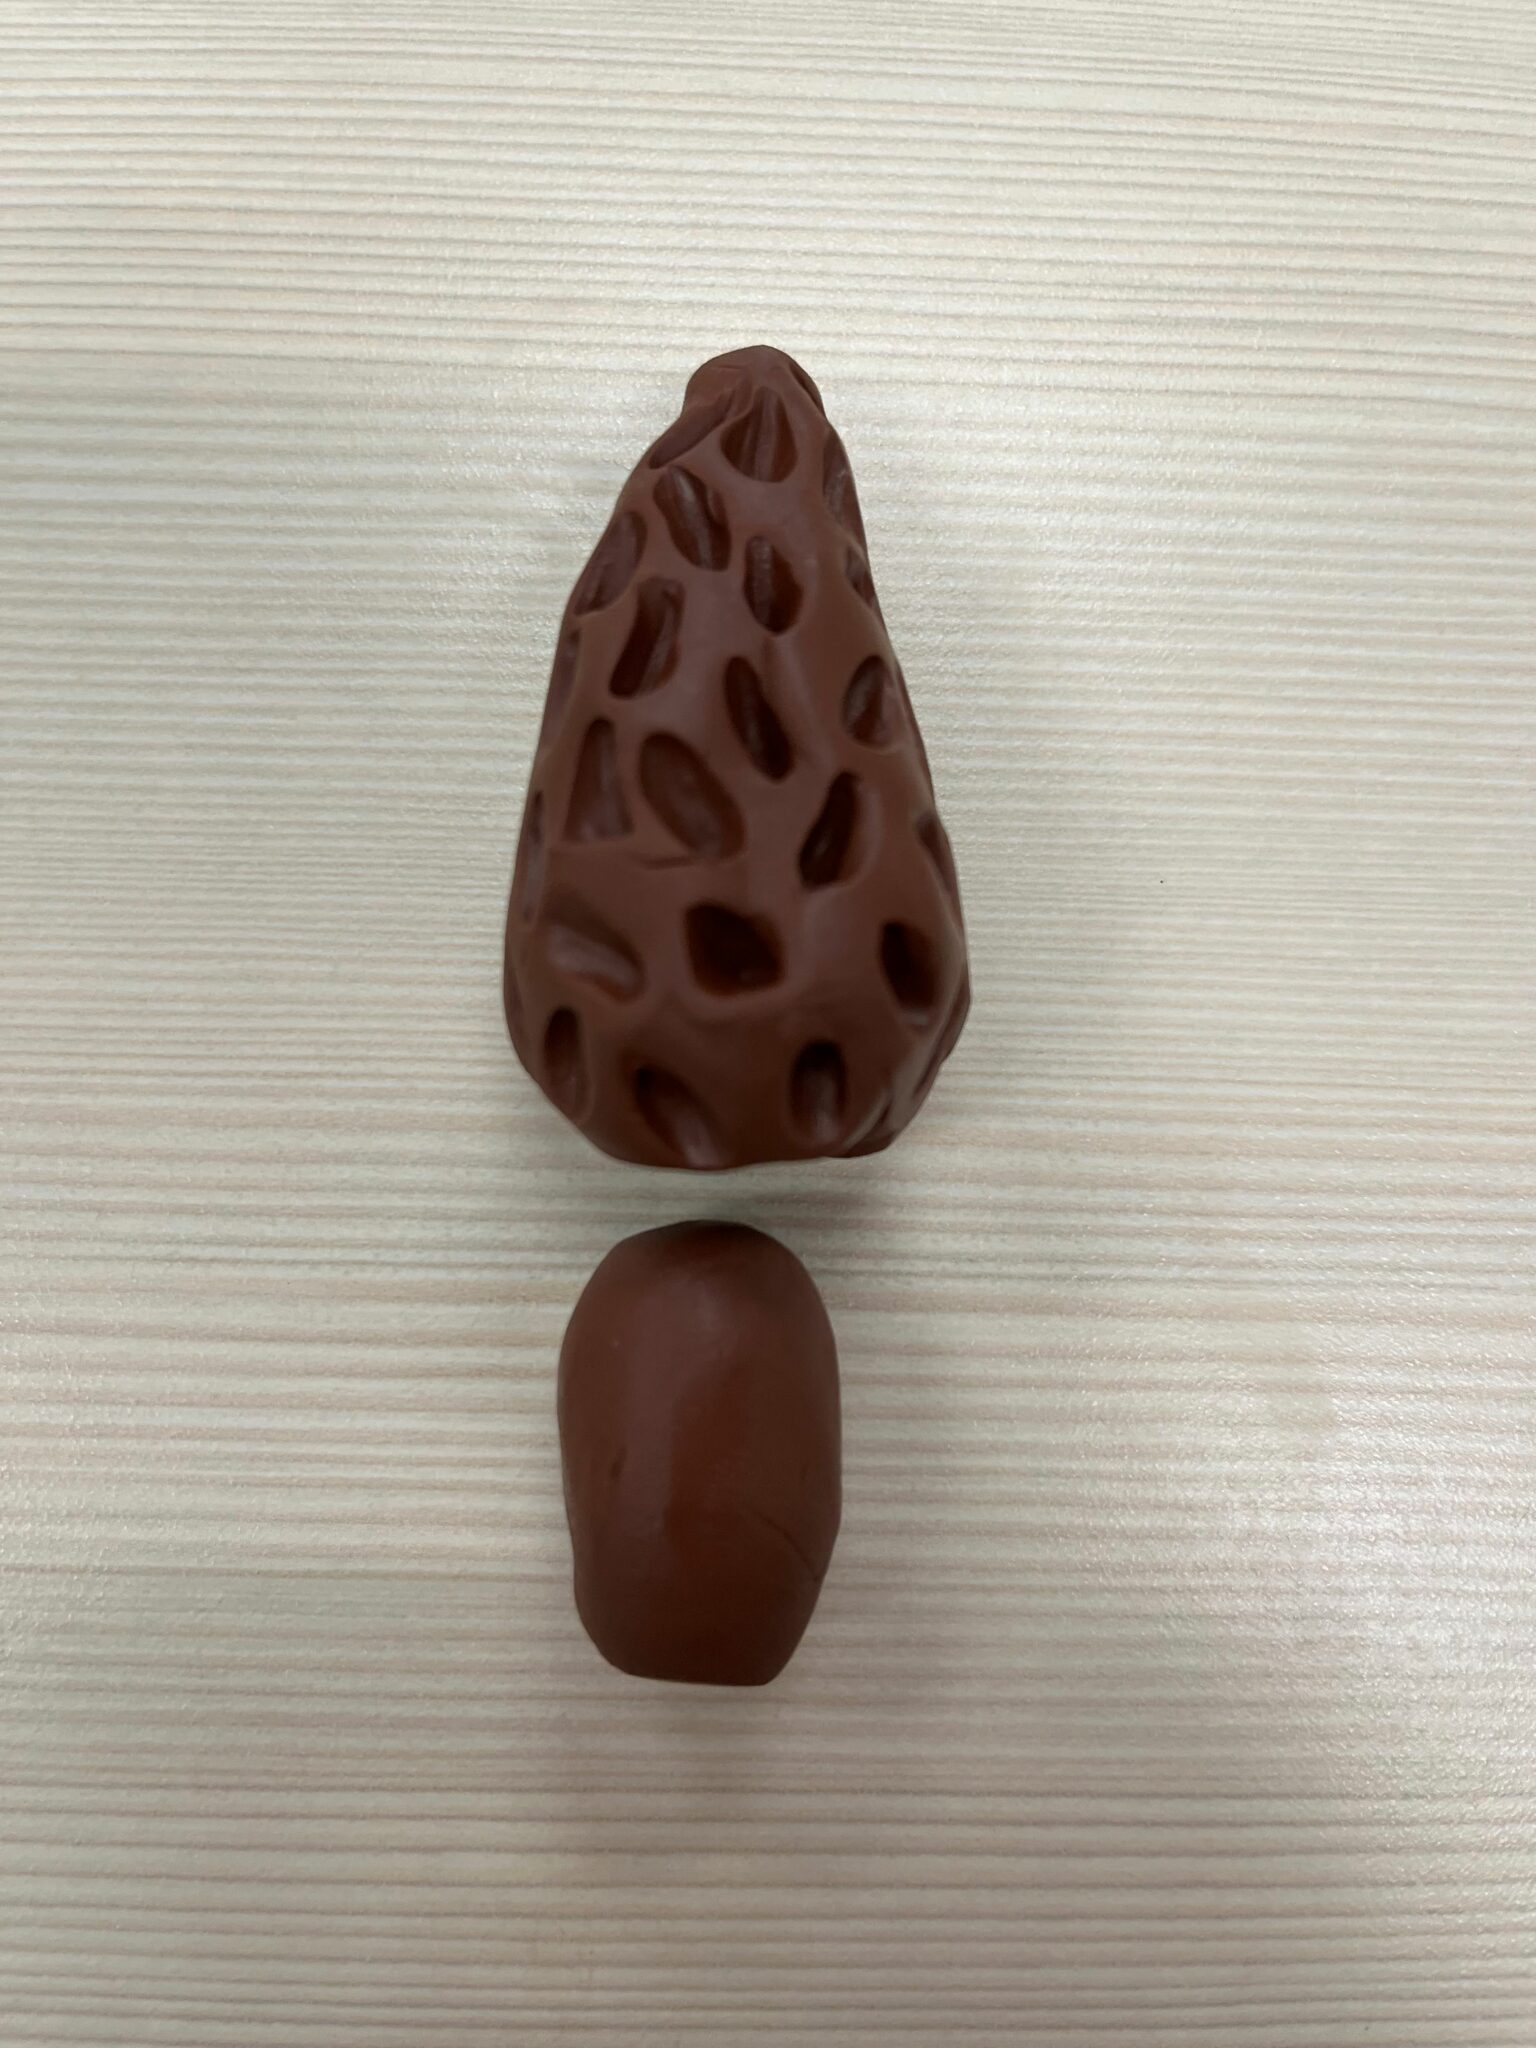
Finally, attach the cap and stem by gently pressing the parts together. No need to “score and slip” as you would with earthenware and other types of clay. Just for fun, I experimented with adding texture to the stem by softly scraping the surface with the edge of a popsicle stick.
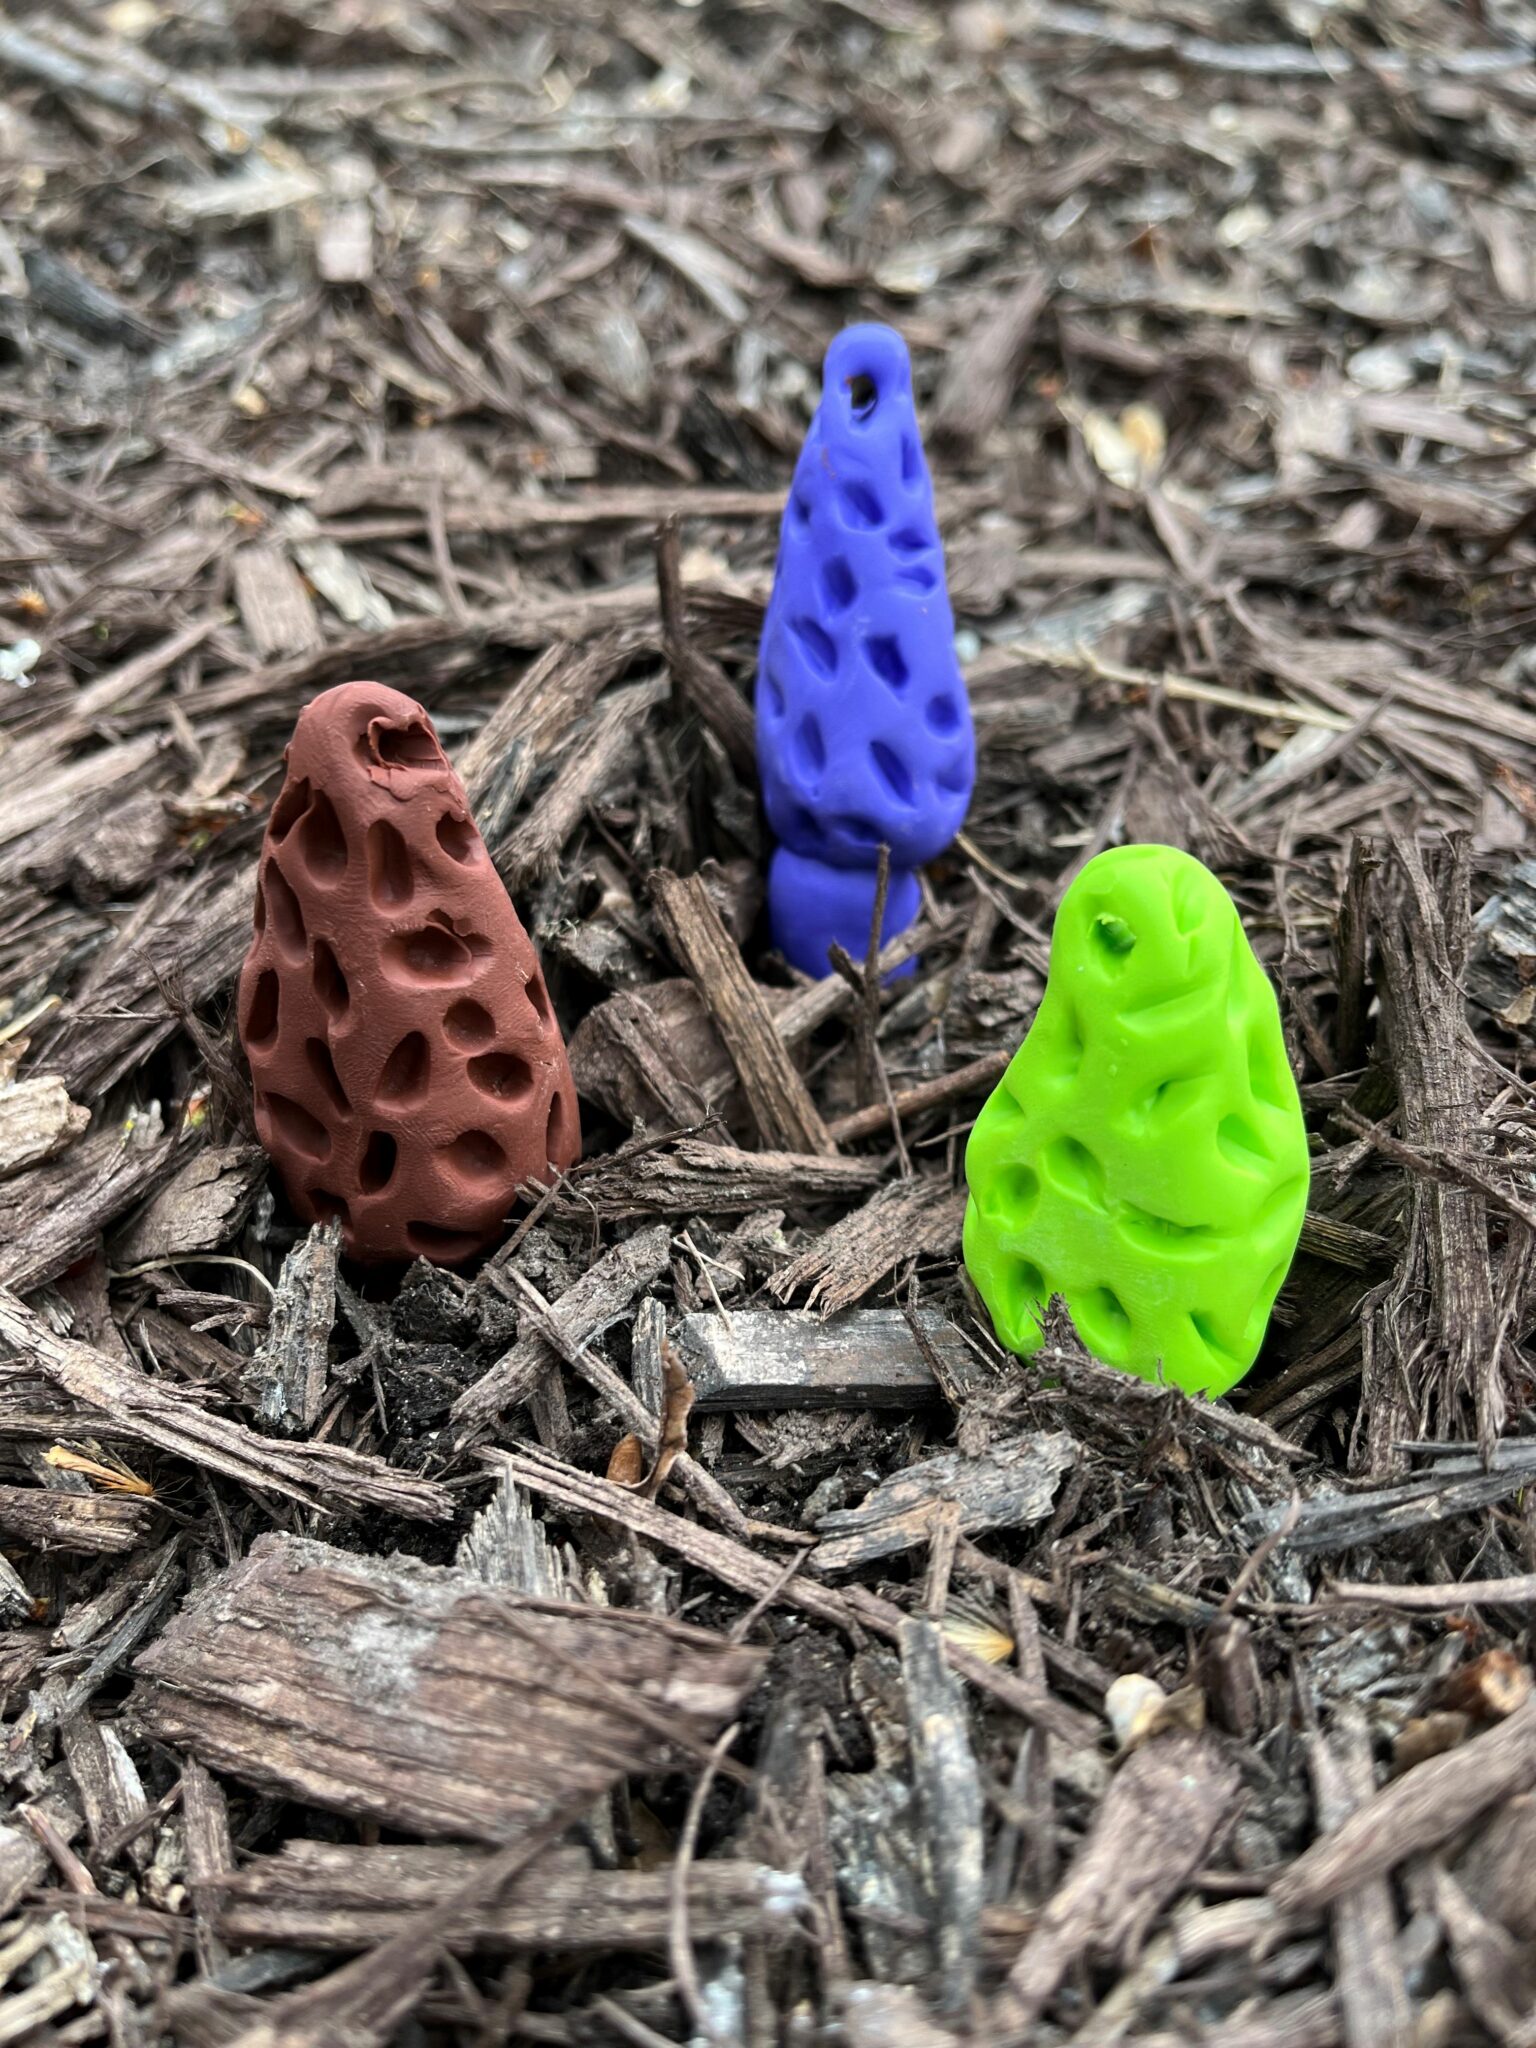
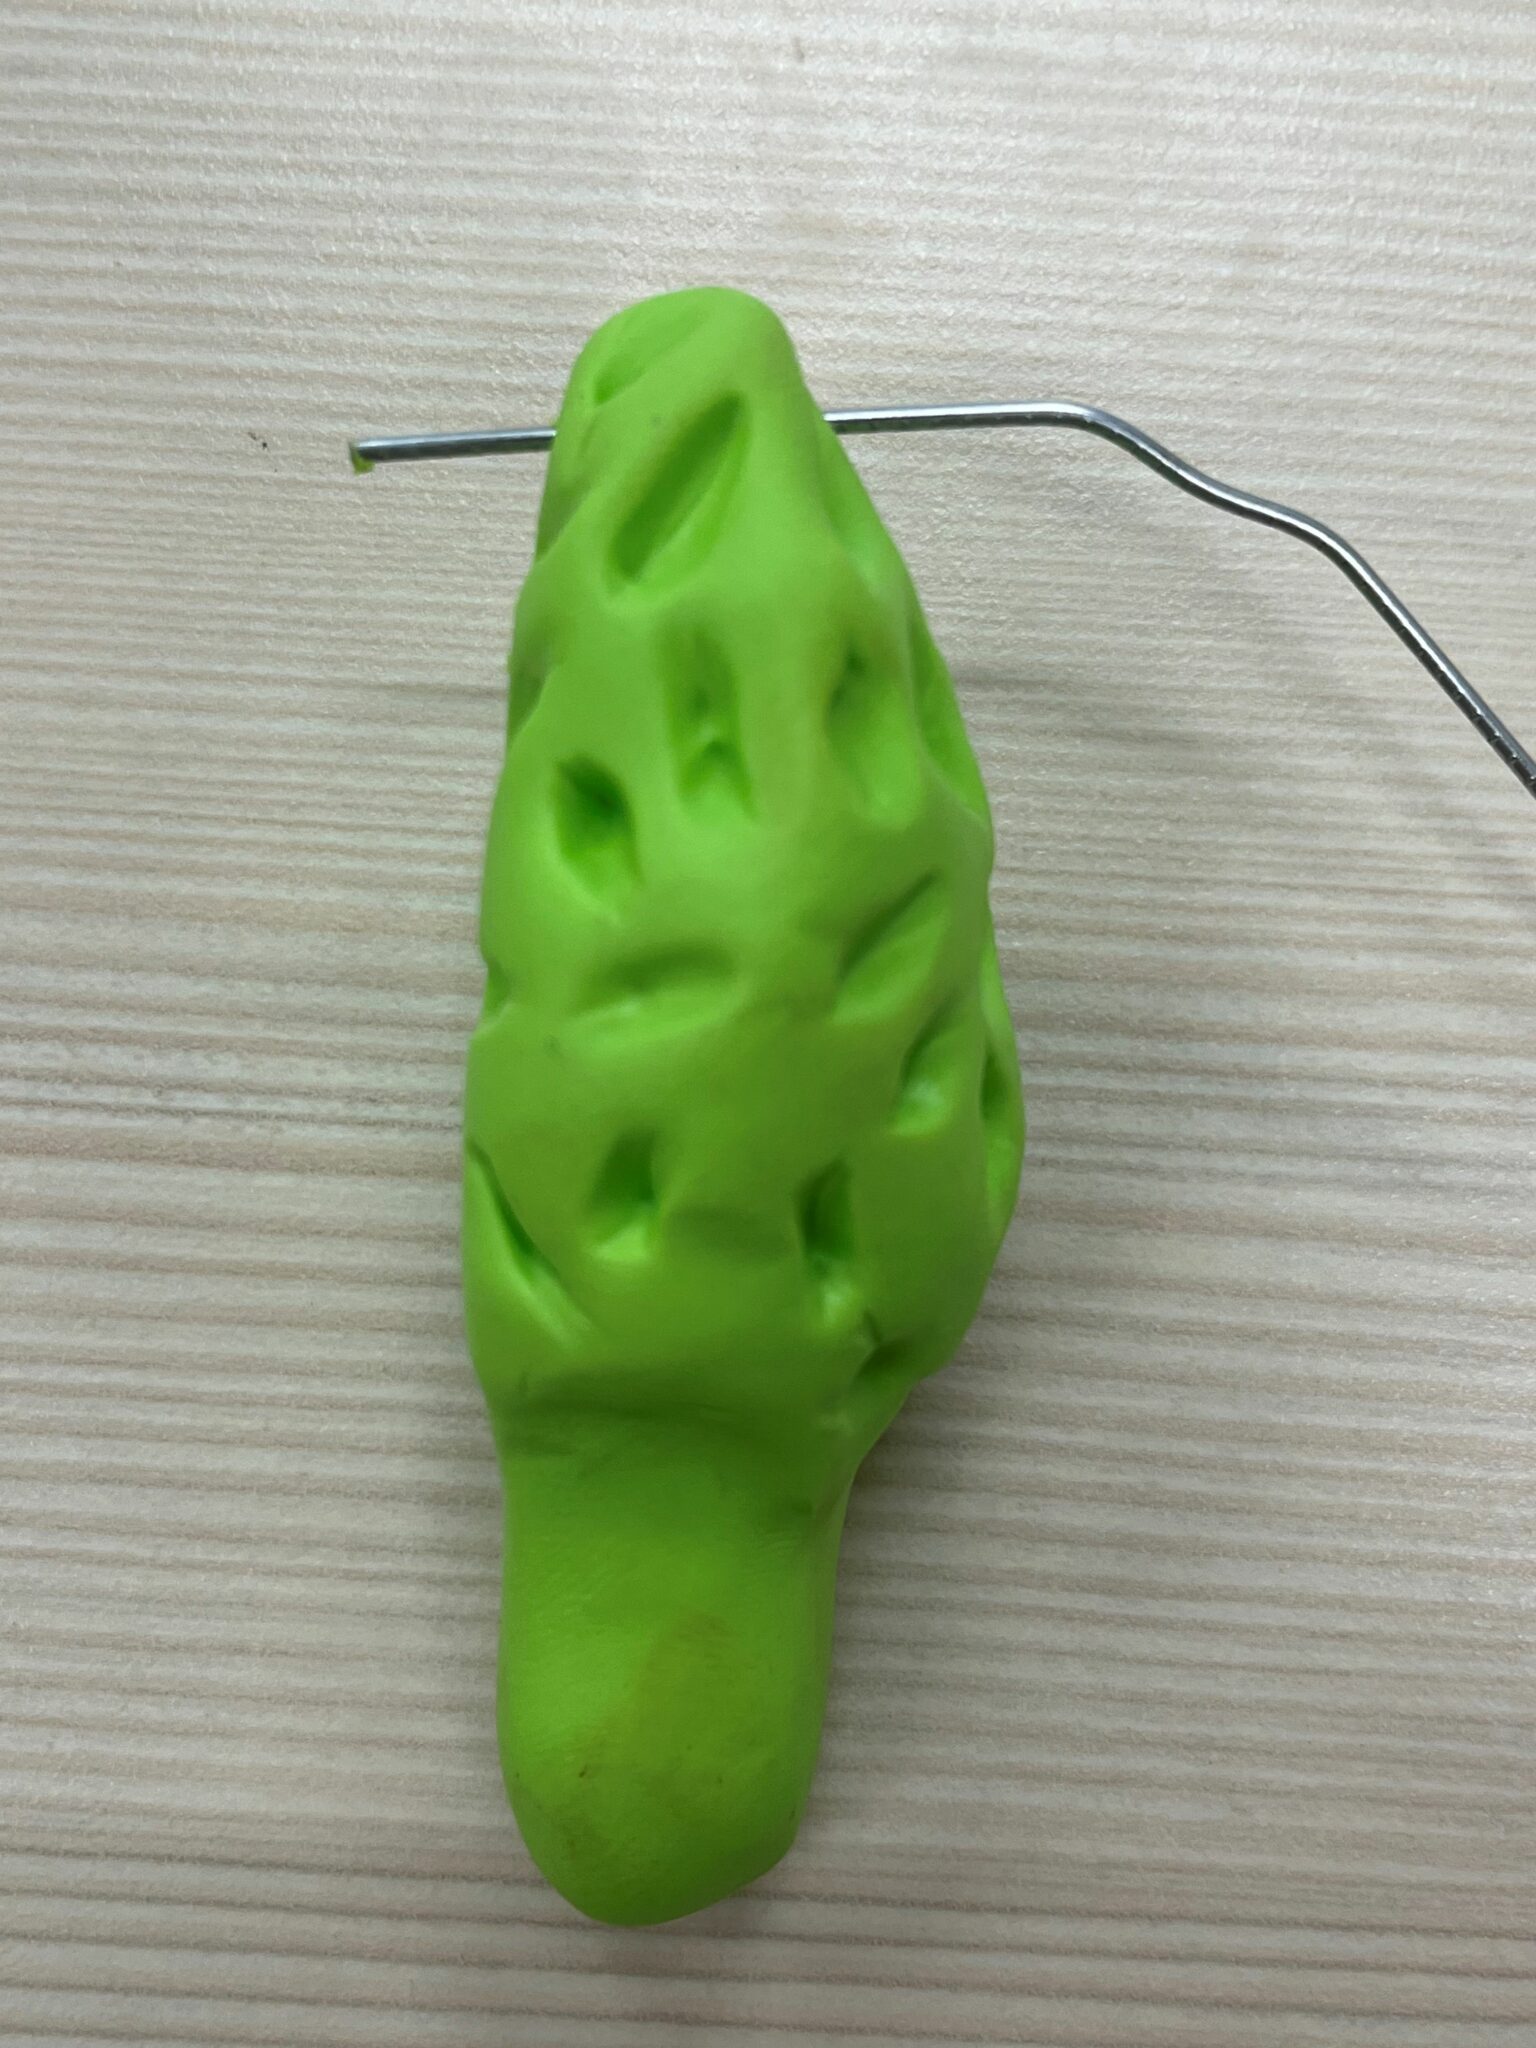
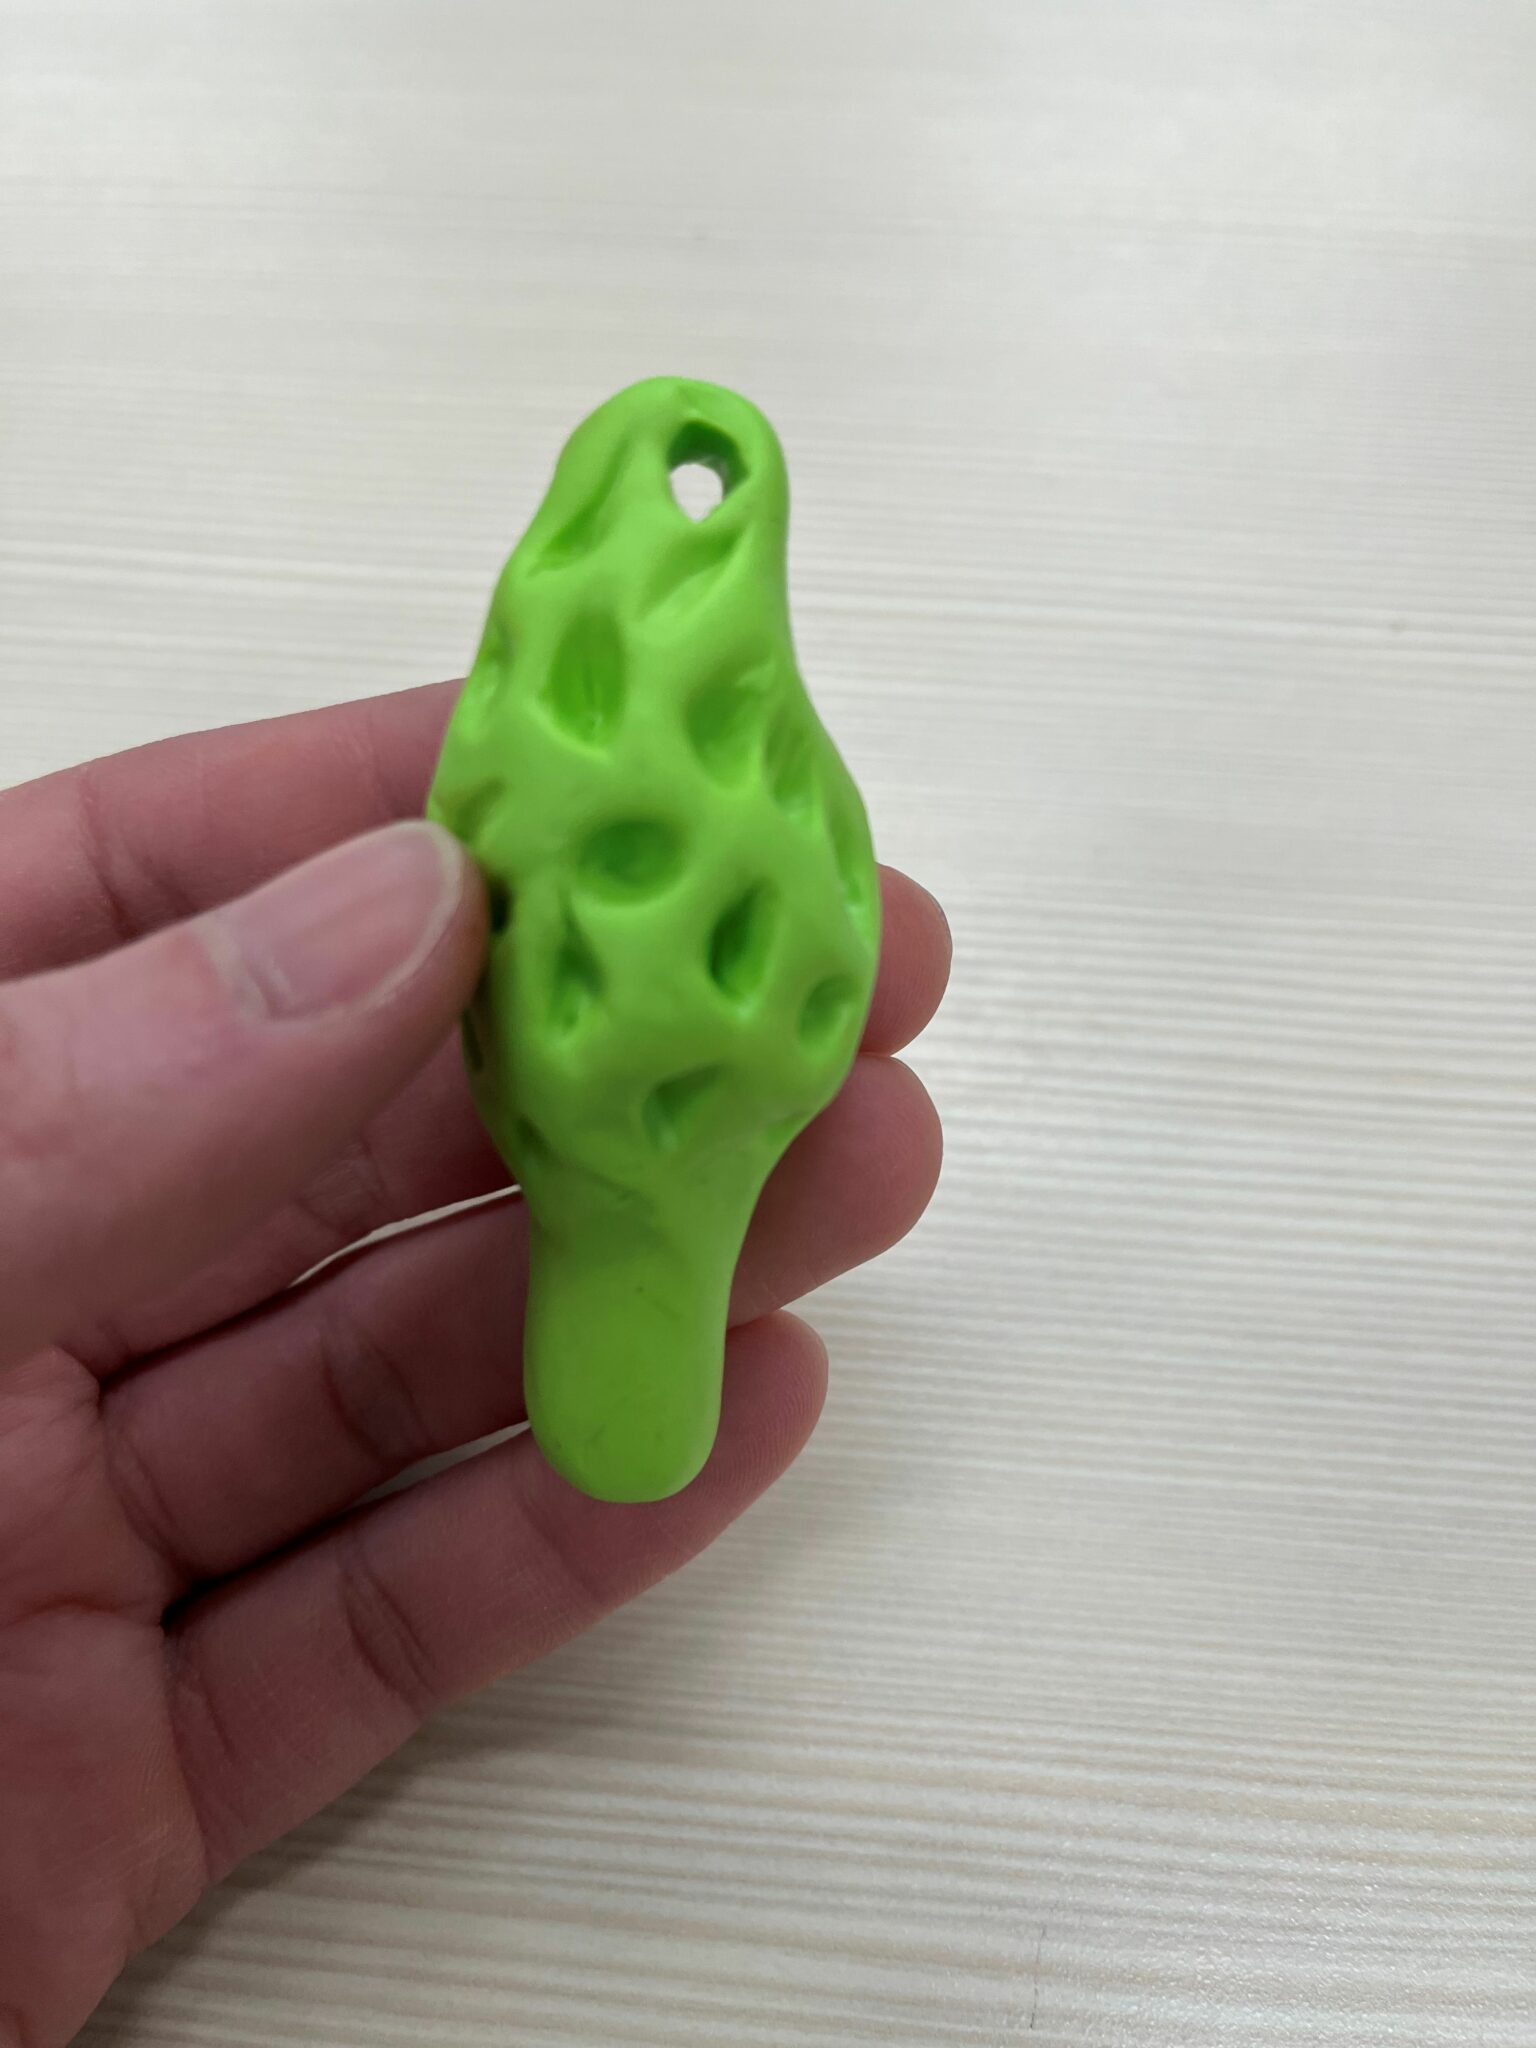
Optional: Poke a hole for a key chain
Using a toothpick, straightened paper clip or something similar, poke a hole near the top of the mushroom cap. Slowly and gently rotate the utensil in a circular motion to make the hole wider. You want to aim for a hole wider than the width of a key ring or wide enough to weave a piece of yarn or string through.
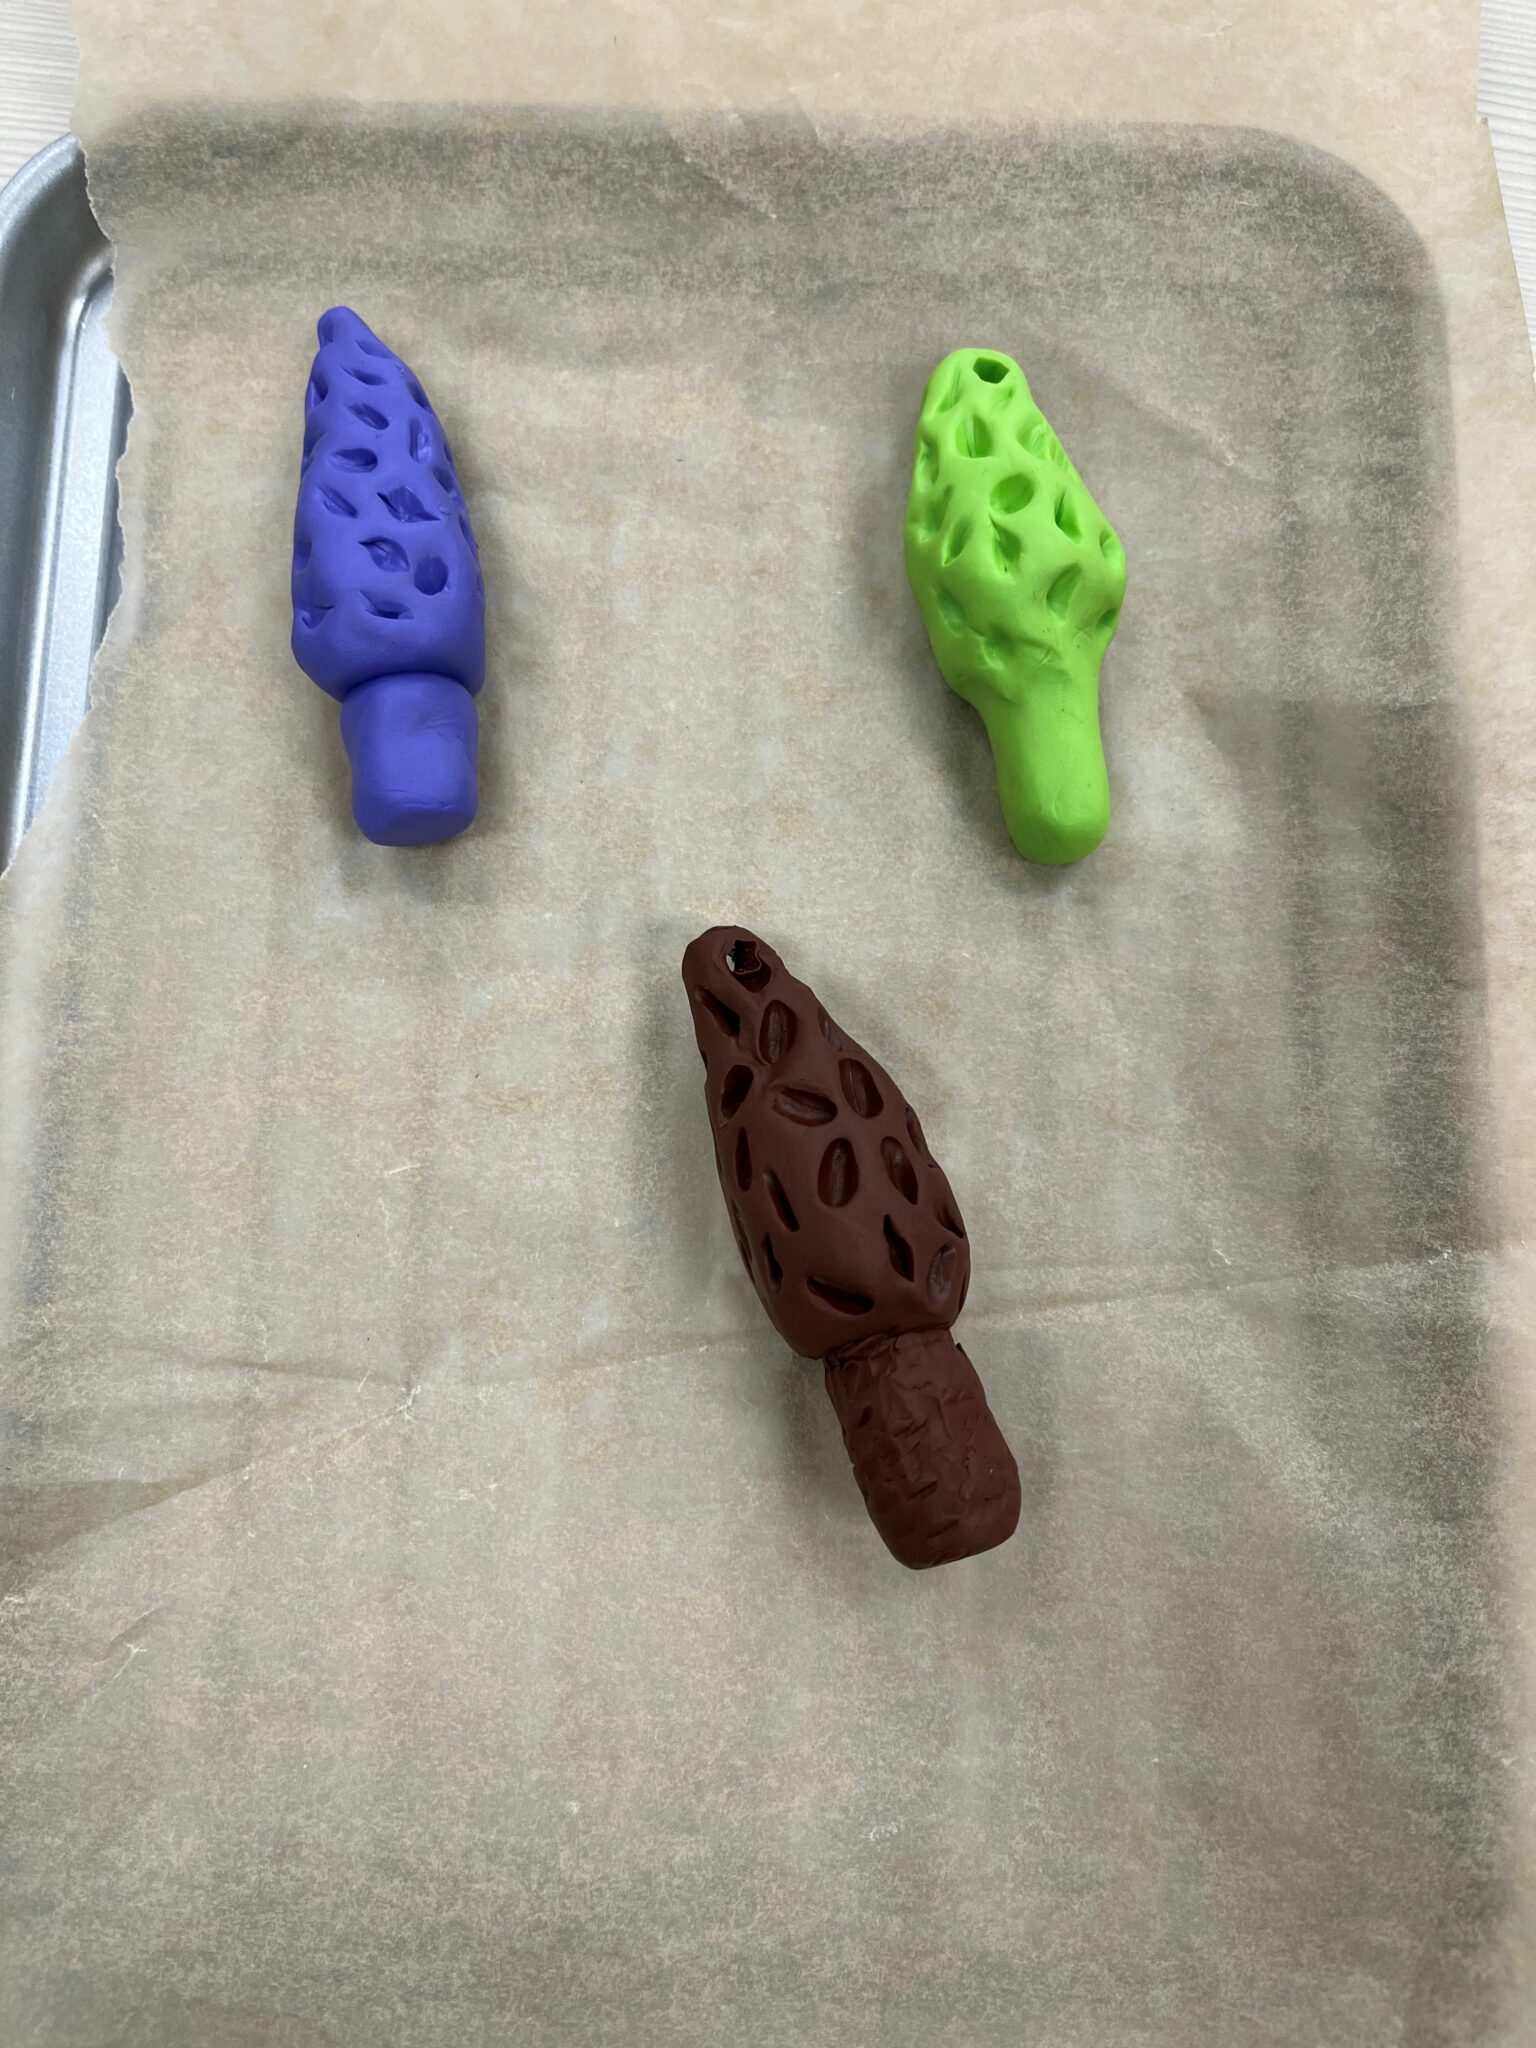
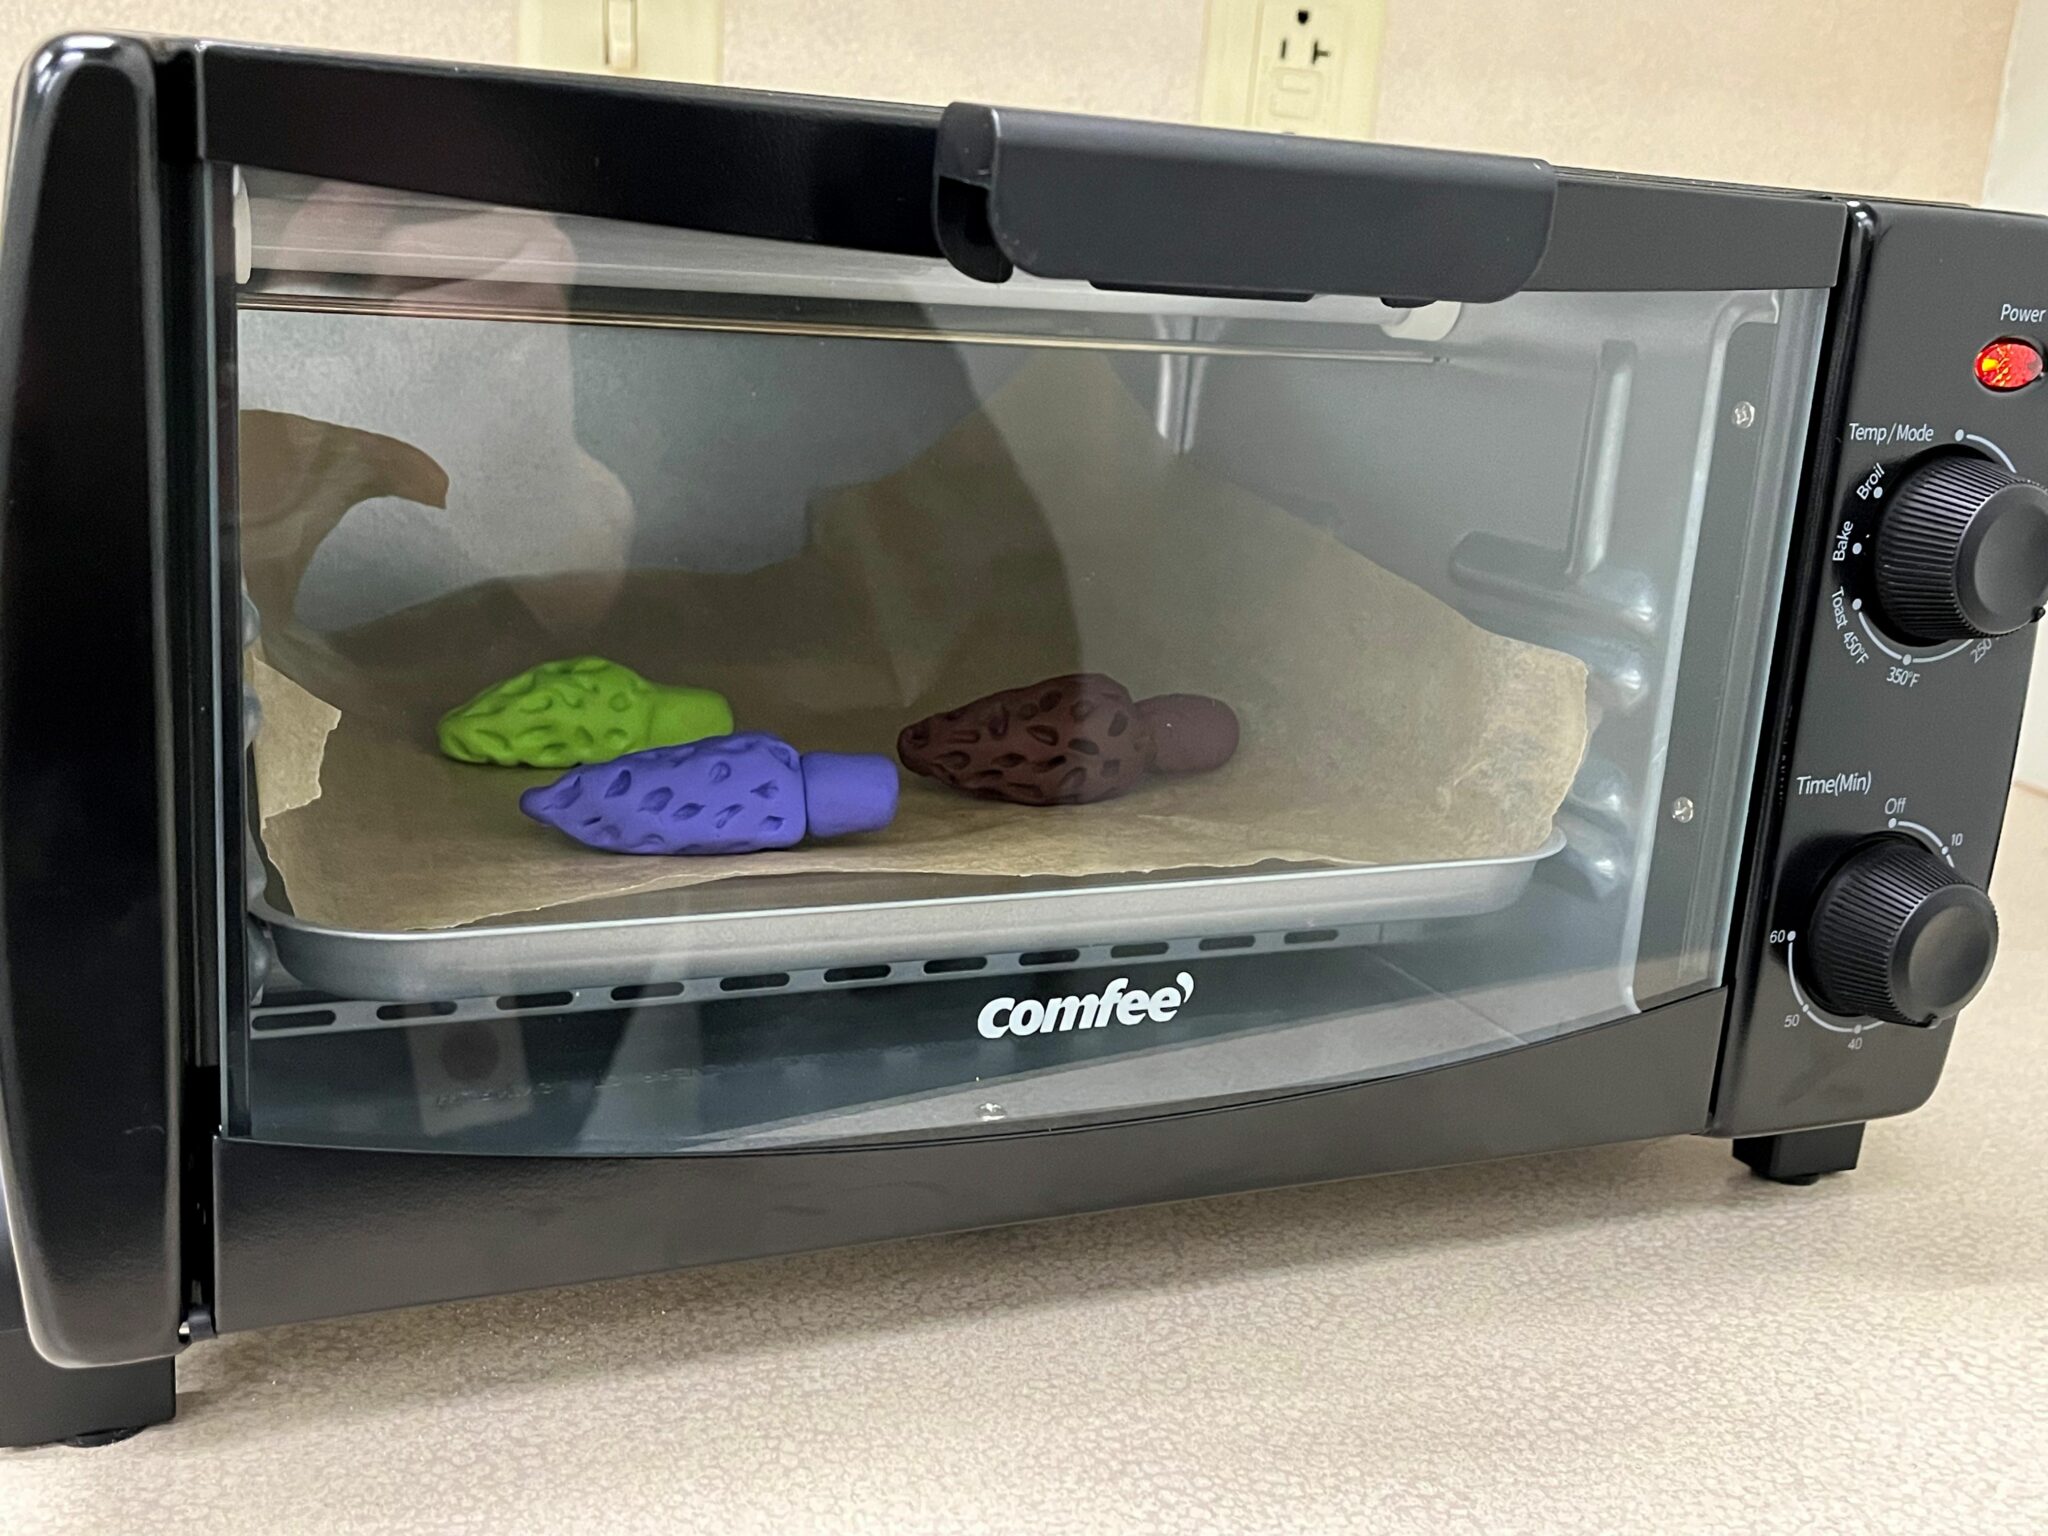
Baking your clay mushrooms
Place your mushrooms on a parchment paper-lined baking sheet.
For polymer clay, it is recommended to bake in the oven at 275° for 15 minutes per ¼ inch thickness.
For this craft, I used a smaller toaster oven. My mushrooms’ thickness ranged from ¼ to ¾ inch. I lowered the recommended temperature to 250° and baked for about 15 minutes. Use your best judgment and keep a watchful eye, looking for signs/smells of “toasty-ness.”
A few things to note
– Clay may squeak 🐁 a little while baking.
– Avoid breathing in 👃🏽 the fumes.
– Wash hands thoroughly 🧼 when finished working with clay.
Marvel at your masterpiece!